Top Flite TOPA0300 User Manual
Page 40
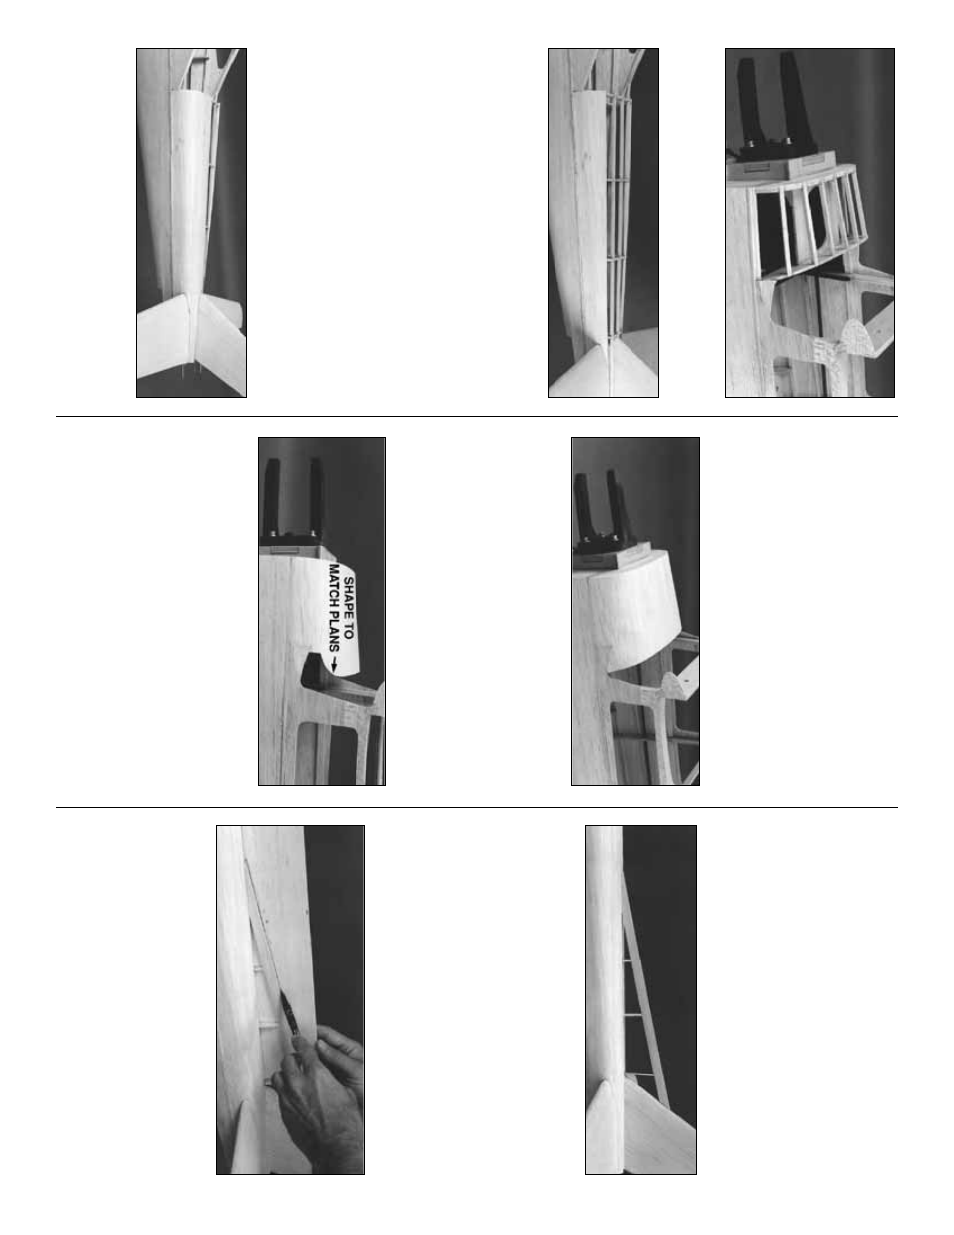
❏
2. Cut 3/16” square balsa Str
ingers to fit from
F-1B to IP
. Glue them in position with thin CA.
❏
3. Use the patter
n on the wing plan to cut an
Upper Side P
anel (not to be confused with T
o
p
P
anel) from a 3/32” x 2-3/4” x 24” balsa sheet.
The cur
v
ed por
tion should be sanded f
or a sn
ug
fit under the Stab when the bottom of the sheet
is on the Main Sub-str
inger
. T
rim the length to fit
flush with the Cabin Side and the aft end of the
Stab
. The top edge should bisect the str
inger
.
Dampen the outside surf
ace of the sheet, fle
x it
to star
t a cur
v
e
, then glue it in place with
medium CA. Repeat this step f
or the other side
of the fuse
.
IMPOR
T
ANT
: Be sure to get a good
glue bond betw
een the sheeting and the bottom
of the Stab
.
❏
4. Once again, use the patter
n on the wing
plan to rough cut the T
op P
anel from a 3/32” x
2-3/4” x 24” balsa sheet. This time
, carefully
sand the aft areas to fit closely with the Stab and
the Fin. T
rim the length e
v
en with the
o
v
erhanging str
ingers at F-5B
. The T
op P
anel
should bisect the top center str
inger
. Repeat this
step f
or the other side
. Use the chalk technique
to mar
k the top center cut line
.
❏
5. Use the off-cut pieces of 3/32” balsa from
the lo
w
er fuse sheeting to sheet the area from F-
1B to 1-1/2”
past
the Instrument P
anel
. The
easiest w
a
y to do this small section is to mak
e a
“skin” b
y
edge gluing three sheets together
, then
cutting them as a unit to fit o
v
er the front end of
the fuse
.
❏
6. Ref
er to the shape of the Instr
ument P
anel
anti-glare shield on the plans
, then carefully cut
and sand the top f
orw
ard sheeting to conf
or
m to
this shape
.
❏
7. Sand off the protr
uding por
tion of the Main
Sub-Str
inger
ledge
from along both sides of the
fuse with a T
-bar or sanding b
loc
k.
❏
8. Dr
a
w
a center
line from the middle of the Fin
LE along the top of the fuse to F-5B
. The tip of
the center str
inger ma
y be used f
or ref
erence
.
Use the plans as a guide to spot glue the die-cut
3/32” balsa
Dor
sal Fin Former D-3
in position.
It m
ust be centered on the center
line y
ou dre
w
.
9. Measure and cut a 7/32” x 1/2” x 15” tapered
balsa
T
op Edg
e
str
inger (lefto
v
e
r from the wing
center section TE) to fit from the Fin’
s LE to the
top of the fuse
, as sho
wn on the plans
. Glue it in
position. Slide die-cut 3/32” balsa
D-1
and
D-2
under the T
op Edge str
inger until the
y fit. Glue
them in position.
❏
1
0
.
Hold a 1/16” x 3” x 30” balsa sheet against
the Dorsal Fin fr
ame
w
o
rk
and tr
ace the outline
,
allo
wing a little e
xtra f
or sanding
. Be
v
el the aft
edge to fit the cur
v
ature of the Fin at the LE.
Glue the sheet to the Dorsal Fin’
s fr
ame and to
the fuse top sheeting being careful
not to b
u
ild
in an
y twists
. Repeat this step f
or the other side
.
40