Top Flite TOPQ7899 User Manual
Warbird drop tank instructions
TANK ASSEMBLY
❑
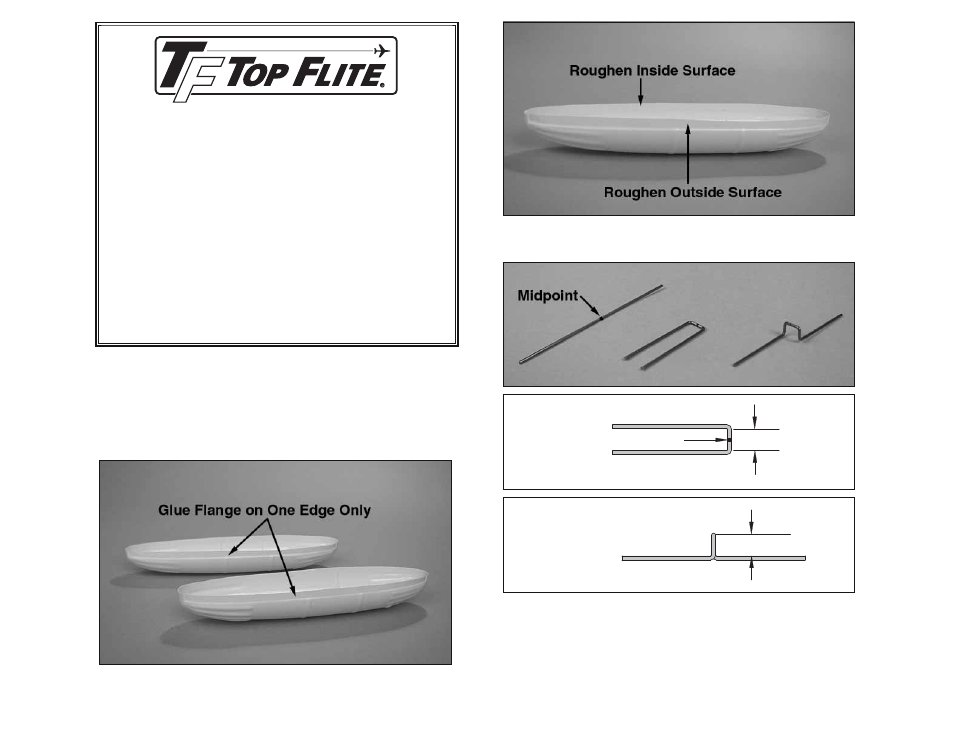
1. Lightly sand the outside of the drop tank halves with 400-grit
sandpaper. This will help the primer and paint adhere to the surface.
❑
2. Trim off the excess plastic to the cut lines on the inside of the
tank with scissors or a hobby knife. Use 220-grit sandpaper to even
up the edges of the glue flange.
❑
3. Use 220 or 150-grit sandpaper to roughen the edges of the
flanges where the two halves will be glued together.
MIDPOINT
1/4" [6.35mm]
Sketch #1
1/4" [6.35mm]
Sketch #2
❑
4. The supplied 0.046" dia x 3" steel wire needs to be bent by
following these steps.
❑
A. Mark the midpoint on the wire.
❑
B. Using Sketch #1 as a template, bend the wire to create a “U”
shape as shown in the above image. The center section is 1/4" wide.
❑
C. Using Sketch #2 as a template, bend the legs in opposite
directions as shown in the above image. The center section has a
height of 1/4".
WARBIRD DROP TANK
INSTRUCTIONS
Thank you for purchasing the Top Flite 108 Gallon Drop Tank
kit. This tank will add a great deal of realism and presence to
many 1/8th scale warbirds. The tank is lightweight and easy to
assemble and finish. It is easy to make droppable on a warbird
under construction. If you are going to add it to a model that is
already built, it would be easier to make it removable manually,
without servo control.