Chapter 8. rs232 communication, 1 introduction, Chapter 8 – AERCO Innovation (G-13-1854 and above) User Manual
Page 103: Rs232 communication, 1 acquiring the putty application, 2 logging on to a remote machine using putty
Innovation Water Heaters Installation, Operation & Maintenance Manual
CHAPTER 8 – RS232 COMMUNICATION
OMM-0078_0J
AERCO International, Inc. • 100 Oritani Dr. • Blauvelt, NY 10913
Page 103 of
196
GF-128
Phone: 800-526-0288
PRI: 11/22/2013
CHAPTER 8. RS232 COMMUNICATION
8.1 INTRODUCTION
The RS232 communication feature permits viewing or changing of Control Panel menu options
and also provides access to data logs showing Event Time Line, Fault and Sensor log displays.
The RS232 port on the front panel of the C-More Control Box (Figure 3-1Error! Reference
source not found.) can be interfaced to a laptop computer or other suitable terminal using a
RS232 adapter cable. RS232 communication can be accomplished using any “Dumb Terminal”
emulation, such as “PuTTY” which is not included with Microsoft Windows, but can be
downloaded for free on the internet. Source and instructions for using Putty are provided below.
8.1.1 Acquiring the PuTTY Application
Download the putty.exe program to your desktop from:
You can use PuTTY to logon to remote computers as well as run a single command on a remote
server. PuTTY does not need to be installed, so just clicking the downloaded executable will start
it.
8.1.2 Logging on to a Remote Machine Using PuTTY
To use PuTTY to logon to a remote machine, bring up the PuTTY application by double-clicking
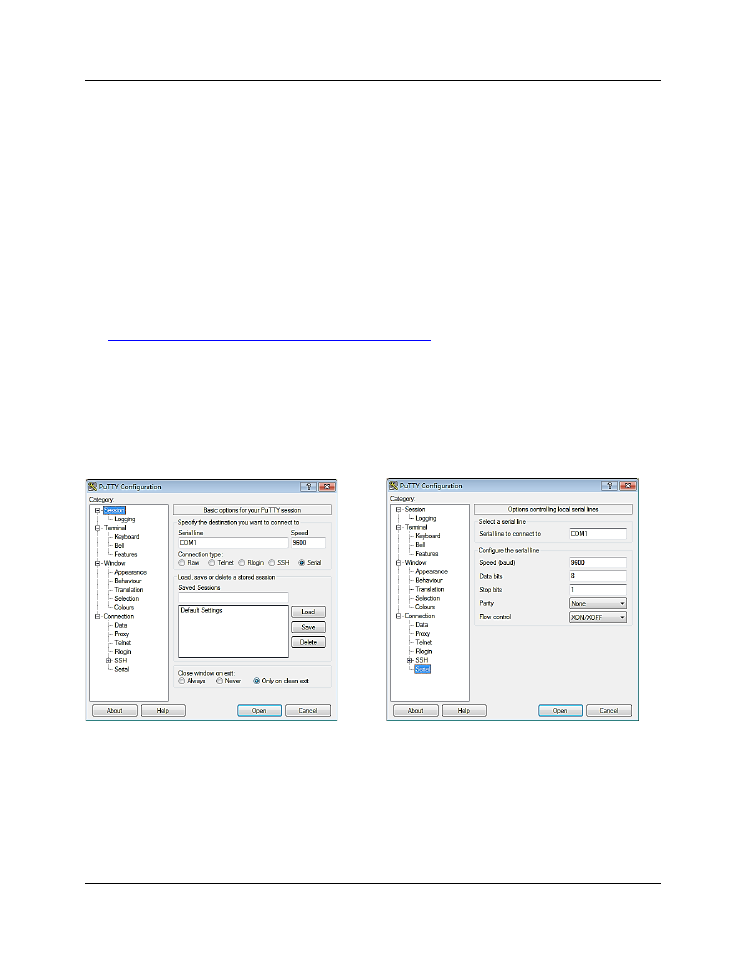
its icon. You will see the main window as shown in left image of Figure 8-1.
Figure 8-1: PuTTY GUI: Basic Serial Session (L) and Serial Options (R)
In Serial mode, text typed into the PuTTY window will be sent straight out of your computer's
serial port, and data received through that port will be displayed in the PuTTY window.
To create a Serial connection, click the radio button labeled Serial. The Serial line and Speed
fields will then be automatically filled in as shown in left image of Figure 8-1, but will allow you to
specify the serial line to use (if your computer has more than one) and what speed (baud rate) to
use when transferring data. For further configuration options (data bits, stop bits, parity, flow