1 using the edp port, 2 using the front panel, Using the edp port – Rice Lake 520 HMI Digital Weight Indicator Installation Manual User Manual
Page 69: Using the front panel
63
520 Indicator Installation Manual
10.3.1 Using the EDP Port
With a personal computer, terminal, or remote keyboard attached to the
520
EDP port, you can use the EDP
command set to customize the print format strings.
To view the current setting of a format string type the name of the print format and press
ENTER
. For example, to
check the current configuration of the GFMT format, type GFMT and press
ENTER
. The indicator responds by
sending the current configuration for the gross format:
GFMT=
To change the format, use the GFMT or NFMT EDP command followed by an equals sign (=) and the modified
print format string. For example, to add the name and address of a company to the gross format, you could send the
following EDP command:
GFMT=JOE'S SALVAGE
A ticket printed using this format might look like the following:
JOE'S SALVAGE
1167 EAST HIGHWAY ROAD
ANYTOWN
1345 LB GROSS
The ticket above could also be formatted by specifying the company address information in the HDRFMT ticket
format, then substituting the
HDRFMT=JOE'S SALVAGE
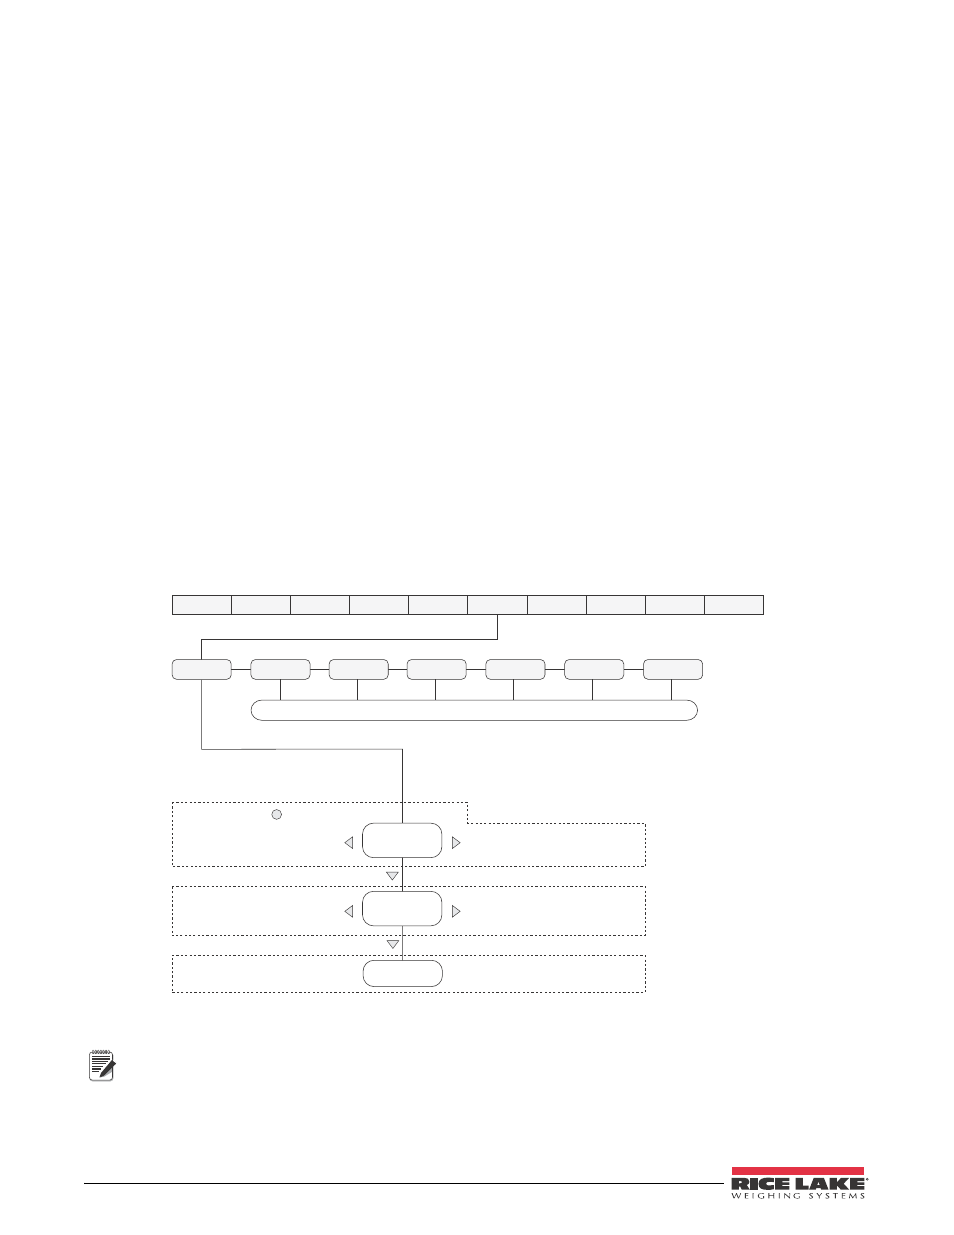
10.3.2 Using the Front Panel
If you have no access to equipment for communication through the EDP port or are working at a site where such
equipment cannot be used, you can use the PFORMT menu (see Figure 10-1) to customize the print formats. Using
the PFORMT menu, you can edit the print format strings by changing the decimal values of the ASCII characters
in the format string.
9999999
9999999
/'.5
4BNFBT('.5
"-(065
%*(*/
4&5154
130(3.
1'03.5
4&3*"-
$"-*#3
$0/'*(
'03."5
7&34
&%1'.5
41'.5
('.5
)%3'.5
%JTQMBZmSTU
DIBSBDUFSTPGGPSNBU
%JTQMBZBOEFEJU
BDUJWFDIBSBDUFSBOE
"4$**WBMVF
%FMFUFBDUJWF
DIBSBDUFS
4DSPMMSJHIUJOGPSNBUTUSJOH
4DSPMMMFGUJOGPSNBUTUSJOH
*ODSFNFOU"4$**WBMVFPGBDUJWFDIBSBDUFS
%FDSFNFOU"4$**WBMVFPGBDUJWFDIBSBDUFS
1SFTT
UPJOTFSUBTQBDF
CFGPSFUIFBDUJWFDIBSBDUFS
$'.5
453.'.5
Figure 10-1. Print Format Menu
Note
Lower-case letters and some special characters cannot be displayed on the
520
front panel (see the ASCII
character chart on page 82) and are shown as blanks. The
520
can send or receive any ASCII character; the
character printed depends on the particular ASCII character set implemented for the receiving device.