Elecraft P3 High-Performance Panadapter Manual User Manual
Page 51
51
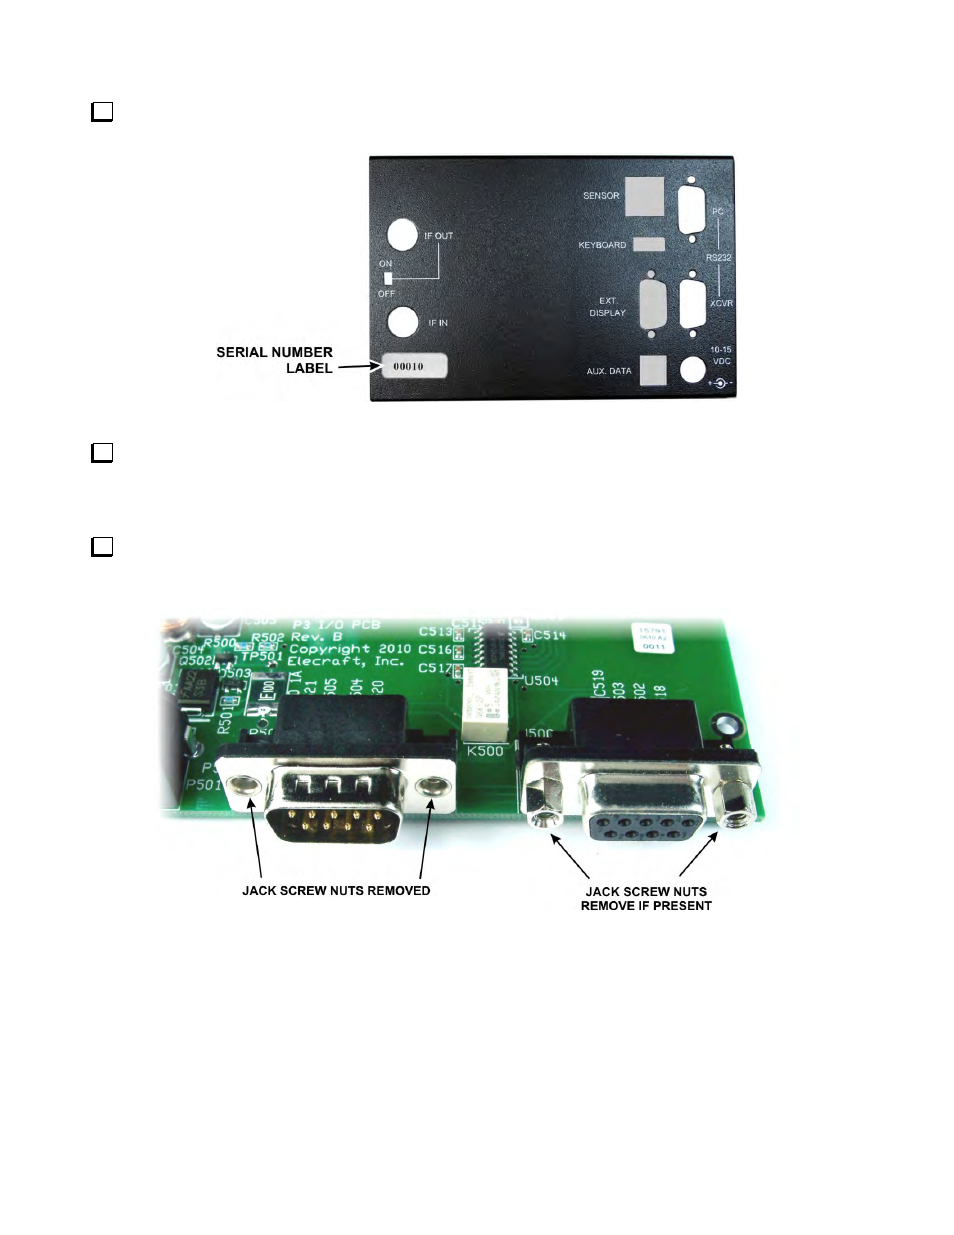
Remove the protective backing from the Serial Number label and carefully position it on the outside of the
rear cover as shown in Figure 13.
Figure 13. Attaching the Serial Number Label.
Mount a 2D fastener in the screw holes in the back cover top and bottom flanges just as you did for the
front cover (see Figure 7 on page 48), using flat head screws in the counter-sunk holes on the top flange and pan
head screws on the bottom flange. Be sure each fastener is oriented correctly with the widest shoulder toward
the outside edge of the panel as shown in the figure.
Remove the I/O printed circuit assembly from its anti-static packaging and check to see if either of the two
multi-pin connectors have jack screw nuts installed (see Figure 14). These are the nuts the jack screws on the
connector shells screw into to secure them. If either connector has jack screw nuts installed, remove them.
Figure 14. Preparing the I/O Board for Installation.
- KX3 Owner's Manual (58 pages)
- KX3 Assembly Manual (47 pages)
- KX3 Assembly Manual Errata (5 pages)
- KX3-2M (30 pages)
- KX3-PCKT (2 pages)
- KX3 Mobile Installation And Operation Guide (17 pages)
- KX3 Guide for Blind Operators (7 pages)
- KX3 Quick Reference (2 pages)
- K3 Programmers Reference (26 pages)
- KX3 Speaker Grille Instructions (9 pages)
- KXFL3 Filter Option (12 pages)
- KXFL3 Filter Option Errata (2 pages)
- KXAT3 (5 pages)
- KXBC3 (13 pages)
- KXPD3 (4 pages)
- Proset Boom Headset (1 page)
- PX3 Owner's Manual (53 pages)
- PX3 Owners Manual Errata (2 pages)
- KXPA100 Manual (55 pages)
- KXPA100 Assembly Manual (27 pages)
- KXPA100 Assembly Errata (1 page)
- KXPA100 Programmers Reference (24 pages)
- KXAT100 Installation Manual (17 pages)
- KX1 Manual (96 pages)
- KXAT1 (12 pages)
- KXPD1 (7 pages)
- KXB30 (8 pages)
- KXB3080 (20 pages)
- K1 (91 pages)
- K1 1.09 F/W (1 page)
- KNB1 Manual (8 pages)
- KAT1 Manual (15 pages)
- KFL1-2 (2 pages)
- KTS1 (1 page)
- KBT1 Manual (8 pages)
- KBT1 Manual Errata (2 pages)
- K1BKLTKT LCD Mod Kit (6 pages)
- K2 Owner's Manual (171 pages)
- K2 Owner's Manual Errata (1 page)
- K2 PLL (4 pages)
- K2ATOBKIT (15 pages)
- K2ATOBKT (2 pages)
- K2 Keying Modification Instructions (4 pages)
- KPA100 Manual (74 pages)
- KPA100 Shield Upgrade (3 pages)