Tools required, Assembly procedure – Elecraft P3 High-Performance Panadapter Manual User Manual
Page 44
44
Tools Required
1. #0 and #1 size Phillips screwdrivers. Use the screwdriver that best fits the screw in each step. To avoid
damaging screws and nuts, a power screwdriver is not recommended.
2. Needle-nose pliers.
The following tools are strongly recommended:
1. ESD wrist strap.
2. Static dissipating work pad.
Assembly Procedure
Overview of the Kit
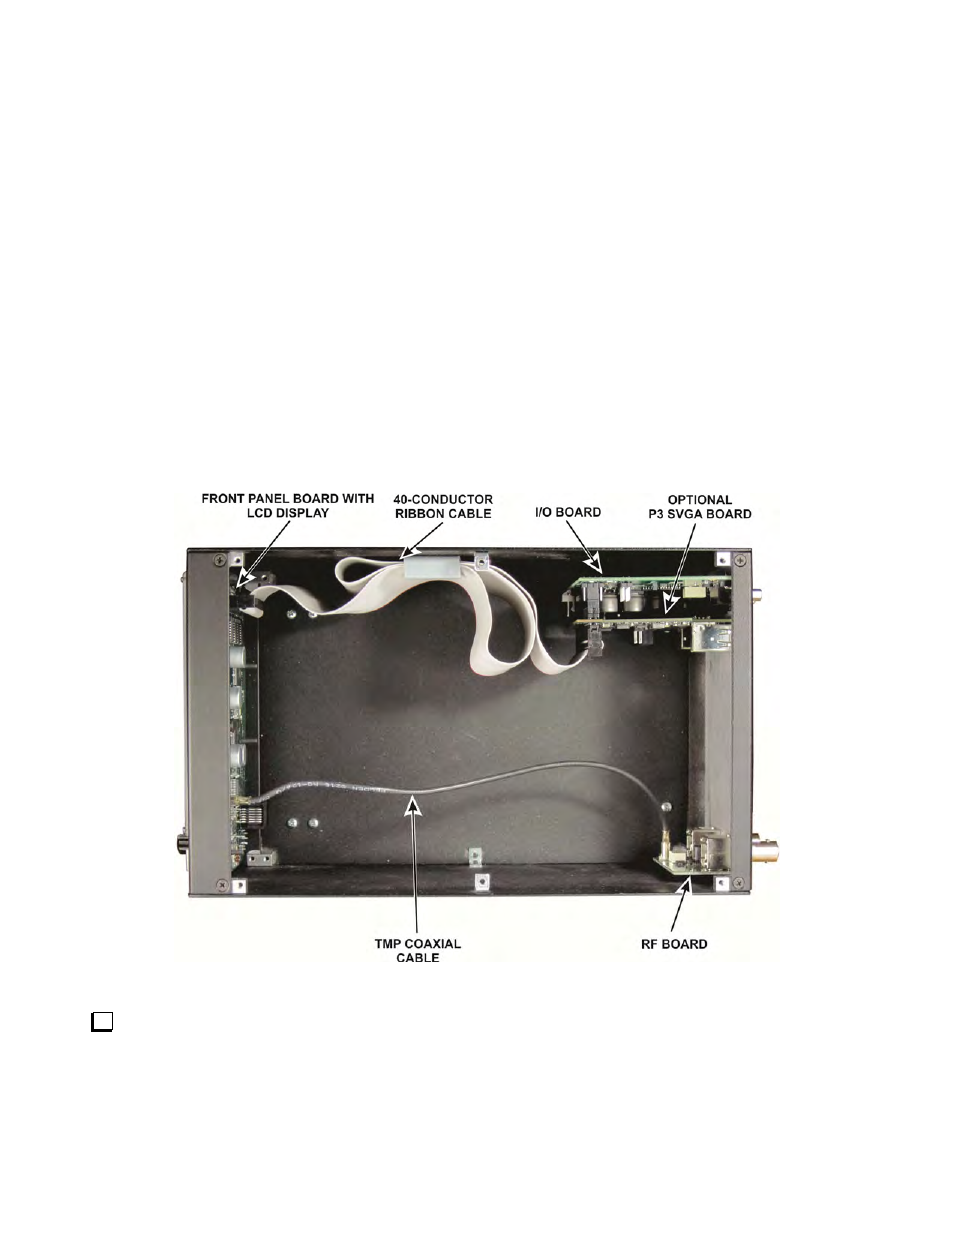
The circuit boards are mounted on the front and rear panels and interconnected by cables as shown in Figure 1.
The enclosure uses Elecraft’s 2D fasteners at the corners of the panels which allow removing any combination
of panels to gain access to the interior.
Figure 1 Assembled P3 with Top Cover Removed.
Before starting construction, do a complete inventory, comparing the parts in your kit with the parts list
beginning on 38, to familiarize yourself with all of the parts and to ensure the kit is complete, but do not
unwrap the front panel display board until instructed to do so in the assembly procedure
. If any parts are
missing, contact Elecraft for a replacement (see, Customer Service and Support on page 9). Recommend you
also keep the printed circuit board assemblies in their anti-static packaging until you are instructed to remove
them.