Ower, 4 power door, 1 removing the power door – Dell Latitude D630 XFR (Early 2008) User Manual
Page 28: 2 installing the power door
Dell
TM
XFR D630 Fully Rugged Notebook Service Manual
Page 28 of 106
Revision A01
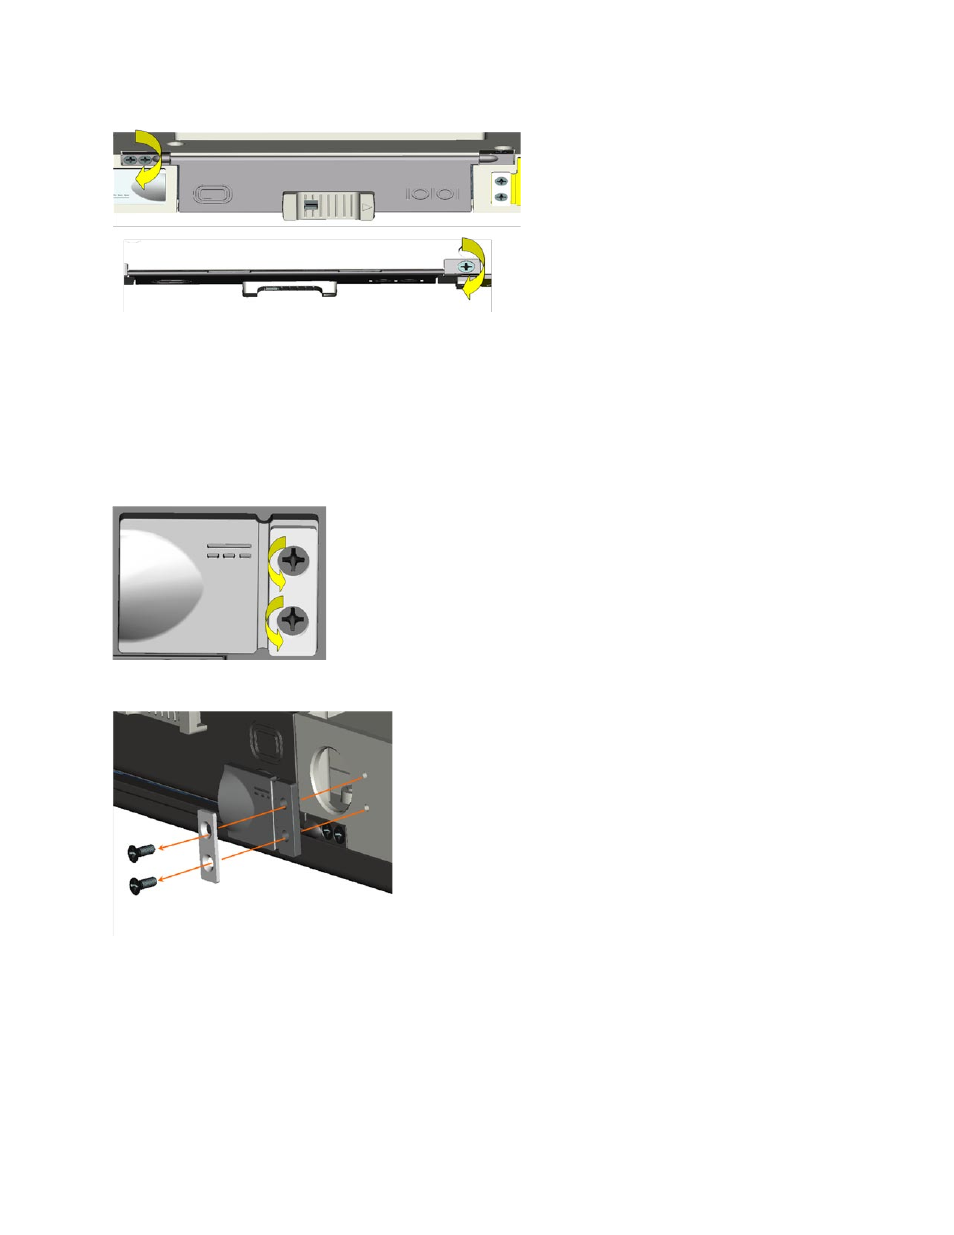
6.4 Power Door
The Power Door is located on the rear panel of the notebook, and protects the notebook’s power
connector.
6.4.1
Removing the Power Door
1.
Remove the 2 screws that secure the Power Door to the notebook.
2.
Remove the screw plate and the Power Door from the notebook.
6.4.2
Installing the Power Door
1.
Align the Power Door and the screw plate with the screw holes provided on the rear panel for
the Power Door.
See also other documents in the category Dell Notebooks:
- Latitude E6410 (52 pages)
- Latitude E6410 (8 pages)
- Latitude D630 (218 pages)
- Latitude E6400 (99 pages)
- Latitude E6400 (70 pages)
- Latitude E6400 (2 pages)
- Latitude E6400 (8 pages)
- Latitude E6400 (4 pages)
- Latitude D630 (168 pages)
- Latitude D630 (43 pages)
- Latitude D630 (69 pages)
- Latitude D620 (43 pages)
- Latitude D620 (102 pages)
- Inspiron 1545 (51 pages)
- Inspiron 1545 (72 pages)
- Inspiron 1545 (4 pages)
- LATITUDE C510 (55 pages)
- LATITUDE C510 (170 pages)
- Inspiron 1200 (45 pages)
- Latitude D531 (Mid 2007) (46 pages)
- Latitude D531 (224 pages)
- Inspiron 1300 (142 pages)
- Inspiron 1300 (44 pages)
- INSPIRON 2600 (168 pages)
- INSPIRON 2600 (2 pages)
- INSPIRON 2600 (134 pages)
- INSPIRON 2600 (87 pages)
- Inspiron 1100 (40 pages)
- Inspiron 1100 (164 pages)
- Inspiron 5150 (160 pages)
- Inspiron E1505 (45 pages)
- Inspiron E1505 (186 pages)
- Inspiron 1150 (38 pages)
- Inspiron 1150 (112 pages)
- Inspiron M5040 (2 pages)
- Inspiron 3520 (72 pages)
- A860 (96 pages)
- 1000 (98 pages)
- STREAK 7 (141 pages)
- XPS 14Z (L412z) (2 pages)
- Latitude D520 (124 pages)
- Latitude D520 (96 pages)
- Latitude D520 (168 pages)
- Latitude D520 (99 pages)
- Latitude D520 (42 pages)