Add i/o modules to your network, Set the scanner’s parameters – Rockwell Automation 1738-ADNX ArmorPoint I/O DeviceNet Adapters User Manual
Page 55
Publication 1738-UM001A-EN-P - February 2005
Configure the DeviceNet Scanner Subnet 4-3
Add I/O Modules To Your Network
After you add the scanner, you must add the modules connected to
the scanner on the Subnet. In the offline mode, I/O modules must be
added individually. Follow these steps:
1. Add modules as shown below.
Set the Scanner’s Parameters
After adding the scanner to the network, you must configure it for use
with I/O modules.
1. Configure the scanner as shown below.
A window will open with a series of tabs along the top. Each tab
opens to a window that provides options to write configuration for
your scanner. These windows are shown on the following pages.
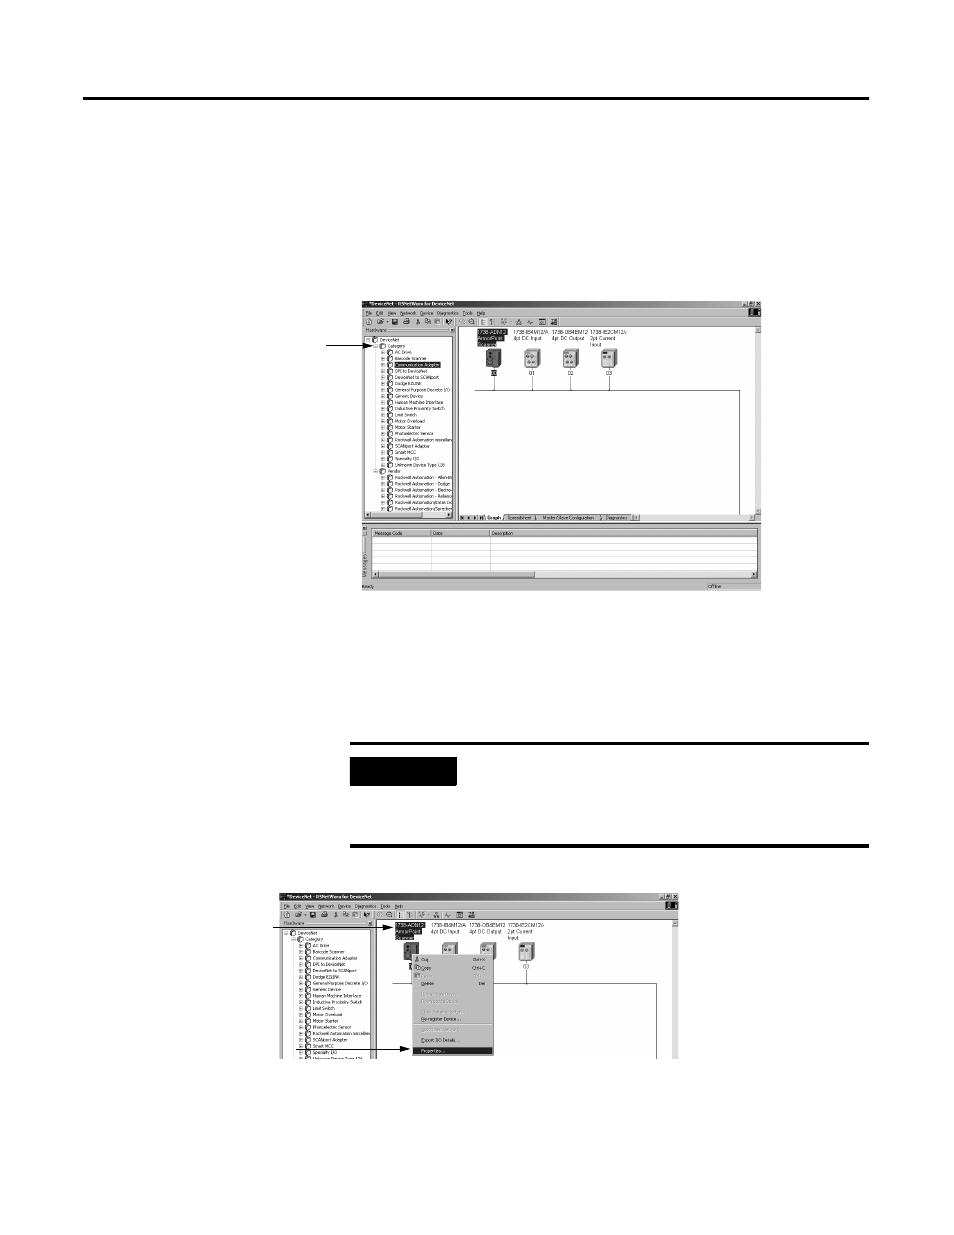
1. Expand the Category to display
the list of I/O modules.
NOTE: Make sure you check under all the
categories that I/O modules reside (i.e.,
General Purpose Discrete I/O,
Rockwell Automation miscellaneous,
and Specialty I/O).
2. Double-click the I/O module you
want to add to the network.
TIP: You can also click and drag the
module name onto the network.
We used the 1738-IB4M12,
-OB4EM12, and -IE2CM12
I/O modules in this example.
Your network screen should
reflect the I/O modules on
your network.
IMPORTANT
This chapter shows configuration in the off line
mode. Changes set in this mode do not take effect
until the scanner goes on line. For more information
on how to go on line, see page 4-8.
1. Right-click on the scanner.
2. Click on Properties... to
configure your scanner.
TIP: You can also double
click on the scanner to
view the Properties
window.