Removing the shutter, Attaching the shutter, Removing the shutter attaching the shutter – Dascom LA48N/LA48W User Guide User Manual
Page 24
Setting up the printer
2-14
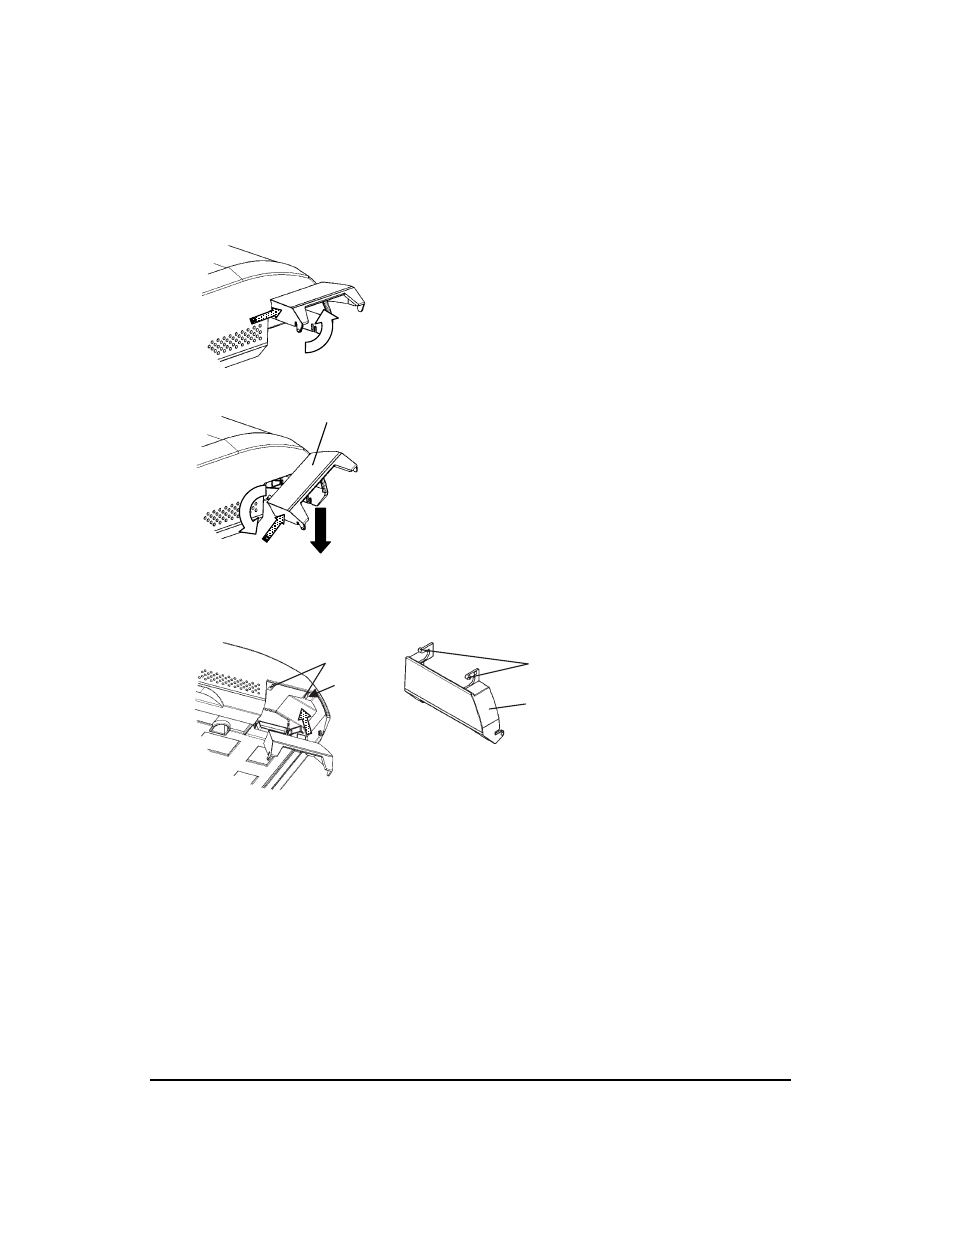
Removing the shutter
Attaching the shutter
CAUTION:
Take care not to use excessive force when pushing the back of the shutter
toward the front of the printer. Otherwise, the shutter tabs may be dam-
aged.
To reattach the shutter, tilt the shutter and insert one of its convex parts
into the installation hole of the printer, and then insert the other part in
the other hole. After inserting both convex parts, lower and push the
shutter in to its original position.
1. Open the shutter.
2. Gently push the back end of the
shutter toward the front of the
printer.
3. While holding the shutter in the
position described in step 2, rotate
it in the manner shown in the
Shutter
(a)
Mounting slots
Tabs
Shutter
5. Tilt the shutter and pass the shutter
tabs through the mounting slots,
starting with the slot on side (a)
shown in the figure on the left. The
order in which the shutter tabs are
- DM-210 User Guide (53 pages)
- DT-210 User Guide (64 pages)
- 7106 User Guide (56 pages)
- 7106 Quick Start Guide (2 pages)
- 7106 Programmers Manual ZPL (76 pages)
- 7106 Programmers Manual DMX (156 pages)
- 7106 Peeler Installation and User Guide (14 pages)
- 7106 Ethernet Installation Guide (8 pages)
- 7106 Cutter Installation Guide (20 pages)
- 7106 PrintServer Manual (238 pages)
- 7106 WLAN Installation Guide (8 pages)
- 7106 Compact Ethernet Board (9 pages)
- 7010 Quick Start Guide (2 pages)
- 7010 Peeler Installation and User Guide (4 pages)
- 7010 Cutter Installation Guide (8 pages)
- MIP480 Flash Utility Operation Manual (4 pages)
- MIP480 User Guide (138 pages)
- MIP480 Quick Installation Guide (2 pages)
- 1325 User Guide (100 pages)
- 1430 User Guide (100 pages)
- 5130 Instructions on How to Flash Firmware (1 page)
- T5040 Programmers Application Manual (12 pages)
- T5040 User Guide (146 pages)
- T5040 Quick Start Guide (28 pages)
- T5040 Quick Start Guide (124 pages)
- T5040 Flash Utility Operation Manual (4 pages)
- LA800+ Quick Start Guide (176 pages)
- LA550N Quick Start Guide (156 pages)
- LA550N User Guide (146 pages)
- LA48N/LA48W Quick Start Guide (2 pages)
- T2380 Installation Information Second Tractor (14 pages)
- T2380 User Guide IGP for Dot Matrix Printers (80 pages)
- T2380 Quick Installation Guide Cutting Device (134 pages)
- T2380 Web Panel Description - ETH-INT (25 pages)
- T2280+ Installation Sheet Face Down (54 pages)
- T2265+ Quick Start Guide (144 pages)
- T2265+ Quick Start Guide (32 pages)
- T2265+ Quick Start Guide (144 pages)
- T2265+ User Guide Automatic Sheet Feeder, Front (24 pages)
- T2250 RS232C/TTY Interface Module Operators Manual (44 pages)
- T2250 Installation Guide Automatic Sheet Feeder Rear (2 pages)
- T2250 Quick Reference Guide (2 pages)
- T2250 Quick Start Guide (134 pages)
- T2250 Quick Start Guide (30 pages)