Removing a disk, 47 disk drive status indicators – HP 4000.6000.8000 Enterprise Virtual Arrays User Manual
Page 99
•
Analyze any failure messages you may have received from system monitoring (System Event
Analyzer).
•
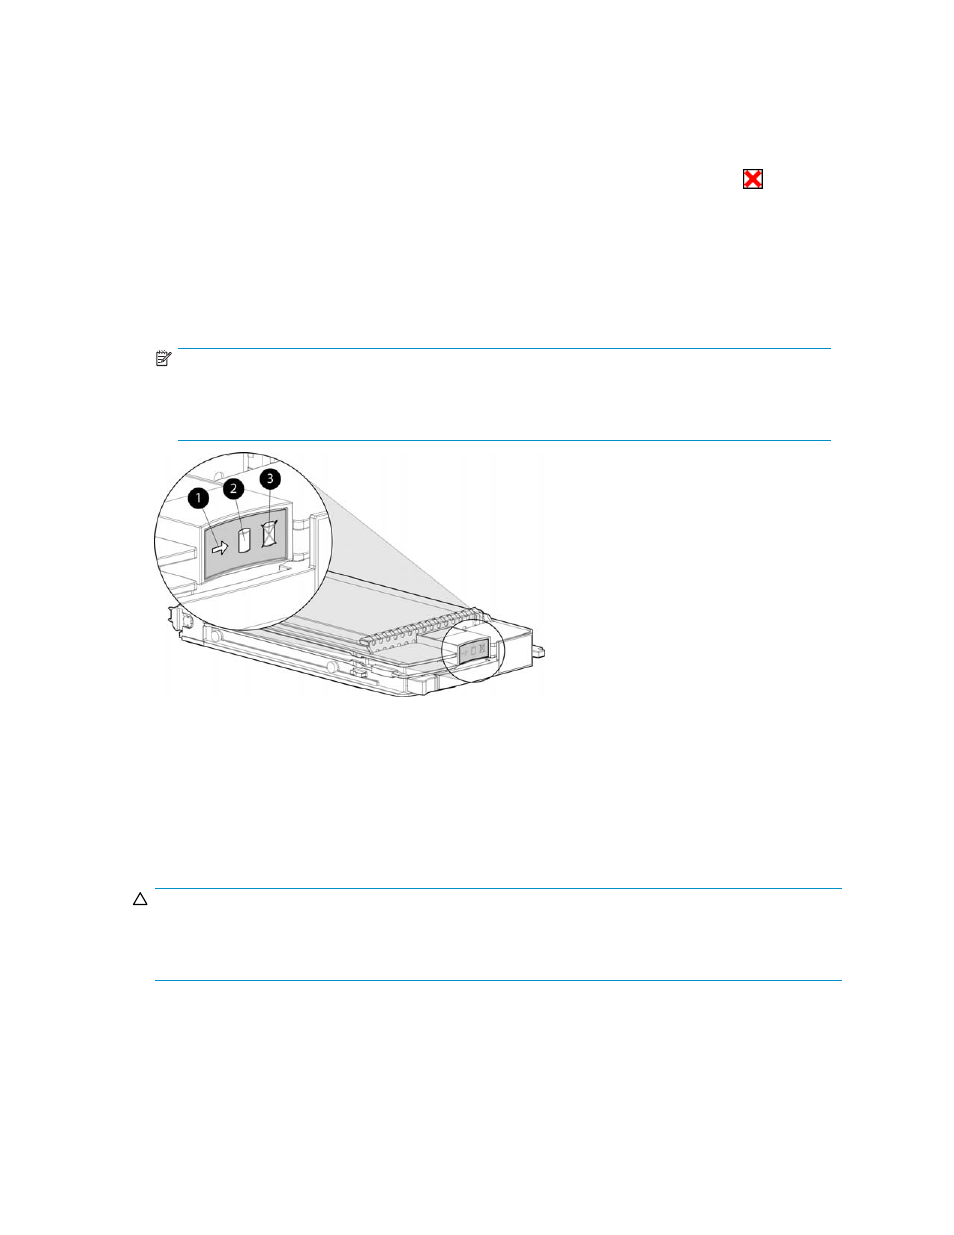
Check the disk drive status indicators. See
. The Fault indicator should be On.
•
Check status using Command View EVA:
1.
In the Navigation pane, select Storage system > Hardware > Rack > Disk enclosure > Bay
2.
In the Content pane, select the Disk Drive tab. The Operational state should be
Failed.
3.
Verify the following status conditions are met before proceeding:
• Migration state - Not migrating
• Requested usage - Ungrouped
• Actual usage - Ungrouped
4.
Click Remove to prepare the disk for removal. The status indicators on the disk drive will begin
flashing to help you locate the disk.
NOTE:
Certain disk drive failures result in a status of
Drive unmated
, and disable the Remove button. In
this situation, the disk drive can be immediately removed from the enclosure. The fault indicator
will be on to help locate the failed disk drive.
1. Activity
2. Online
3. Fault
Figure 47 Disk drive status indicators
Removing a disk
CAUTION:
Rotating media can make the disk drive difficult to handle. To avoid dropping and damaging the disk
drive, wait approximately 30 seconds for the media to stop rotating before removing the drive from the
enclosure.
1.
Push in the wine-colored ejector push button (1,
) and pull the release lever (2) down to
the full open position.
2.
Pull the disk drive part way out of the enclosure (3) and wait for the media to stop spinning.
3.
When the media has stopped spinning, remove the disk drive from the enclosure.
4000/6000/8000 Enterprise Virtual Array user guide
99