Changing the device addition policy, Installing a disk drive, Verifying proper operation – HP 4000.6000.8000 Enterprise Virtual Arrays User Manual
Page 100: 48 removing a disk drive, 49 installing a disk drive, Figure 48
0115a
3
2
1
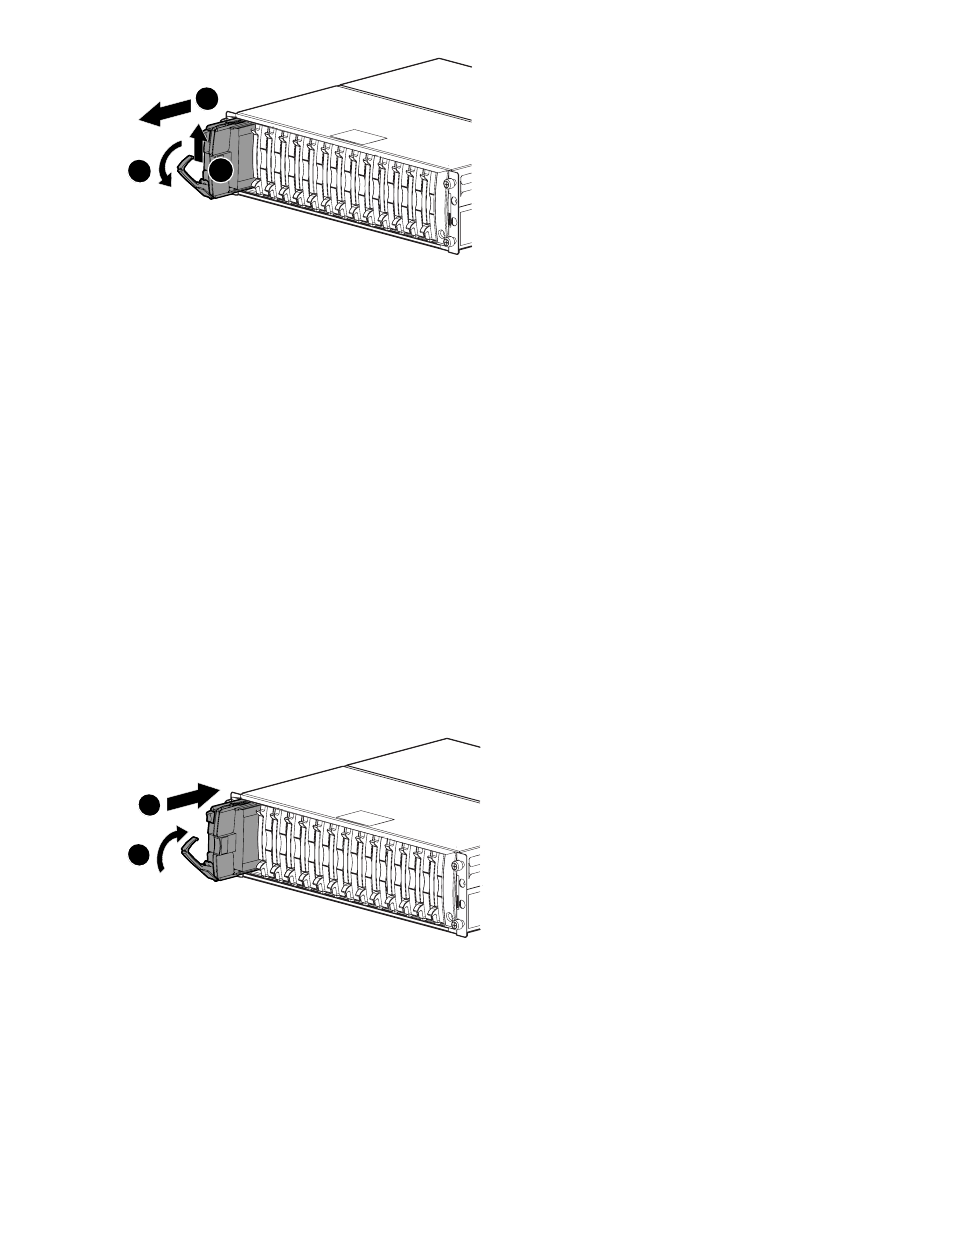
Figure 48 Removing a disk drive
Changing the Device Addition Policy
To prevent the storage system from automatically grouping a new disk drive that may have the incorrect
firmware on it, the Device Addition Policy must be checked and set to manual if necessary:
1.
In the Command View Navigation pane, select the storage system.
The Initialized Storage System Properties window opens.
2.
Click System Options
3.
Select Set system operational policies
4.
If the Device Addition Policy is set to Automatic, change it to Manual
5.
Click Save changes
Installing a disk drive
1.
Push in the ejector push button on the disk drive and pull the release lever down to the full open
position.
2.
Insert the drive into the enclosure as far as it will go (1,
3.
Close the release lever until it engages the ejector push button, and the disk drive seats in the
backplane (2).
4.
Press in firmly on the disk drive to ensure it is seated properly.
0116a
2
1
Figure 49 Installing a disk drive
Verifying proper operation
After replacing the disk drive, check the following to verify that the disk drive is operating normally:
100
Customer replaceable units