Installing a blower, Verifying proper operation, Returning the failed component – HP 4000.6000.8000 Enterprise Virtual Arrays User Manual
Page 95: 42 removing a blower, 43 installing a blower
1.
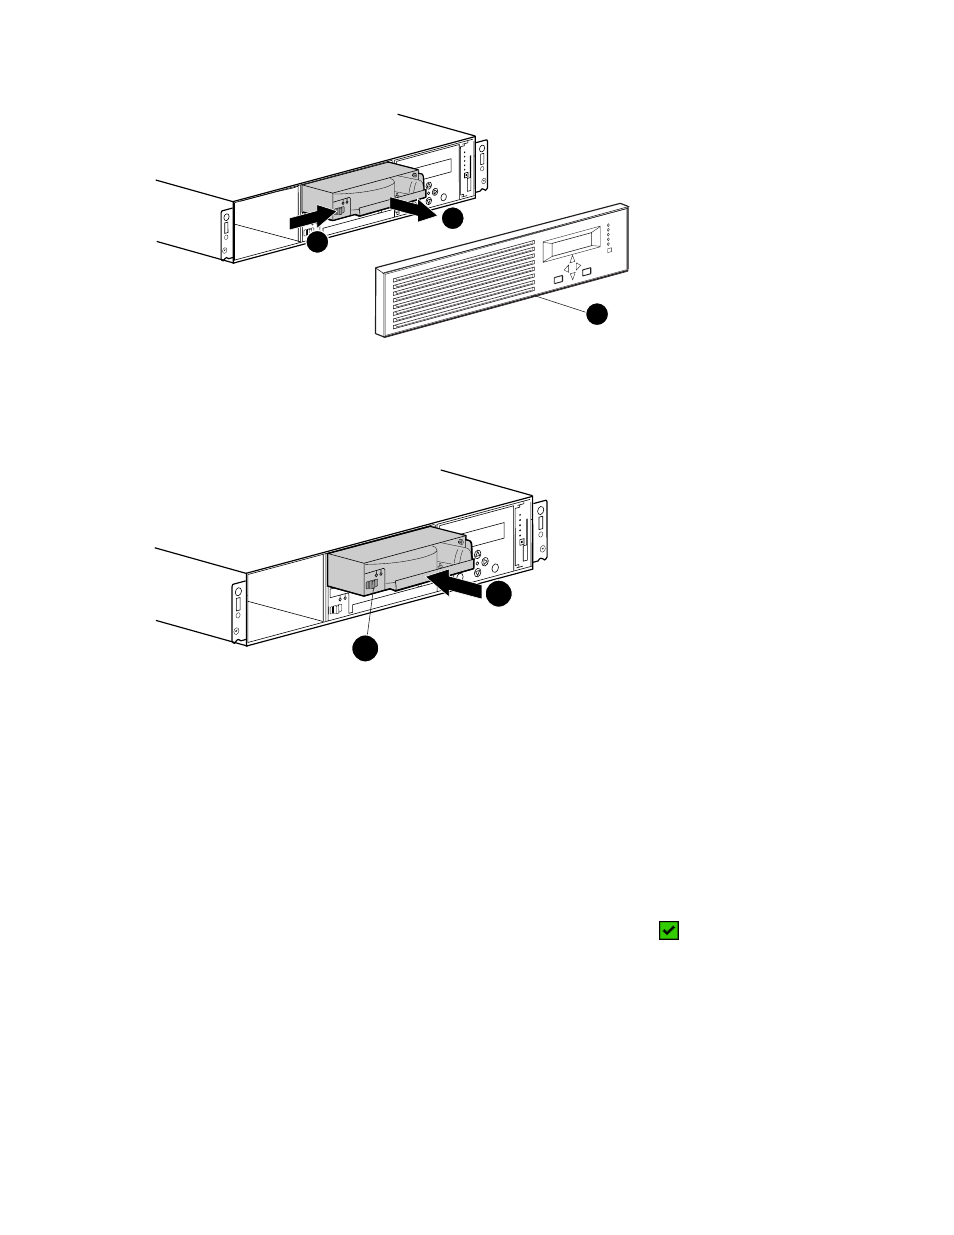
Remove the front panel (1) by grasping the panel at each end pulling it off the enclosure.
2.
Move the wine-colored mounting latch (2) to the right, and pull the blower out of the enclosure (3).
0104b
2
3
1
Figure 42 Removing a blower
Installing a blower
•
Position the blower as high in the slot as possible, then slide the blower into the enclosure (1)
until the mounting latch (2) engages.
2
1
0105a
Figure 43 Installing a blower
Verifying proper operation
After replacing the blower, check the following to verify that the component is operating properly:
•
Blower should begin operating immediately.
•
Check the controller blower status indicators. See
• The status indicator (1) should be on.
• The fault indicator (2) should be off.
After checking the status indicator, install the front panel on the enclosure by pressing it firmly into
place. Also clear the locate message on the OCP by pressing the ESC push button.
•
From Command View EVA
• Navigate back to the component and check the status. It should be
.
• Turn off the locate function by clicking Locate > Locate Off
Returning the failed component
Please follow the return instructions provided with the new component.
4000/6000/8000 Enterprise Virtual Array user guide
95