Franklin Fueling Systems TS-DTU Data Transfer Unit Dispenser Retrofit Manual User Manual
Page 38
38
Wayne Vista 3 - DTU Installation
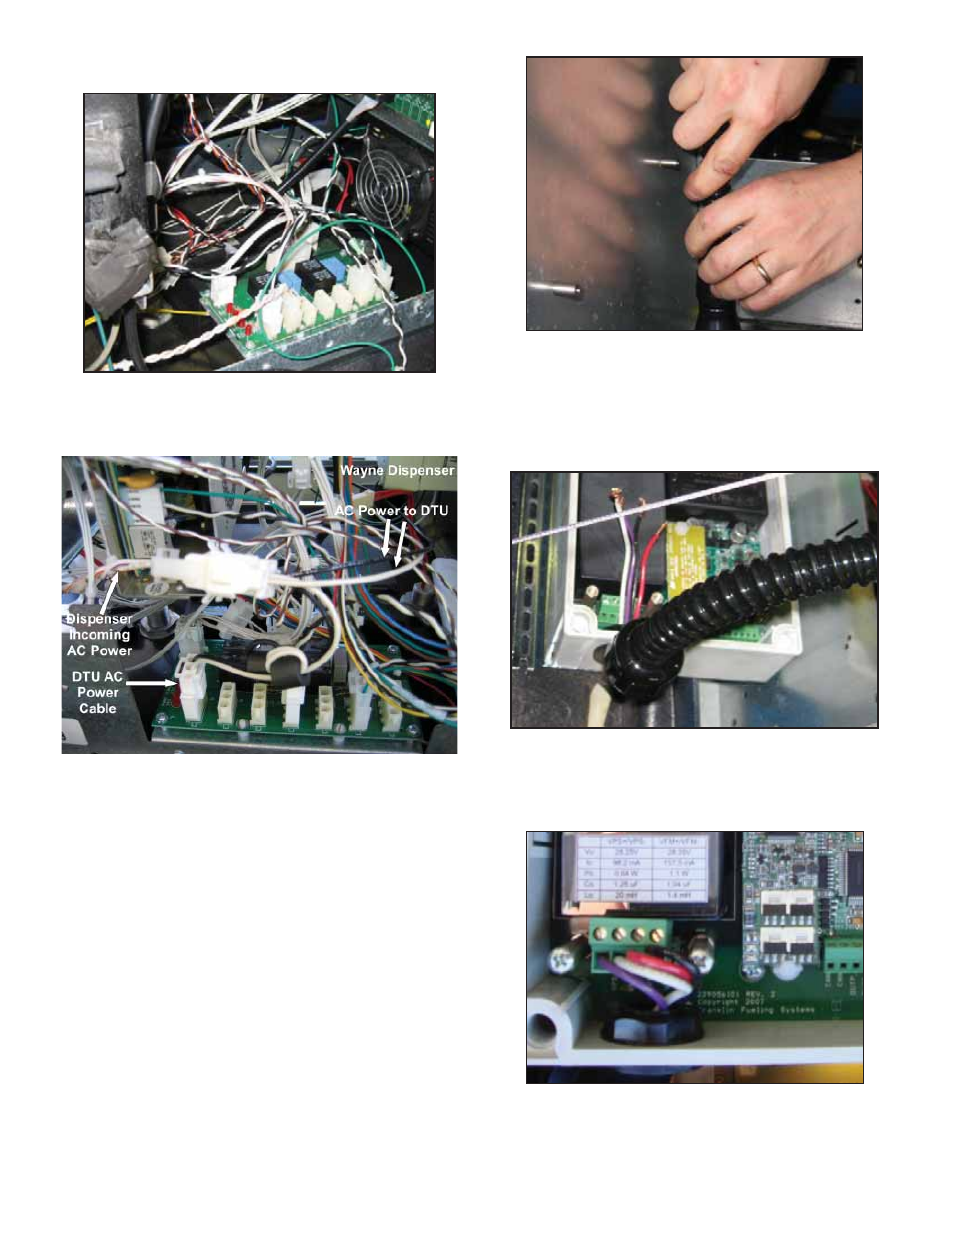
21. Find the incoming power connection on the
dispenser power supply board shown in Figure 9
Figure 9: Attach White Connector
22. Attach the new Wayne power extension cable
between the incoming power connector and the
power supply board.
Figure 10: Attache Power Cable
23. Find straight conduit fi tting and fl exible conduit
from IS conduit kit, 020-1513. Remove nut and
bushing from straight conduit fi tting. Put bushing
on one end of fl exible conduit.
24. Determine length of fl exible conduit needed and
cut to fi t.
25. Push wires from nipple assembly through
bushing / fl exible conduit and attach fl exible conduit
to straight conduit fi tting using nut.
Figure 11: Flexible Conduit Installation
26. Remove nut and bushing from 90-degree conduit
fi tting and push fl exible conduit through nut. Push
bushing on unattached end of fl exible conduit. Pull
wires from fl exible conduit through the 90-degree
conduit fi tting and pull excess wire into DTU.
Attach fl exible conduit to 90-degree fi tting with nut.
Figure 12: 90-Degree Fitting Installed
27. Cut excess wire inside DTU allowing a length of
2” for terminal block wiring. Strip wire insulation
3/8” from end of wire. Attach wires to DTU terminal
block as follows.
Figure 13: Wires attached to DTU
28. Reinstall barrier cover using screws set aside in
step 17.
29. Replace DTU cover.