Franklin Fueling Systems TS-DTU Data Transfer Unit Dispenser Retrofit Manual User Manual
Page 33
33
Wayne Vista 2 - DTU Installation
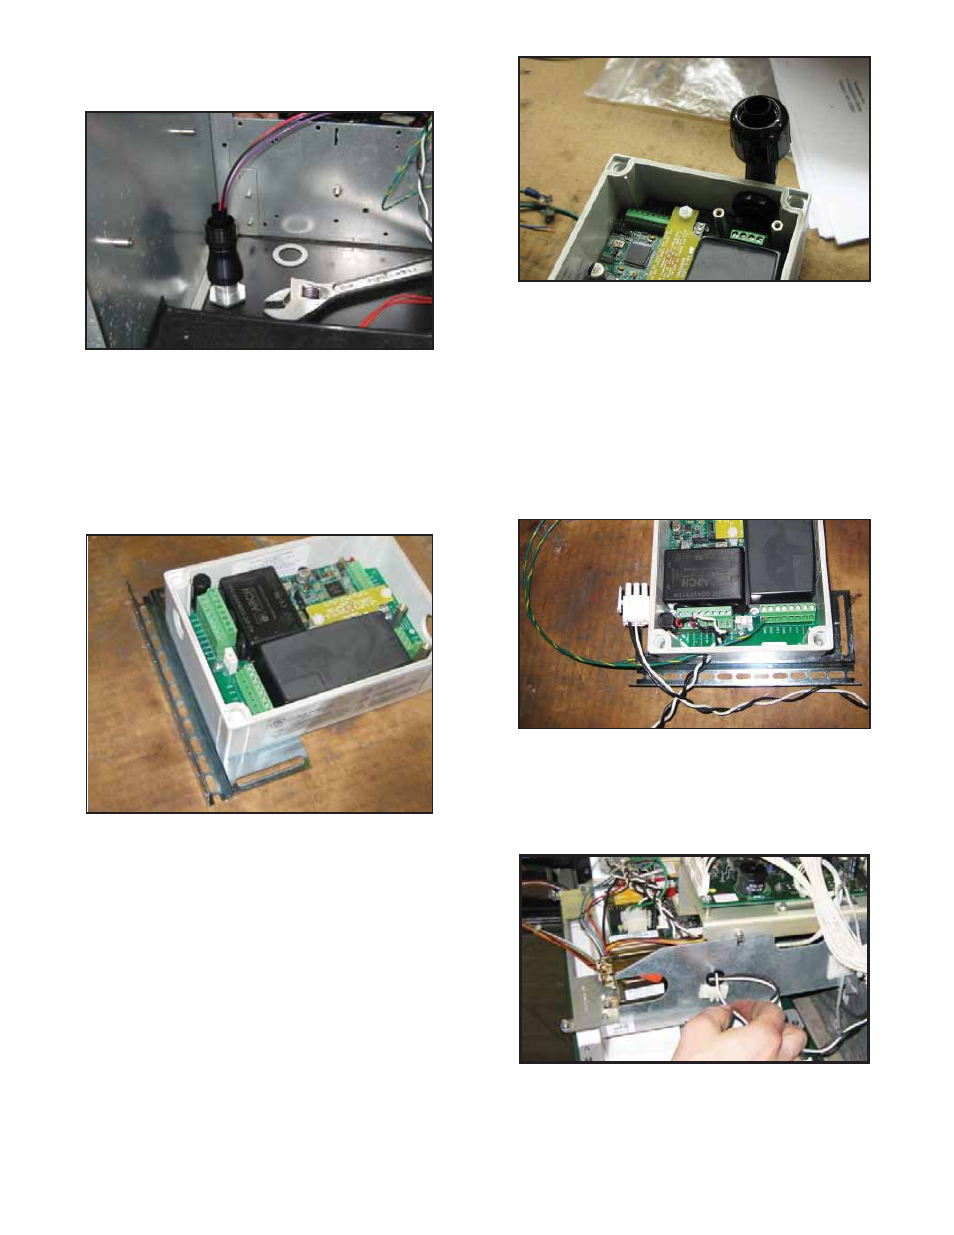
13. From electrical enclosure, pull wires from the
potted nipple assembly through opening of straight
conduit. Attach straight conduit fi tting onto reducer.
Figure 6: Straight Conduit Installed
14. Find TS-DTU/P kit and remove brackets, DTU,
and hardware from box.
15. Remove cover from DTU.
16. Install mounting bracket to DTU with two screws,
nuts and washers from hardware provided with
DTU, as described in the General Information
Section. Make sure that bracket is installed on
correct side as shown in Figure 7.
Figure 7: Mounting Bracket on DTU
17. Remove two screws from IS wiring cover inside
the DTU and remove cover. Keep cover and
screws for reassembly.
18. Find 90-degree fi tting in IS conduit kit, 020-1513.
Remove nut from 90-degree fi tting. Attach fi tting
to opening nearest IS wiring terminal block of DTU
using nut previously removed.
Note: The installation of the DTU in the dispenser will
occur after all connections have been made to the
DTU.
Figure 8: 90-Degree Fitting Installed
19. Find power harness kit part number 600-0165.
Find the Wayne power harness and ground wire
with ring terminal as shown in fi gure 4 of the Parts
List. Remove tie-wraps and uncoil.
20. Push wiring harness end with crimp connector
through opening in DTU nearest power terminal
block J1. Attach white lead to terminal block
position labeled NEUTRAL and black lead to
terminal block position labeled L1 on terminal
block J1 of DTU. Attach ground wire to terminal
block position labeled GND of J2 on DTU.
Figure 9: DTU Wiring
21. Cut both connectors off the Wayne power harness
kit. Strip wire insulation 3/8” from the end of the wire.
22. Pull wire underneath bracket, along bottom of
dispenser and through wire bushing in display
assembly.
Figure 10: Power Harness Wiring
23. Dispenser supply power wires from the potted
nipple. Cut wires 6 to 12 inches away from the
potted nipple, forming four leads and uncoil. Strip
wire insulation 3/8” from the end of each wire.