Franklin Fueling Systems TS-DTU Data Transfer Unit Dispenser Retrofit Manual User Manual
Page 14
14
Gilbarco Encore 300 and 500 - DTU Installation
24. Find straight conduit fi tting from IS wiring kit
020-1513. From electrical enclosure, pull wires
from the potted nipple assembly through opening
of straight conduit fi tting. Attach straight conduit
fi tting onto the reducer. Refer to Figure 10.
Figure 10: Reducer Installed
25. Remove two screws from IS wiring cover inside
the DTU and remove cover. Keep cover and
screws for future reassembly.
26. Find the 90-degree fi tting from IS wiring kit,
020-1513. Remove nut from 90-degree fi tting.
Attach fi tting to opening of DTU nearest the IS
connector using nut previously removed.
Figure 11: 90-degree Fitting Installed
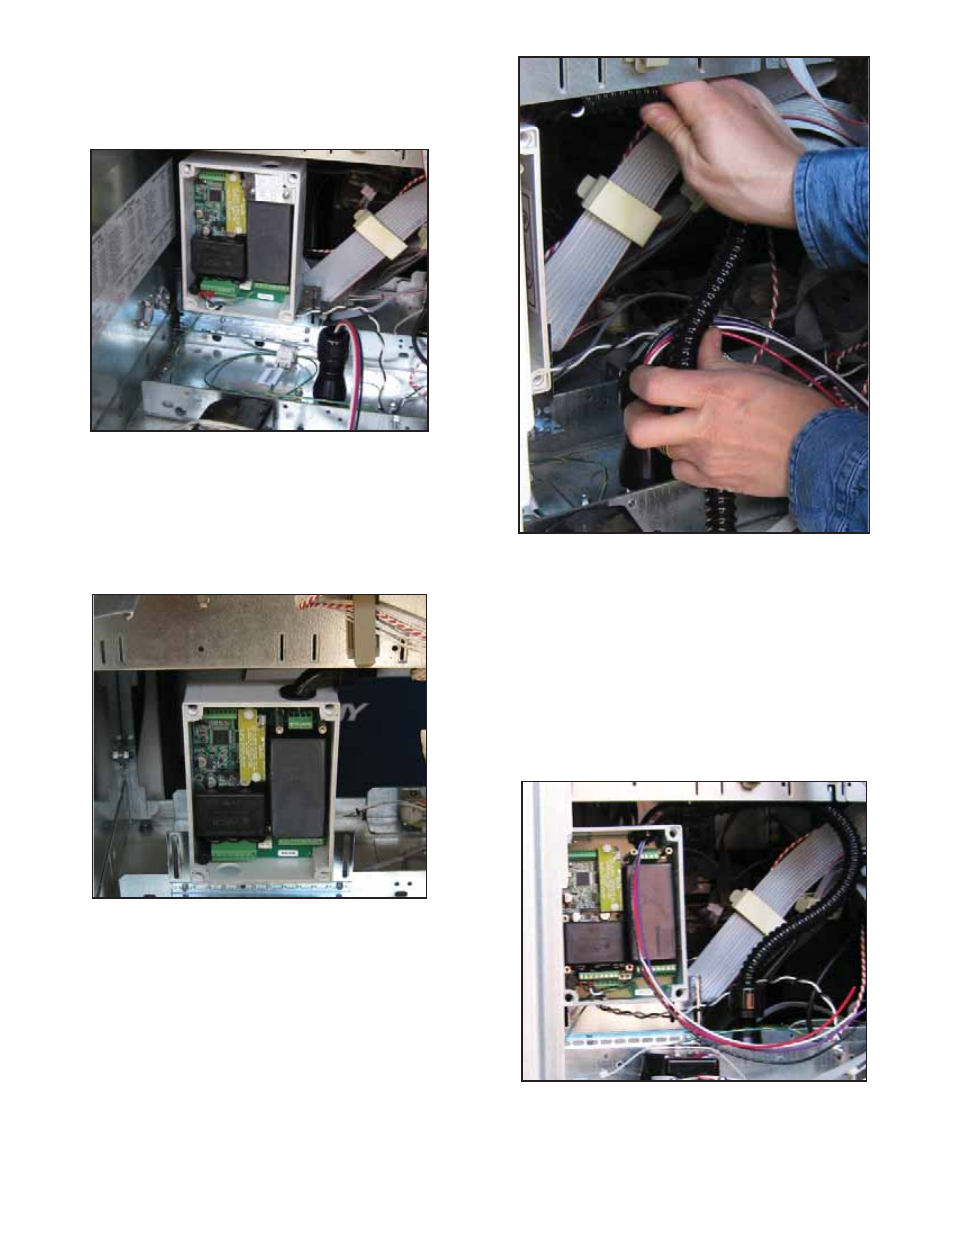
27. Find the fl exible conduit from the IS Wiring Kit,
020-1513. Using 90-degree fi tting and straight
fi tting installed earlier, determine length of fl exible
conduit assembly needed and cut to fi t. Refer to
Figure 12.
Figure 12: Flexible Conduit Installation
28. Pull wires from potted nipple assembly through
fl exible conduit.
29. Remove nut and bushing from straight conduit
fi tting.
30. Push bushing onto end of fl exible conduit and
reattach to straight fi tting using nut.
31. Remove bushing and nut from 90-degree conduit
fi tting on DTU and pull wiring / fl exible conduit
through.
32. Route wires through 90-degree conduit fi tting and
pull into the DTU enclosure.
Figure 13: Wires in Flexible Conduit
33. Using nut and then bushing, attach fl exible conduit
to 90-degree conduit fi tting.