Wayne ovation – Franklin Fueling Systems TS-DTU Data Transfer Unit Dispenser Retrofit Manual User Manual
Page 24
Wayne Ovation - DTU Installation
24
Wayne Ovation
This section illustrates the basic components needed to
retrofi t a TS-DTU module into an existing dispenser. This
system can be installed in any “Non-Vapor or Vapor Ready”
dispenser including dispensers with existing “Balance” or
“VacAssist” piping.
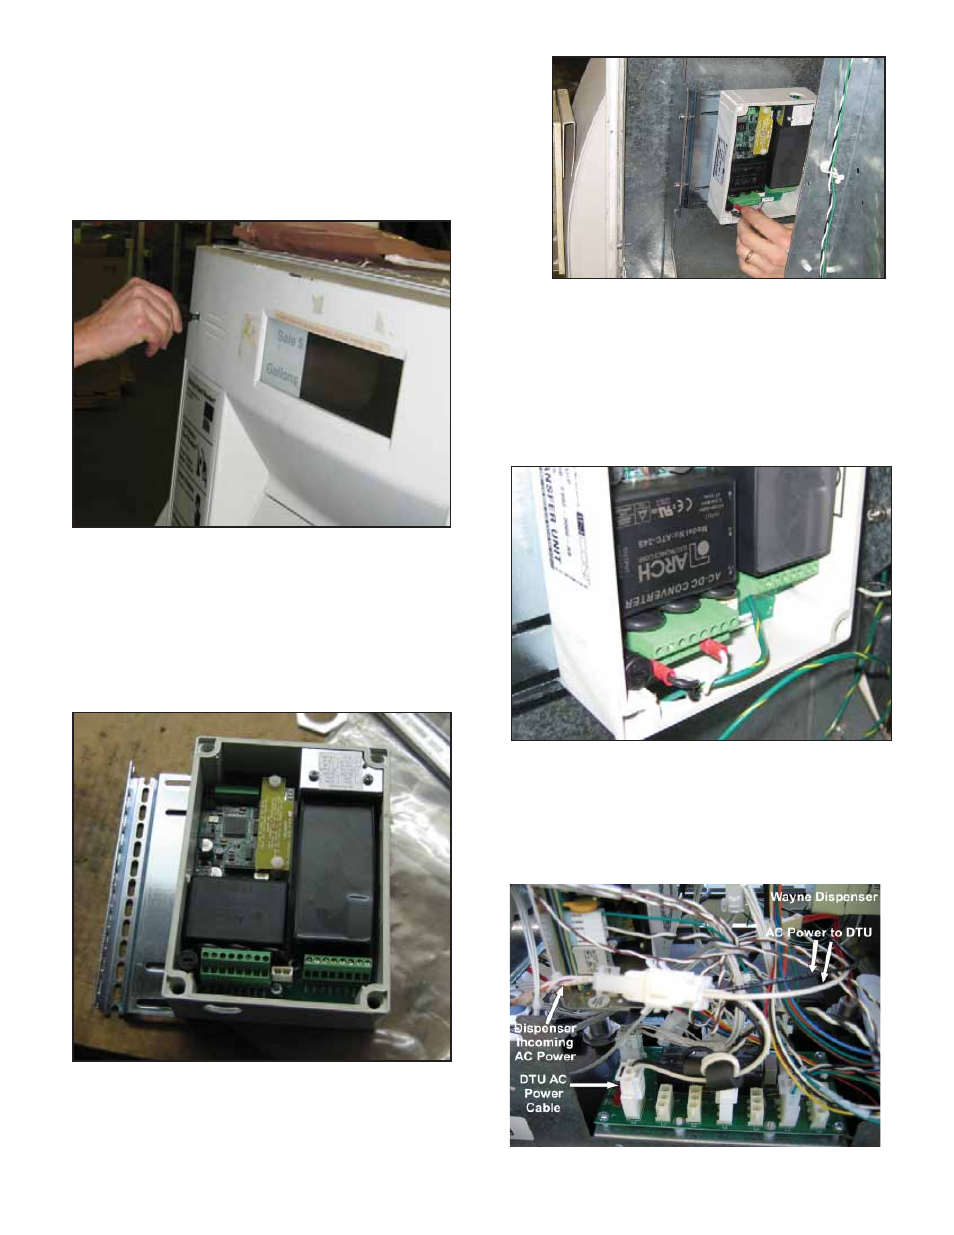
1. Open the upper dispenser door on both sides by
loosening two screws on each door.
Figure 1: Open Dispenser
2. Find TS-DTU/P kit and remove brackets, DTU, and
hardware from box.
3. Remove cover from DTU.
4. Install the mounting bracket on DTU with two
screws, nuts and washers from hardware provided
with DTU as described in the General Information
Section. Ensure that bracket is installed on correct
side as shown.
Figure 2: Mounting Bracket Installed
5. Install the DTU assembly in the vertical
dispenser bracket as shown in Figure
3. Use the two screws, washers, and nuts
as supplied in the TS-DTU/P hardware kit.
Figure 3: Attach DTU to Dispenser
6. Find power harness kit part number 600-0166. Find
the Wayne power harness as shown in Figure 4 of
the Parts List. Remove tie-wraps and uncoil.
7. Pull wiring harness end with crimp connector
through bottom of DTU. Attach white lead to
terminal block position labeled NEUTRAL and
black lead to terminal block position labeled L1 on
terminal block J1 of DTU.
Figure 4: Attach Power Wiring
8. Inside
dispenser,
fi nd the incoming power
connection on the dispenser power supply board
and disconnect.
9. Attach the Wayne power extension cable between
the incoming power connector and the power
supply board (Figure 5).
Figure 5: Attach Power extension Cable