Figure 13.0b alarm input & output menu, Figure 13.0c alarm-in setup menu, Click alarm-in setup – LOREX Technology NETWORK READY H.264 HIGH PERFORMANCE DIGITAL VIDEO SURVEILLANCE RECORDER LH300 Series User Manual
Page 49: Figure 13.0d alarm-out setup menu, Click alarm-out setup
35
Using the Main Menu
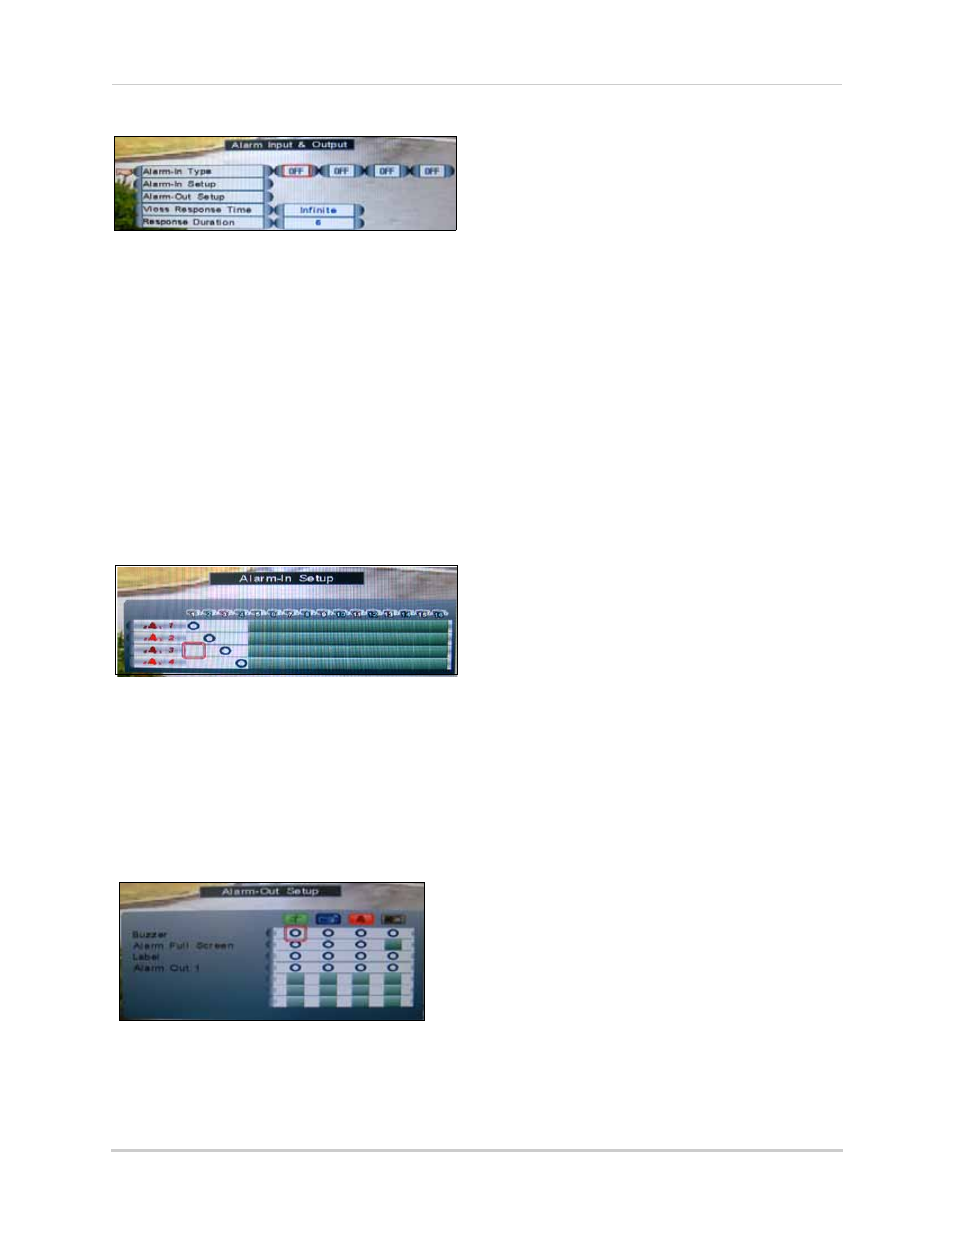
Alarm Input & Output Menu
• Alarm-In Type: Select NO (normally open)
or NC (normally closed) for the alarm in
device.
• VLoss Response Time: Select the time (in
seconds) for the system to record prior to
a triggered event: 0, 3, 5, 10, 30, 60, 120,
180, or Infinite.
• Response Duration: Select the time (in
seconds) for the system to record after a
triggered alarm or motion event: 1~255.
NOTE:
The Response Duration also applies to the
accompanying message and/or buzzer.
Alarm-In Setup Menu
To configure the Alarm-In Setup:
1. Click Alarm-In Setup.
2. Click on the desired alarm number (alarm
1~4) and assign it to the desired camera
number.
Alarm-Out Setup Menu
To configure the Alarm-Out Setup menu:
1. Click Alarm-Out Setup.
2. Click to assign an Event notification
(Motion, VLoss, Alarm, HDD ON/OFF) to an
Alarm-Out notification (Buzzer, Alarm
Full-Screen, Label, Alarm Out 1).
• Buzzer: Select O to enable the system
to beep when an alarm is triggered or
motion is detected; select
X
to disable
it.
• Alarm Full Screen: Select O to enable
a full-screen display of the active
alarm/motion channel; select
X
to
disable it.
• Label: Select O to enable the system to
display camera OSD when an alarm
triggers.
• Alarm Out 1: Alarm 1 output.
3. To save your settings, right-click until you
return to the main screen.
Figure 13.0b Alarm Input & Output menu
Figure 13.0c Alarm-In Setup menu
Figure 13.0d Alarm-Out Setup menu