List: opens the event list menu, Osd: show/hide the on-screen display, Primary controls – LOREX Technology NETWORK READY H.264 HIGH PERFORMANCE DIGITAL VIDEO SURVEILLANCE RECORDER LH300 Series User Manual
Page 19: Menu: opens the system main menu, P/ch+: move cursor in menus up; channel up, 4/;: start/pause forward playback, Q/ch-: move cursor in menus down; channel down, Esc: go back / exit menus, Increase the value of selected menu option, Decrease the value of selected menu option
5
Getting Started
Lorex EDGE
+
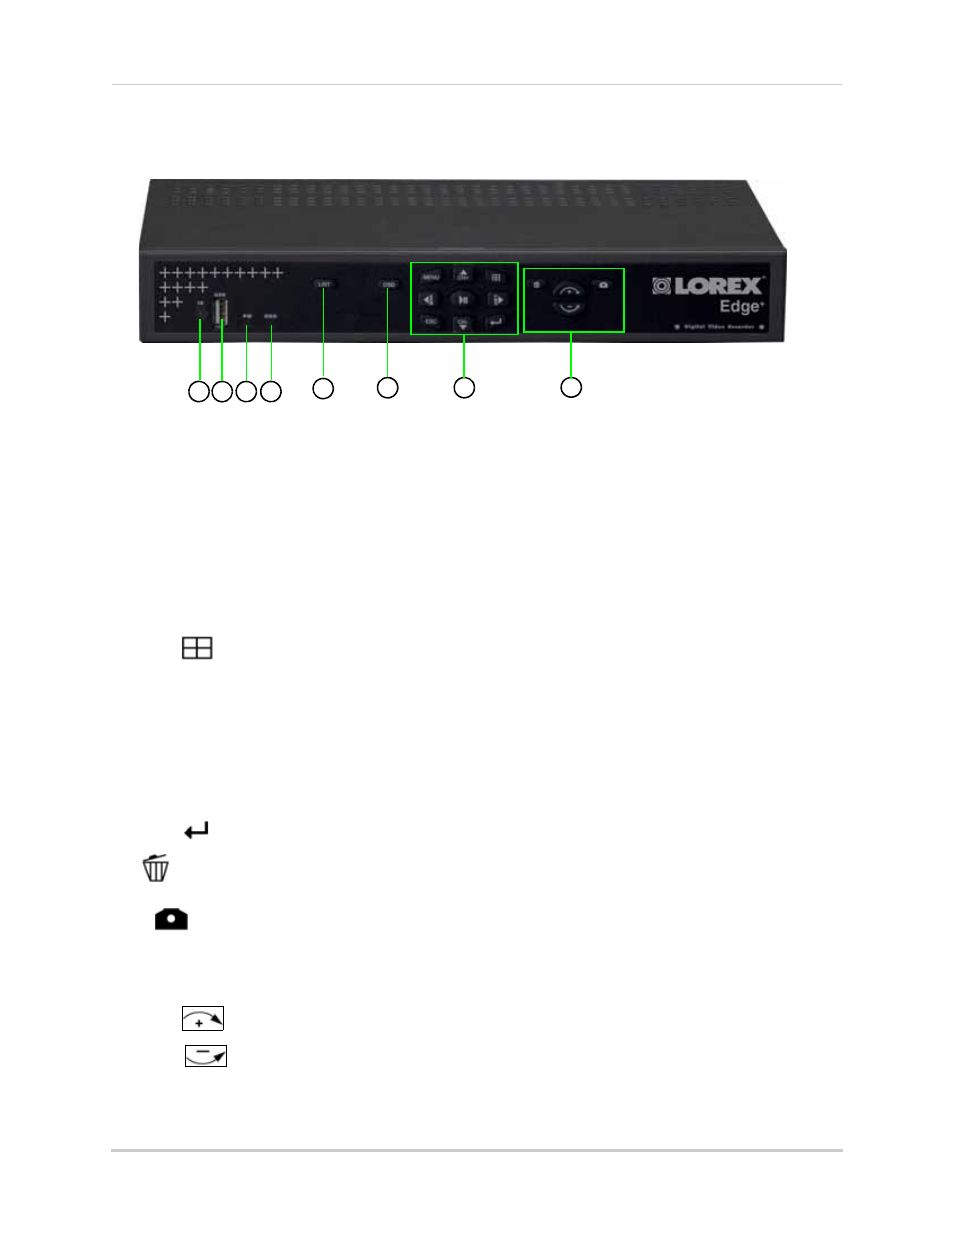
: Front Panel
All Models
1. IR Receiver: Internal IR receiver for the remote control.
2. USB port: Connect a USB flash drive for data backup and firmware updates (download from
website).
3. Power Indicator: LED indicator for system power. When system is powered on, LED is lit red.
4. HDD Indicator: LED indicator for internal hard drive. When in continuous recording mode,
LED pulses red.
5. LIST
: Opens the Event List menu.
6. OSD
: Show/hide the on-screen display.
7. Primary Controls:
•
MENU
: Opens the system main menu.
•
: Press to open the Split-Screen Selection menu (
8 / 16-channel only).
From full-screen single channel view, changes display view to Quad split-screen (
4-channel model only)
• S/
CH+
: Move cursor in menus up; Channel Up.
• X/
FWD
: Move cursor in menus right; during playback, increase forward playback speed (5X, 15X, 60X).
• W/
REW
: Move cursor in menus left; during playback, increase reverse playback speed (5X, 15X, 60X)
•
/
: Start/pause forward playback.
• T/
CH-
: Move cursor in menus down; Channel down.
•
ESC
: Go back / exit menus.
•
:
Confirm menu selections. Press twice in live viewing to access system information.
8.
: While in Event List menu, press to delete a selected event (no confirm or undo).
•
:
During Live Mode and Playback; Press to take a screenshot of the main display—USB
flash drive must be connected
(8/16-channel only).
• Increase/Decrease buttons:
•
: Increase the value of selected menu option.
•
: Decrease the value of selected menu option.
5
8
3
1
2
4
6
7