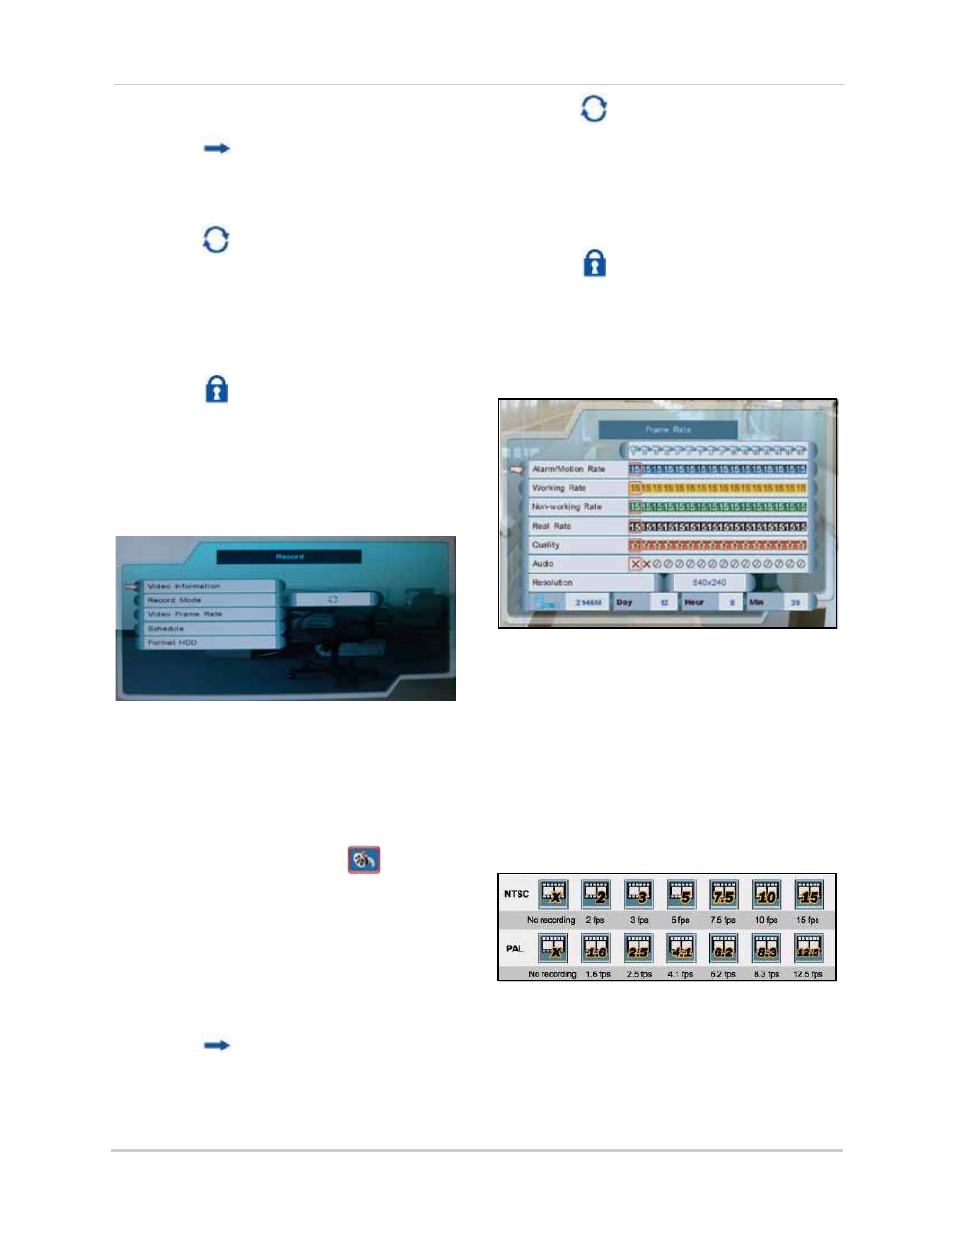
Figure 12.3 record menu (8/16-channel), From the main menu, click . the record menu opens, Configure the following – LOREX Technology NETWORK READY H.264 HIGH PERFORMANCE DIGITAL VIDEO SURVEILLANCE RECORDER LH300 Series User Manual
Page 46: Figure 12.4 frame rate menu (8/16-channel only), Figure 12.5 frame rates for ntsc and pal, 8/16-channel
32
Using the Main Menu
• Record Mode: Select one of the following:
z
Single-Way: The system
stops recording when the internal
hard drive is full.
z
Overwrite: The system
continues recording when the
internal hard drive is full by
overwriting the oldest recorded
data.
z
No Record: The system
does
not
record.
3. To exit, right-click until you return to the
main screen.
8/16-channel
NOTE:
As you make changes to the recording
parameters, the storage calculator at the
bottom of the menu displays the time remaining
on the hard drive.
To configure record settings:
1. From the Main Menu, click
. The
Record menu opens.
2. Configure the following:
• Video Information: View video quality
statistics
• Record Mode: Click to select one of the
following:
z
Single-Way: The system
stops recording when the internal
hard drive is full.
z
Overwrite: The system
continues recording when the
internal hard drive is full by
overwriting the oldest recorded
data.
z
No Record: The system
does
not
record.
• Video Frame Rate: Set the frame rates for
alarm/motion, working hour, and
non-working hour:
z
Alarm/Motion Rate: Click under
each camera and select X, 2, 3, 5,
7.5, 10, or 15 (fps).
z
Working Hour Rate: Click under
each camera and select 0, 2, 3, 5,
7.5, 10, or 15 (fps).
z
Non-working Hour Rate: Click
under each camera and select 0, 2,
3, 5, 7.5, 10, or 15 (fps).
z
Real Rate: The system will
automatically calculate and
allocate a
Real Rate
when you
change the Working Rate.
Figure 12.3 Record menu (8/16-channel)
Figure 12.4 Frame Rate menu (8/16-channel only)
Figure 12.5 Frame rates for NTSC and PAL