D- (tx-), From the main menu, click . the camera menu opens, Click rs-485 – LOREX Technology NETWORK READY H.264 HIGH PERFORMANCE DIGITAL VIDEO SURVEILLANCE RECORDER LH300 Series User Manual
Page 110: Click ptz camera setup, Installing a ptz (pan, tilt, zoom) camera on edge, Lh320 series
96
Appendix B: Connecting Motion / Alarm Devices
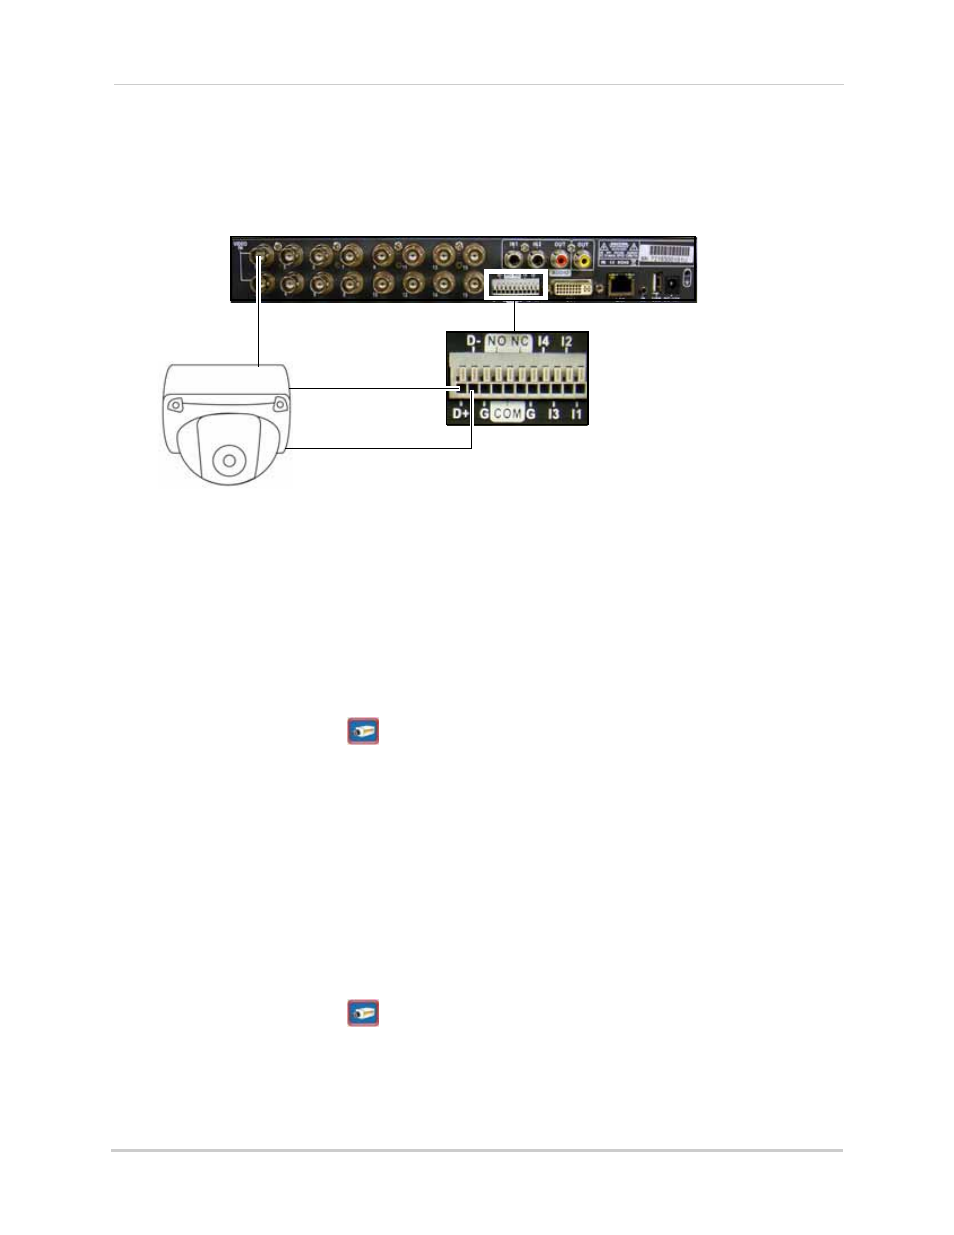
Installing a PTZ (Pan, Tilt, Zoom) Camera on EDGE
+
LH320 series
You can connect RS-485 PTZ cameras (not included) to the PTZ Control Block on the rear panel of
the system (LH320 series only).
To install a PTZ camera:
1. Connect the Transmit Cable to the D+ (TX+) port of the PTZ block on the rear panel.
2. Connect the Receive Cable to the D- (TX-)port of the PTZ block on the rear panel.
3. Connect the video cable to a BNC port (usually channel 1).
4. Connect the power cable from the PTZ camera to a power outlet.
To configure the PTZ Camera’s Baud Rate and DVR ID on the system:
1. From the Main Menu, click
. The Camera menu opens.
2. Click RS-485.
3. Beside Baud Rate, adjust the values to match the baudrate of your PTZ camera.
NOTE: If installing multiple PTZ cameras, ensure all the PTZ cameras have the same baudrates.
This system is capable of configuring a single baudrate only.
4. OPTIONAL: Beside DVR ID select the system’s DVR ID number.
NOTE: DVR ID is used if you have a single PTZ camera that connects to multiple DVR’s. Each
DVR is assigned a DVR ID. Configuring the DVR ID allows the system to match itself with the
PTZ camera.
To configure PTZ settings:
1. From the Main Menu, click
. The Camera menu opens.
2. Click RS-485.
3. Click PTZ Camera Setup.
4. Click on the camera channel the PTZ camera is connected to.
D- (TX-)
D+ (TX+)
PTZ camera (not included)
Video (BNC)