Internal source, Timing settings and adjustments, Clamp type – JVC CB100 User Manual
Page 59: Vtr mode
Chapter 4—Setup Adjustments
HJT Model 100 User's Guide
4-7
NOTE: Refer to Section 4.11.3 and 4.11.4 beginning on page 4-41 for
details on editing and setting up for optional VICs.
11. Press E
SCAPE
to exit the E
DIT
mode.
12. Press E
NTER
to activate the VIC.
13. Press the right arrow key to move to the S
OURCES
list.
14. Use the up/down arrow keys to select a blank line for a new source or
suitable existing source. If using an existing source, use the arrow
keys to highlight. Press E
NTER
to attach the source to the highlighted
channel. If setting up for a new source, add the new source (refer to
procedure for adding a channel name). Press E
NTER
to attach the
new source name to the channel highlighted.
NOTE: The only item in the S
OURCES
list that can be edited is the
source name. All other columns and items are sensed by the
projector and added automatically when the source is received.
15. Press the left arrow key to move back to the C
HANNELS
list. Verify that
the new source is listed in the highlighted Channel.
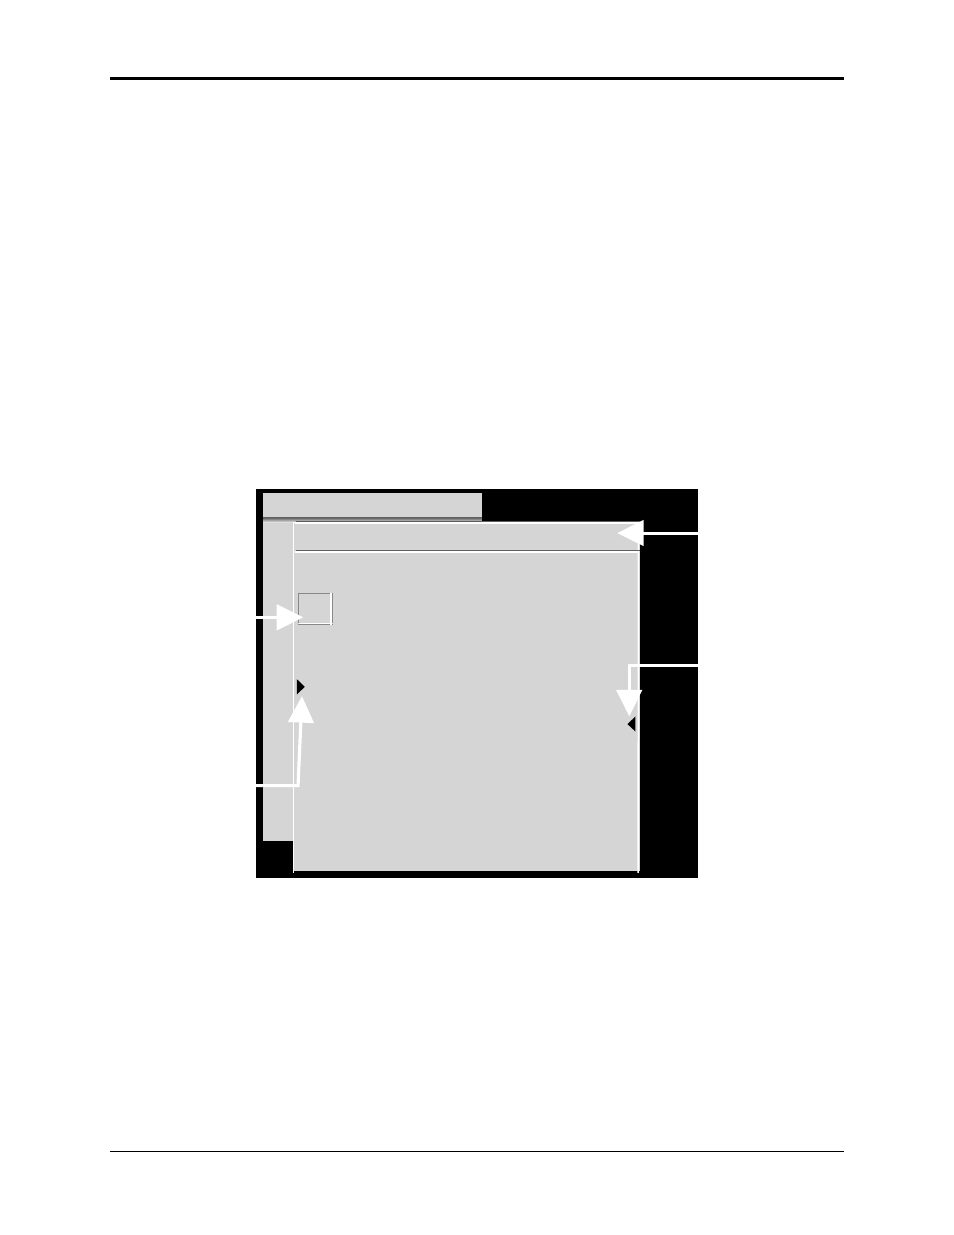
MAIN
CHANNELS
CH 3 (SVGA2)
# Name
VIC
Sources
1
VGA
2.1
LDNT
2
RGB
1.1
LD
3
SVGA
2.1
VGA
SVGA1
SVGA2
4
MAC
2.2
MAC33
MAC45
5
HD-LD
2.3
HD
6
CABLE
2.4
GRA
Figure 4.0-1 Channels Menu
NOTE: If a channel has more sources than can be shown on the list above,
the last line indicates this with three (3) periods or ellipsis (…).
Indicates active channel
(CH 3) and active source
(SVGA2).
Pointer shows active source
(SVGA2) for Channel 3 (CH 3).
Pointer changes to tide (~) for
an approximate match.
Highlighted channel,
not selected yet.
Move the highlight with
the arrow key.
Pointer shows the active
(on screen) channel,
provided it is visible on the
screen list.