Starting a scan using the epson scan 2 icon – Epson WorkForce Pro WF-M5799 Workgroup Monochrome Multifunction Printer with Replaceable Ink Pack System User Manual
Page 196
196
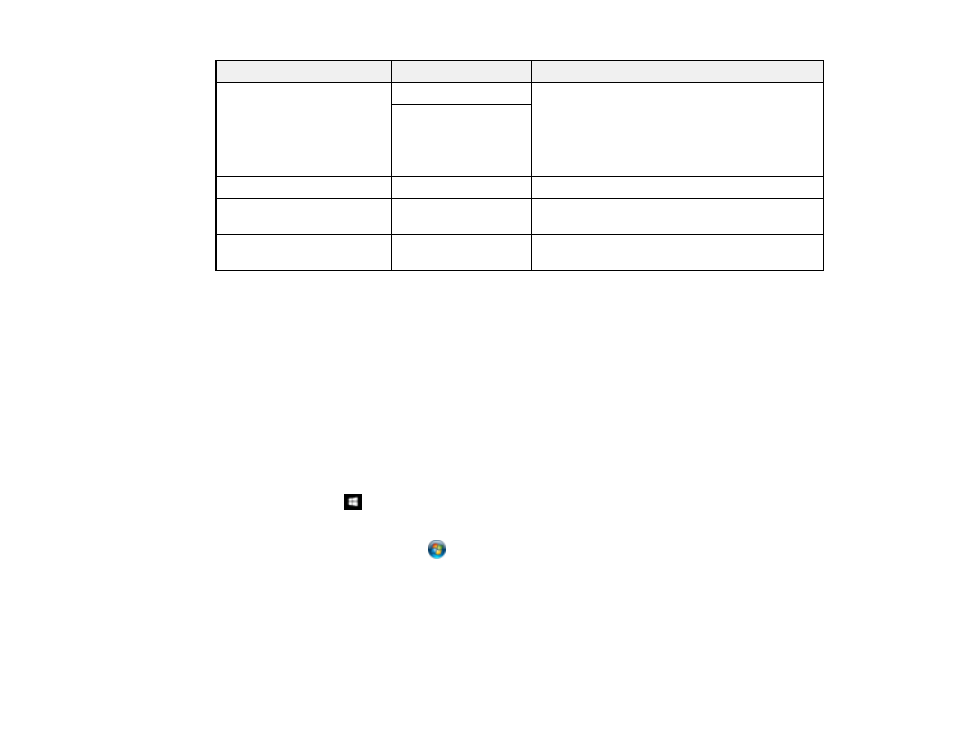
Scan to setting
Available options
Description
Remove Punch Holes
On
Erases the binding holes on a document. Select
the side of the original with the binding holes and
select the orientation of the original (
Up
Direction
or
Left Direction
). Enter the distance
in mm to erase from the edge of the original in
the
Erase Amount
field.
Off
Subject
—
Lets you enter a subject for your email
Attached File Max Size
Various sizes
Lets you select the maximum file size that can
be attached to an email
File Name
—
Lets you enter a prefix, the date, and the time to
the file name for your scanned file
Note:
When you turn on password settings, you can use the LCD screen keyboard to set the password.
Parent topic:
Starting a Scan Using the Product Control Panel
Starting a Scan Using the Epson Scan 2 Icon
You can start the Epson Scan 2 program to select scan settings, scan, and save the scanned image to a
file.
Note:
If you are using your Epson product with the Windows 10 S operating system, you cannot use the
software described in this section. You also cannot download and install any Epson product software
from the Epson website for use with Windows 10 S; you must obtain software only from the Windows
Store.
•
Windows 10:
Click
and select
EPSON
>
Epson Scan 2
.
•
Windows 8.x
: Navigate to the
Apps
screen and select
Epson Scan 2
.
•
Windows (other versions)
: Click
or
Start
, and select
All Programs
or
Programs
. Select
EPSON
>
Epson Scan 2
>
Epson Scan 2
.
•
Mac:
Open the
Applications
folder, open the
Epson Software
folder, and select
Epson Scan 2
.