Grass Valley Profile XP Aug 16 2004 User Manual
Page 79
Binding disks and creating a video file system
23 July 2004
Profile XP System Guide
79
e. On the Profile XP media platform, start Configuration Manager using the
desktop shortcut or by selecting
Start | Programs | Profile Applications |
Configuration Manager
.
f. In Configuration Manager, click
File System
to start the GVG Disk Utility.
4. Expand the tree view and identify bound LUNs and unbound disks by their
placement in the hierarchy of the tree view.
5. If there are unbound disks displayed in the tree view, you must perform the
following steps, otherwise, proceed to step 6.
a. To bind unbound disks, right-click the
Unbound
node for a controller, then select
Bind LUNs
in the context menu. (Peer controllers that share the same set of disks
are automatically selected as a pair.)
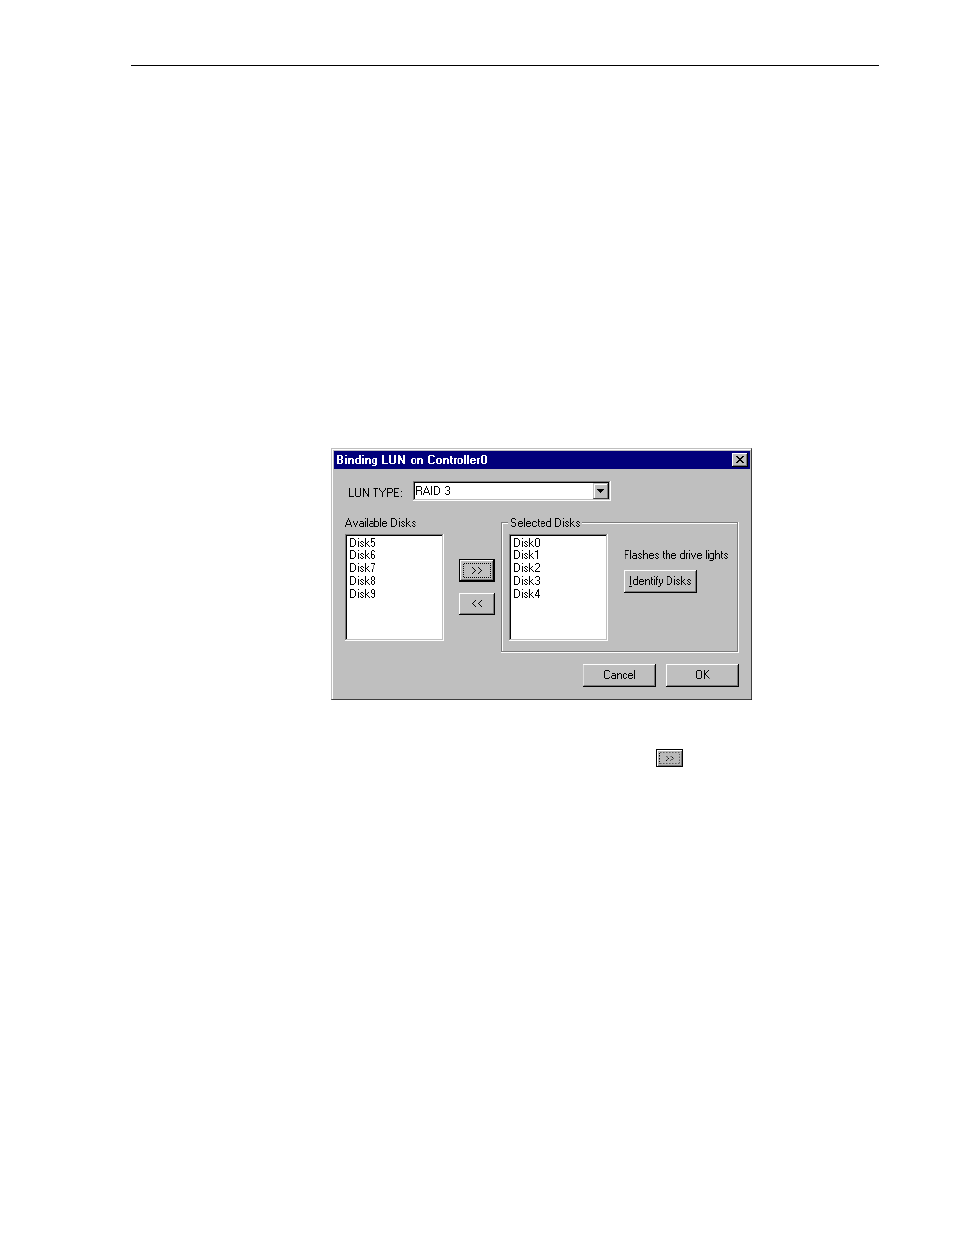
The Binding LUN… dialog box opens showing all unbound disks for the
controller listed in the Available Disk list.
b. Select
RAID 3
using the LUN TYPE drop-down box.
c. Select five contiguous disks, then click the add button
to add them to the
Selected Disks list. (TIP: Use ‘shift-click’ or ‘control-click’ to select disks.)
NOTE: As an aid in identifying a disk module’s physical location, select it in the
Selected Disks list, then click
Identify Disks.
This causes the disk drive LED to flash.
d. Click
OK
to close the Binding LUN… dialog box and begin the binding process.
The Progress Report dialog box opens, showing the status of the binding
process.