Rear panel connections, Supervisory port, Rear panel connections -9 – Verilink WANsuite 5370 (34-00310.D) Product Manual User Manual
Page 23: Supervisory port -9
A b o u t t h e W A N s u i t e 5 3 7 0
1-9
The user-activated input control buttons on the WANsuite 5370 used to access
and set configuration and control options from the LCD menus are described
in the table below.
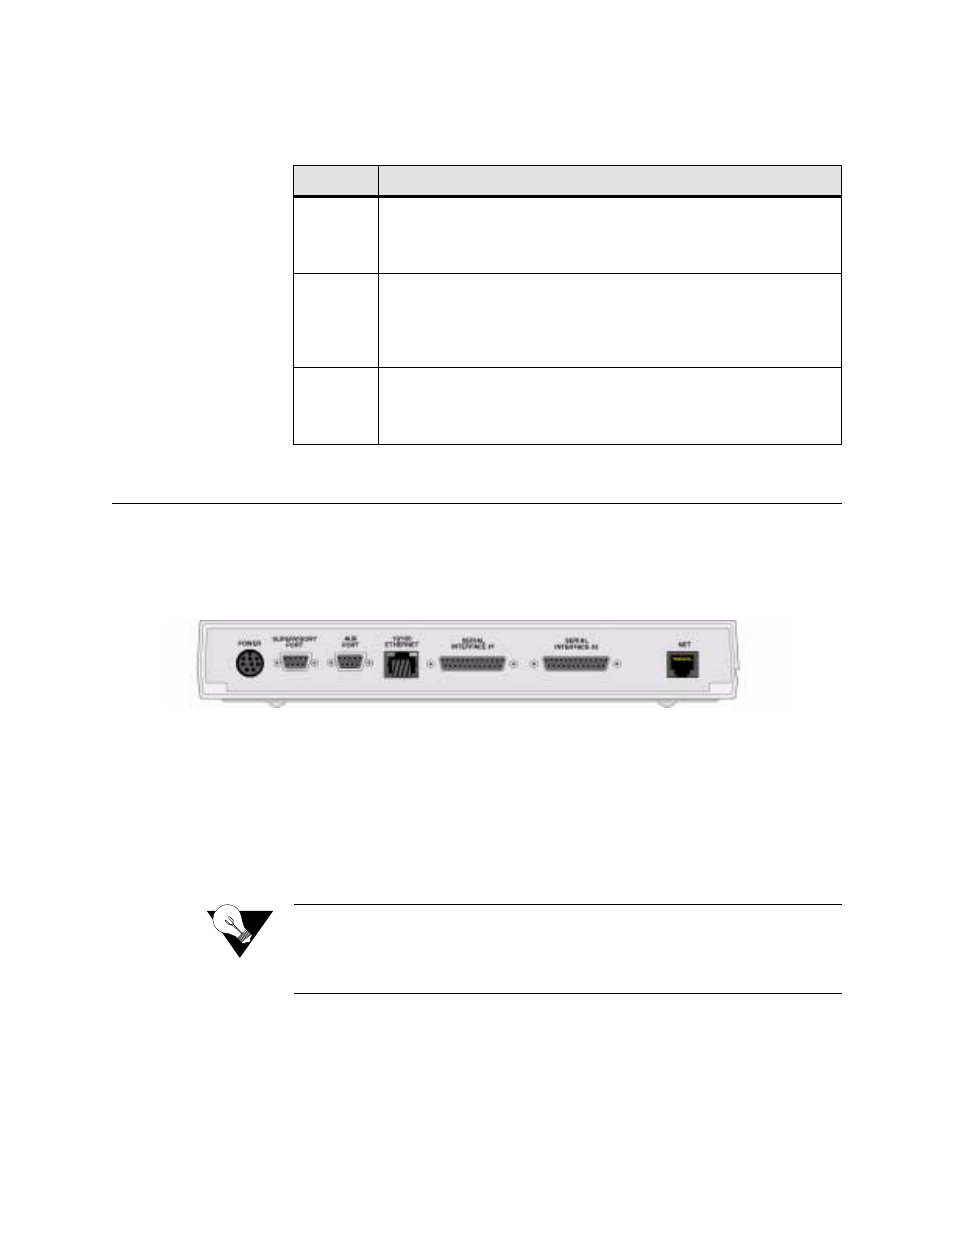
Rear Panel Connections
The rear panel of the WANsuite 5370 has seven connectors
−
POWER
,
SUPERVISORY PORT
,
AUX PORT
,
10/100 ETHERNET
,
SERIAL INTERFACE
#1
,
SERIAL INTERFACE #2
, and
NET
−
as shown in Figure 1.2 below.
Figure 1.2
WANsuite 5370 Rear Panel
Supervisory Port
The
SUPERVISORY PORT
is a DB-9 female DCE connector that supports a
variety of configurable parameters, including port speed, character size, parity,
and stop bits. The Supervisory port speed can be set to 1200, 2400, 4800,
9600, 19200, 38400, 57600, or 115200 bps. Default settings for the
Supervisory port are 19200 bps, 8 bits, no parity, and 1 stop bit.
NOTICE:
For information on pinout assignments for the DB-9 female DCE
connector, refer to Supervisory and Auxiliary Port Pin Assignments on
page A-8. See Ordering Information on page A-4 for information on
cables for this connector.
The Supervisory port performs several different functions. It serves as the
VT100 interface port, providing VT100 screens. It also supports asynchronous
PPP, providing access to the Web Server interface. In addition, the
Supervisory port is an asynchronous data port. Data is encapsulated in frame
relay packets and then transmitted through the Network port.
Button
Description
EXIT
The
EXIT
button exits a menu option, which then places the unit in the
next higher level of the menu hierarchy. If you are editing an option,
pressing
EXIT
exits that screen without saving any changes. If you are in
the main menu, pressing
EXIT
logs off the unit.
SCROLL
The
SCROLL
button lets you review the available options for a given
level in the menu hierarchy or scroll through possible settings for a
parameter. You can also use the
SCROLL
button to set alphanumerical
values, where applicable, by scrolling incrementally through digits 0–9
or letters A–Z and a–z.
SELECT
The
SELECT
button lets you select the currently displayed option or
value for a given field, and enter an “edit” mode for parameters that
require user-specified input. Additionally, you can use the
SELECT
button to confirm certain actions or settings.