Hardware installation (for notebook & desktop pcs) – Measurement Computing Personal488 rev.3.0 For DOS & Windows 3.Xi User Manual
Page 39
I. HARDWARE GUIDES
6. Personal488/CARD
Personal488 User’s Manual, Rev. 3.0
I-23
Hardware Installation (for Notebook & Desktop PCs)
Hardware installation topics are covered in the following paragraphs. It is strongly suggested that you
read and perform the following instructions to assure the proper installation and usage of the
Personal488/CARD.
The hardware installation topics include:
•
Personal488/CARD-to-Interface Cable connection
•
Installation of Personal488/CARD into PC
•
Interface Cable connection with IEEE 488 compatible accessories
The plug and play operation of the Personal488/CARD allows for the operating parameters to be
configured via software, circumventing the need for switch or jumper settings.
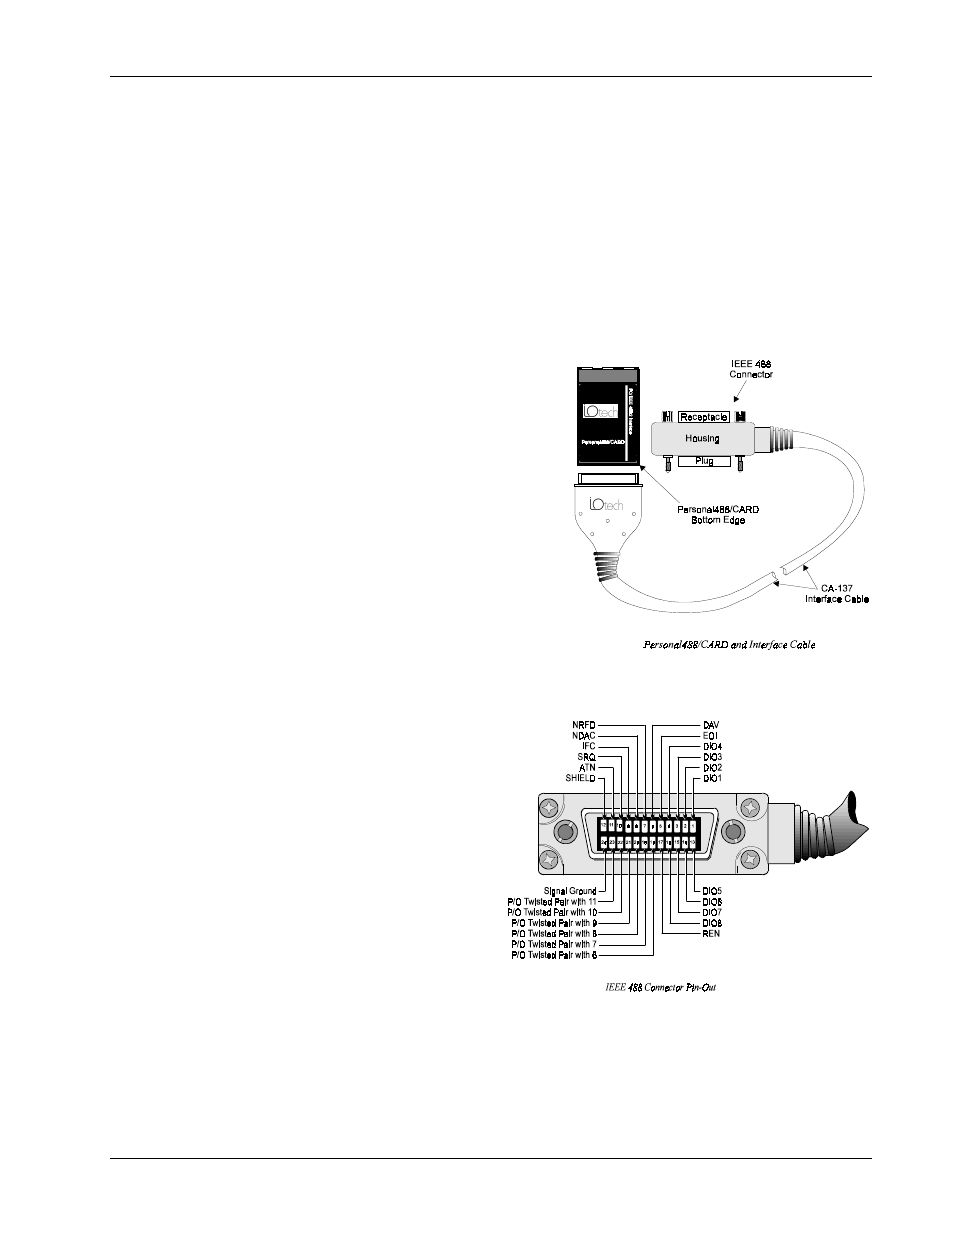
Interfaces & Connectors
The Personal488/CARD is shipped with an interface
cable (CA-137) that permits the card to directly
interface with up to fourteen (14) IEEE 488
instruments.
The PCMCIA card connects to the CA-137 cable via
the female slot connector found along its “bottom”
edge, as shown in the figure. The unit itself, being a
PCMCIA socket card, constitutes a Type II (5mm)
PCMCIA socket interface.
The opposite end of the CA-137 Interface Cable is
terminated in an IEEE 488 connector with metric
studs. A pin-out of this connector is provided below.
Interface Cable Connection
Follow the instructions below to connect the Personal488/CARD to the Interface Cable (CA-137).
Note:
The PCMCIA Card and the Slot
Connector End of the Interface
Cable are keyed to ensure proper
connection. The card and cable
should connect easily and fit
snug. DO NOT force the
PCMCIA Card / Interface
Cable mating. Refer to the
figures on this page while
performing these instructions.
1.
In one hand, hold the PCMCIA Card
so that the company logo is face up
and the bottom edge of the card is
facing you.
2.
In the other hand, hold the Slot
Connector End of the Interface Cable
so that the groove (keyed portion of the connector) is face down and the company logo is face up.
3.
Press the Slot Connector into the PCMCIA Card. The Personal488/CARD should now be firmly
connected to the Interface Cable.