Measurement Computing DASYLab User Manual
Page 43
DasyLab - Standard Driver
989693
Configuring DASYLab for WaveBook A-7
How to Add a WBK Module to a DASYLab Setup.
Complete the following steps to add a WBK module to the DASYLab setup. You will need to repeat steps
2 through 5 for each additional module. If you have not already done so, review the preceding section,
Notes regarding Daisy Chains, page A-6.
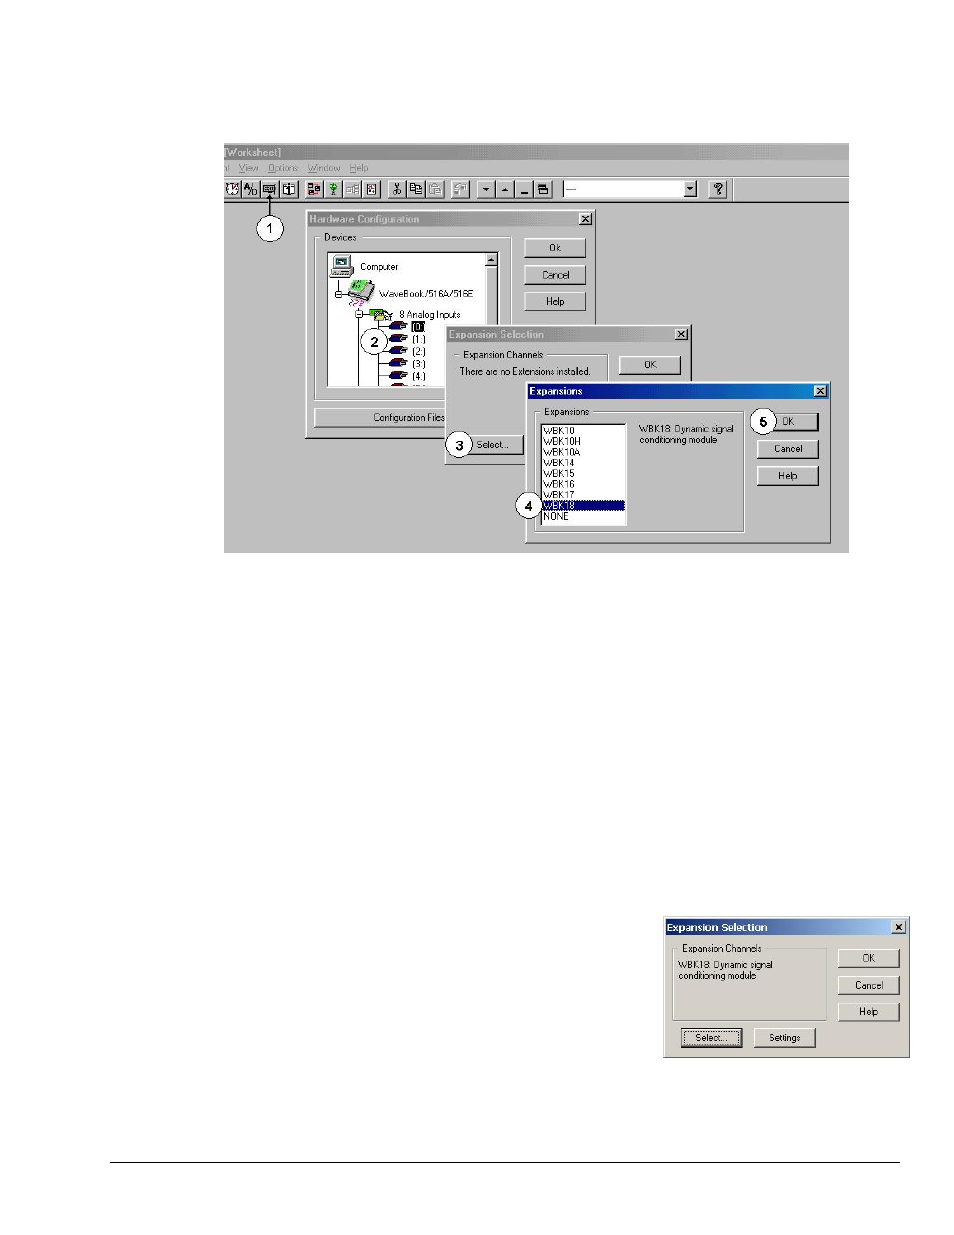
Adding a WBK Module to an Analog Input Connector
1. Single-click the
The Hardware Configuration dialog box will appear.
2. Double-click on the Analog Inputs icon to expand its list of connectors; then double-click the
applicable connector. In the above figure, connector [0] has been selected. This is indicated by a
black square surrounding the number.
The Expansion Selection dialog box appears. If no hardware was assigned to the connector the
message “There are no Extensions installed” will be displayed, as in the above figure.
3. Click the
An Expansions dialog box appears with a list of available expansion devices. The list includes a
selection entitled “None.” This is used to remove a previously connected device from the
configuration tree.
4. Select the desired device. In the above example WBK18 has been selected.
5. Click the
The Expansion Selection dialog box indicates the chosen
device. In this example, a WBK18 module was selected.
Thus the dialog box appears as indicated in the right-hand
figure.
6. To go back and make other WBK connections, click the
this point in time, click the
settings are discussed later in this chapter.