Select the iotech driver in dasy lab – Measurement Computing DASYLab User Manual
Page 34
4-6 IOtech 640 & 650 Series Devices
977491
DASYLab
–Enhanced Driver
Using the Control Panel Device Manager
(for 640u and 650u)
The host PC will automatically detect plug-and-play data acquisition devices such as the 640u and 650u. However;
if you need to find the name of your device, for example, if you are writing a custom program, navigate from the
Windows Desktop to the Device Manager. The navigation path is:
Start
Settings
Control Panel
System
Hardware(Tab)
Device Manager
DaqX PnP Devices
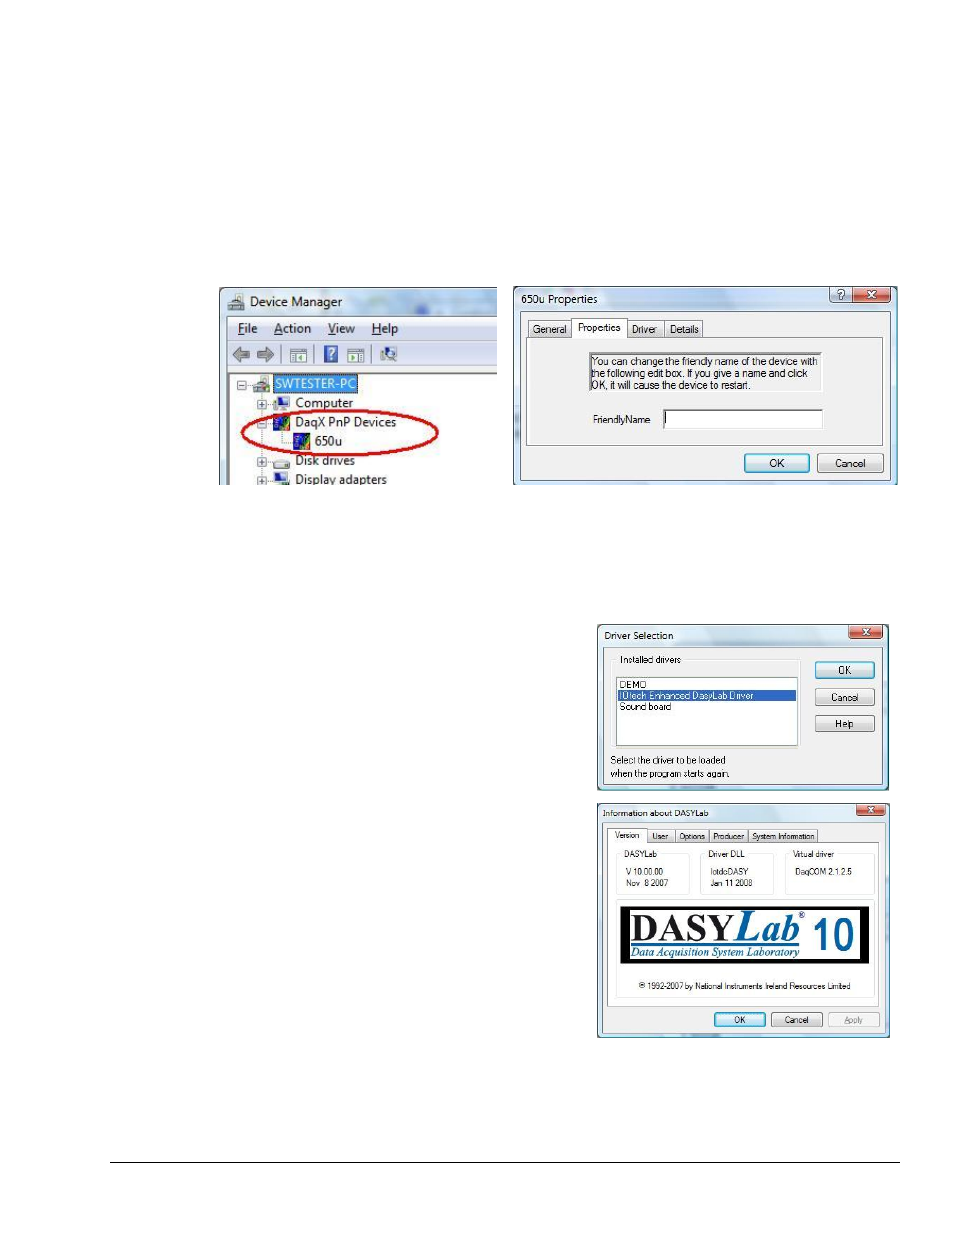
You will see the device listed under DaqX PnP Devices (see first figure, below). You can change the name of the
device by doing a right-click on the device name to open its properties dialog box, then clicking on the Properties
tab (see second figure). You can then change the “FriendlyName” of the device.
Locating DaqX PnP, 650u Devices
650u Properties Dialog Box
Select the IOtech Driver in DASYLab
1.
Start DASYLab and go to Measurement / Driver Selection
(see figure at right).
2.
When the driver selection menu is presented, select the IOtech
Enhanced DASYLab driver from the list. You may be prompted
to restart DASYLab for the changes to take effect. If so, exit and
restart DASYLab before continuing.
3.
Click Help
About DASYLab. The “Information about
DASYLab” screen will appear.
The screen’s “Version” tab states the versions of:
DASYLab, the active hardware DLL Driver, and the
low-level hardware Virtual Driver.
4.
Verify that the DLL name is iotdcDASY.
5.
Verify that the Virtual Driver name is DaqCOM.
The Enhanced DASYLab driver uses DaqCOM to communicate
with, control, and acquire data from the hardware.
6.
Use the “Additional Options” tab to confirm that the options you
purchased have been properly installed.