Measurement Computing DASYLab User Manual
Page 17
DASYLab
– Standard Driver
896992
Configuring DASYLab for Personal Daq/54, 55, 56 2-5
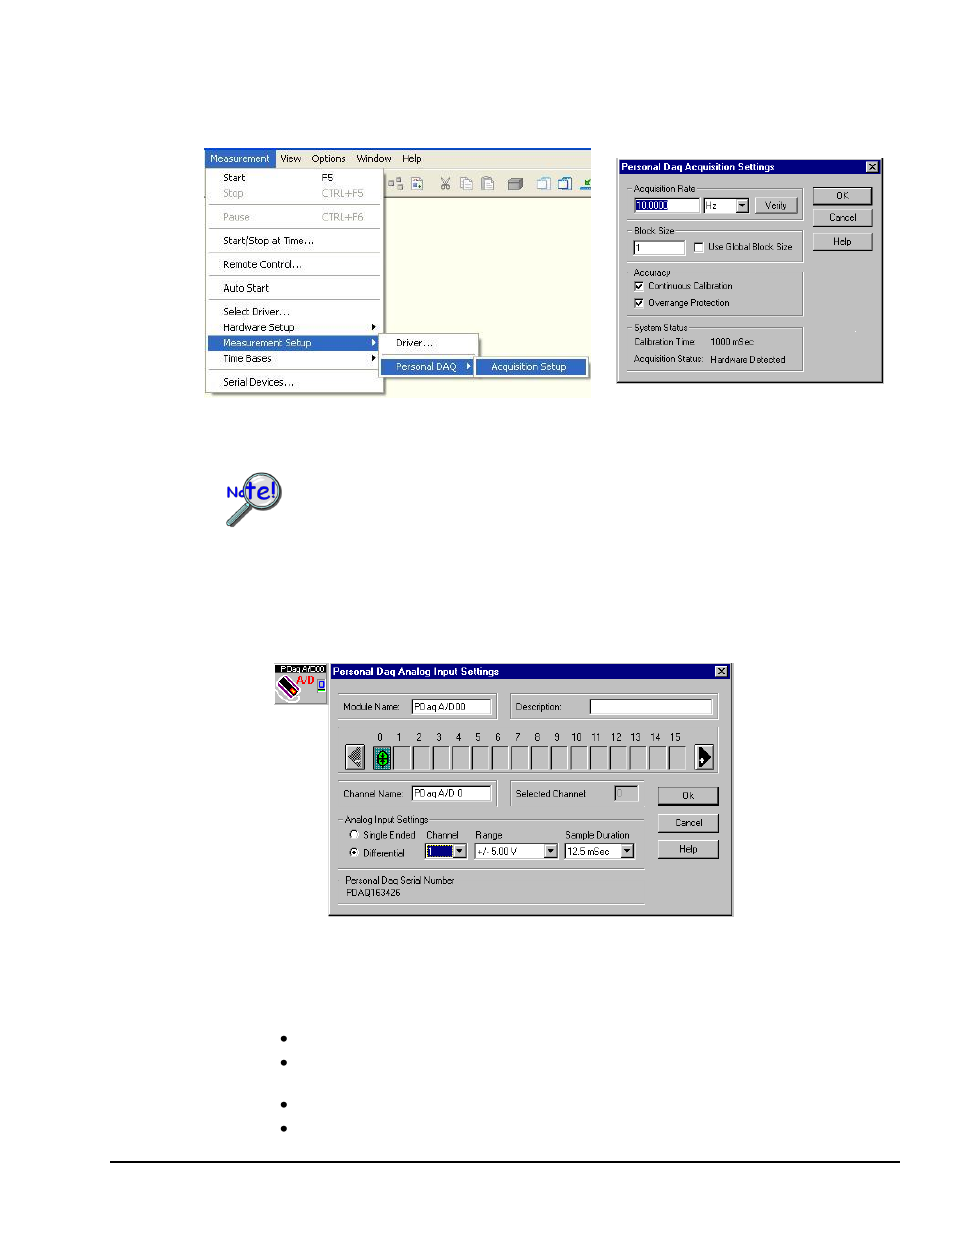
DASYLab’s Personal Daq menu includes an Acquisition Settings dialog box for setting the Acquisition
Rate, Block Size, and Accuracy (Continuous Calibration and/or Overrange Protection). The dialog box also
includes a system Status panel.
Accessing Personal Daq Acquisition Settings
Personal Daq Acquisition Settings
When using Personal Daq you should use the Personal Daq Acquisition Settings
window to set the Acquisition Rate and Block Size (see the preceding figure). You
should not use the Experiment Setup window to do this, as these two parameter values
are not generally coordinated between windows. An exception is that Block Sizes will
be coordinated if the checkbox for “Use Global Block Size” is checked.
A screen similar to that in the following figure appears after selecting Analog Inputs and double-clicking on
the module icon [after it is added to a worksheet]. Notice that the device serial number appears on this
screen.
Personal Daq Analog Input Settings
In the screen (see preceding figure) you must assign physical channels on the Personal Daq [and on PDQ1
and PDQ2, if present] to virtual channels in the A/D module. This is accomplished by highlighting each of
the virtual channels in the 0 to 15 channel bar and then defining channel parameters as follows:
Select Single-Ended or Differential
Select the Channel; this is the physical channel number. Guidelines and examples follow the
bulleted list.
Select the Range
Select the Sample Duration.