Installation on jacketed fiber – Legrand OR-205KAN9GB-MM User Manual
Page 67
OR-71601671
Page 60
25
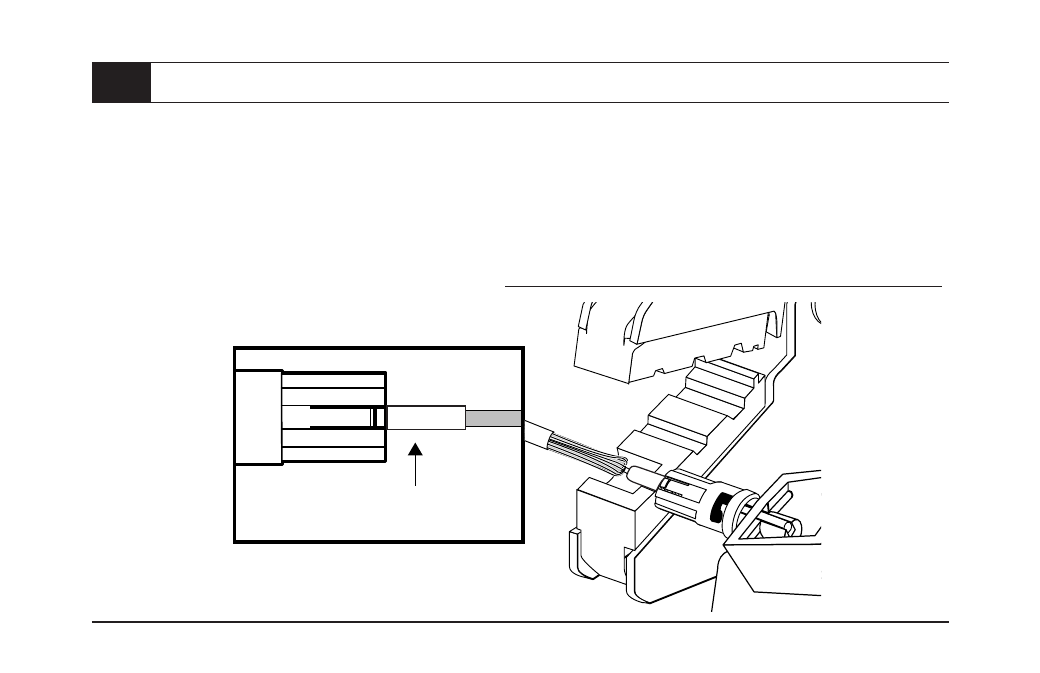
Disengage coupling nut by pushing and rotating the connector body 1/4 turn counterclockwise in order to
unlock the connector from the installation tool. Rest the crimping tool against the connector body to
ensure it is aligned properly. Using the first and smallest die (.068 hex) on the crimping tool, crimp
strongly the stem on the buffer at the “buffer crimp area”, making sure neither the jacket nor any aramid
yarn is in the way. The smallest diameter hex face is against the rear of the connector.
Buffer crimp area
Installation on jacketed fiber
*
Make sure that the crimp tool you are using is in proper operating condition before attempting this step. Also make sure that the tool is set to the
settings shown in the Technical Bulletin—OptiMo
®
Field Installable Connectors document that is provided with your Ortronics
®
Field Installation Kit.
ST
- OR-205KAN9GA-MM OR-205KAN9GB-SM OR-205KAN9GA-SM OR-60300128 OR-60300126 OR-205KAN9FB-MM OR-205KAN9FA-MM OR-205KAN9FB-SM OR-205KAN9FA-SM OR-205KAN9EB-MM OR-205KAN9EA-MM OR-205KAN9EBSM OR-205KAN9EA-SM OR-205KAS9GB-50T OR-205KAS9GA-50T OR-205KAS9GB-62 OR-205KAS9GA-62 OR-205KAS9GB-09 OR-205KAS9GA-09 OR-205KAS9FB-50T OR-205KAS9FA-50T OR-205KAS9FB-62 OR-205KAS9FA-62 OR-205KAS9FB-09 OR-205KAS9FA-09 OR-205KAS9EB-50T OR-205KAS9EA-50T OR-205KAS9EB-62 OR-205KAS9EA-62 OR-205KAS9EB-09 OR-205KAS9EA-09