Daktronics Pro Series Operations and Maintenance Manual User Manual
Page 82
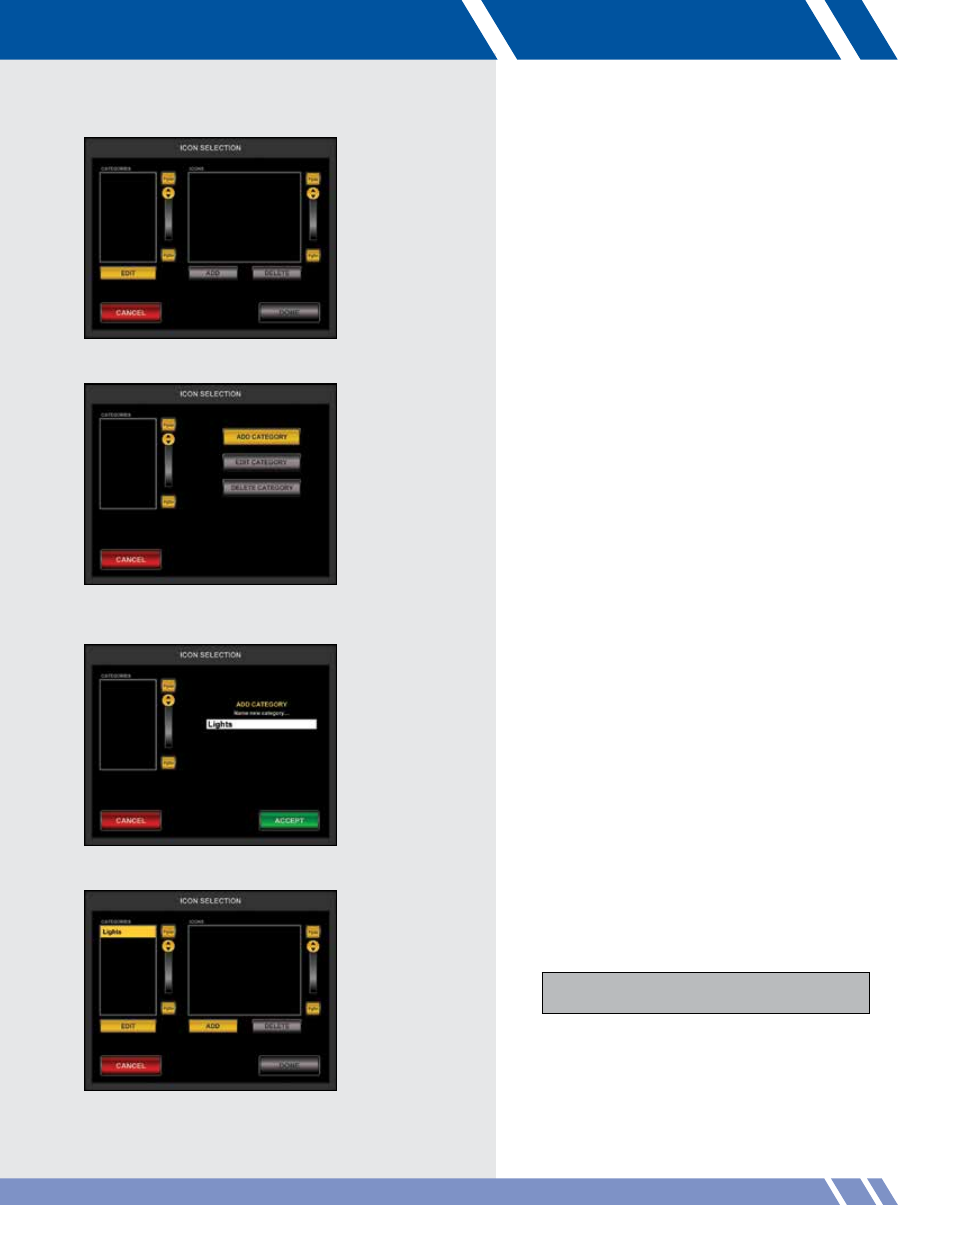
Icon Management
Instead of using icons with a picture, we will use
icons that display a number for the purposes of this
instruction.
When the Icon Selection module opens it looks like
Figure 9.32. The only option is the EDIT button under
the category list. Touch this button and the only
option is ADD CATEGORY (Figure 9.33).
The reason that the EDIT CATEGORY and DELETE
CATEGORY buttons are deactivated is because
no category has been selected for editing. Touch
ADD CATEGORY to add a new category.
Add Category
Type in a name for the new category (Figure 9.34)
and the ACCEPT button will activate. Touch ACCEPT
and the new category will appear in the category
list, selected and ready to add icons (Figure 9.35).
Add Icons
To add icons to the selected category, touch the
ADD button under the Icons window (Figure 9.35).
A Windows file selector will display allowing the
location of the new icon to be chosen.
Note: Icons must be 85 pixels wide by 95 pixels
tall and saved as non-progressive jpeg files.
Figure 9.32: Icon Selection, opening display
Figure 9.33: Edit Category, with no
category selected
Figure 9.34: Add Category
Figure 9.35: New category added
75
SETUP