Draining fluid from the exchanger – Cannon Instrument CMRV-4500 User Manual
Page 23
17
CANNON
®
Mini-Rotary Viscometer CMRV-4500 Instruction & Operation Manual
Version 1.1e—October, 2011 •
CANNON
®
Instrument Company
2139 High Tech Road • State College, PA • 16803 • USA
7. Replace the connector on the Exchanger hose, and reattach the
connector to the fitting on the Exchanger (see photo).
Draining fluid from the Exchanger
After the antifreeze mixture has been flushed from the Air/Water Heat
Exchanger per the preceding procedure, drain the system as follows:
1. Make certain that the Heat Exchanger power is OFF, then remove the
external housing from the Air/Water Heat Exchanger by removing
the six screws securing the housing to the sides of the frame (three
screws on each side of the unit) and the six screws on the top and
sides of the rear panel.
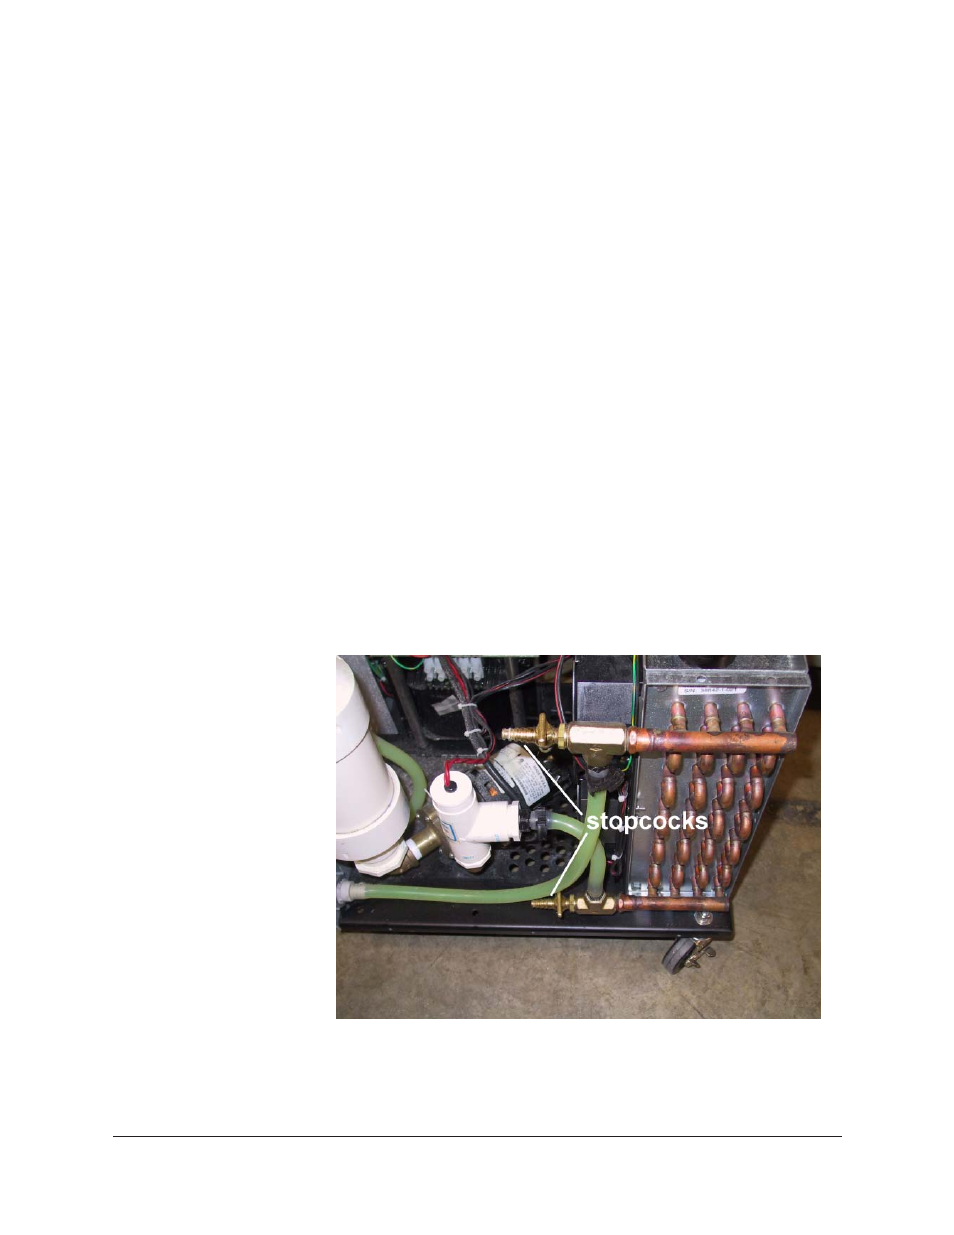
2. Locate the twin stopcocks at the top and bottom of the radiator (see
photo, next page). Attach a drain hose to the bottom stopcock and
place the opposite end of the hose in a drain bucket.
3. Open the top and bottom stopcocks by turning them parallel to the
nozzle and permit water to drain from the radiator. Then close the
stopcocks and remove the drain hose from the bottom stopcock.
NOTE
A small amount of water/antifreeze mixture may remain in the tubing
leading from the external connector to the reservoir. If desired, this fluid
may be drained by pulling the hose off of the ribbed section of the quick-
connect fitting previously installed. Reattach the tubing before completing
the remainder of this procedure.
Heat Exchanger with housing removed and stopcocks highlighted