Cannon Instrument CMRV-4500 User Manual
Page 124
118
CANNON
®
Mini-Rotary Viscometer CMRV-4500 Instruction & Operation Manual
Version 1.1e—October, 2011 •
CANNON
®
Instrument Company
2139 High Tech Road • State College, PA • 16803 • USA
3. Plug the converter’s RS-232 25-pin connector into the
COM
port you
selected for multi-unit configuration during installation of the CMRV
software. If you are using
COM 1
, a DB-25 to 9-pin adaptor may be
required.
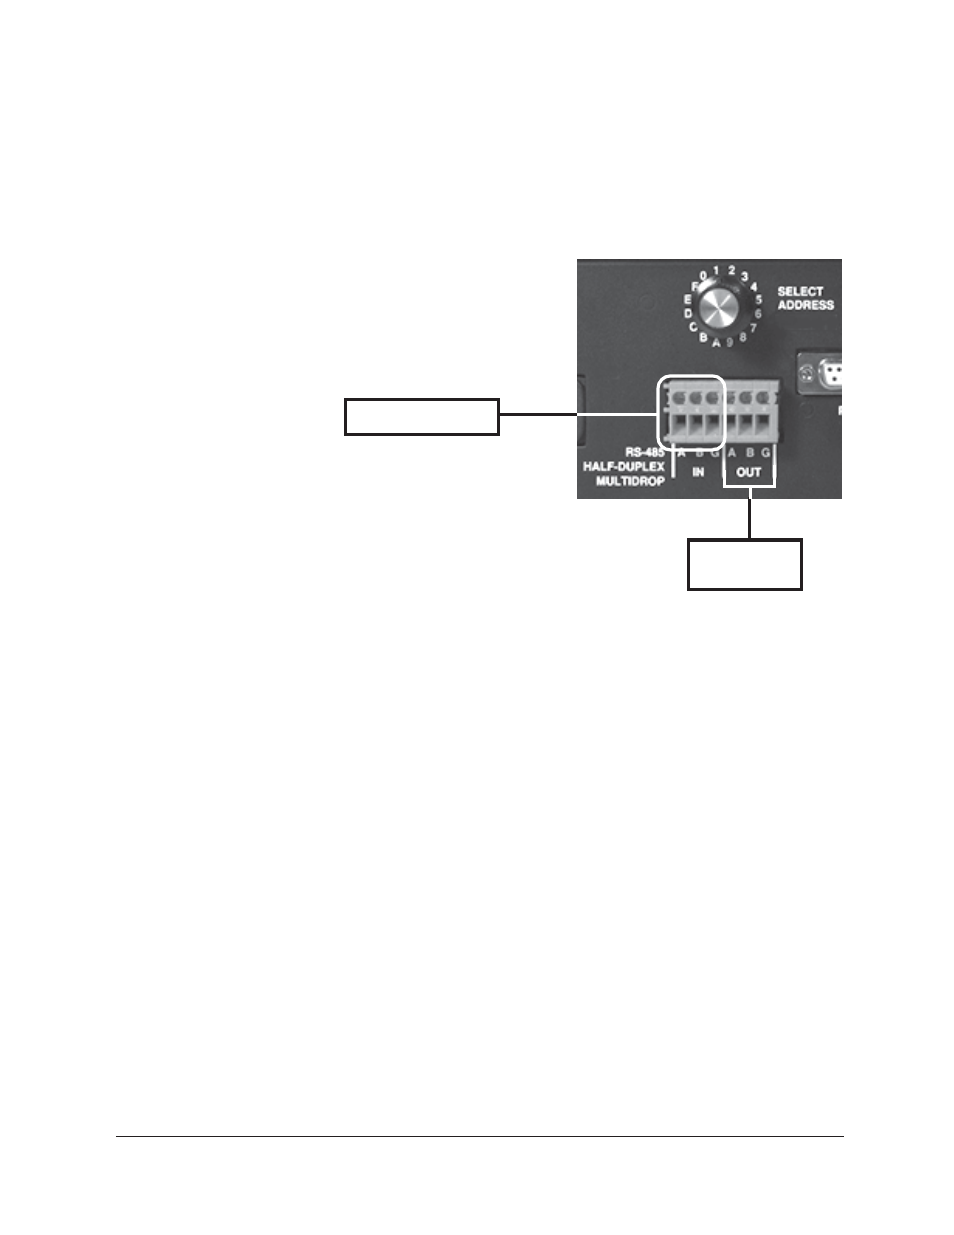
4. Select a CMRV unit as the first in the “daisy chain” and attach the
three wires from the converter to the
ABG
connection marked
IN
on
the RS-485 port on the back of the first CMRV chassis as follows
(see diagram):
Attach the red wire to
IN-A.
Attach the white or brown
wire to
IN-B.
Attach the black wire to
IN-G
.
5. Set an Instrument Address for
the first CMRV unit
using the
SELECT
dial above the RS-485 port on the
CMRV chassis.
6. Locate one of the 8' cables included with the
interface kit.
7. Connect one end of the cable to the RS-485 port on the first CMRV
unit as follows:
Attach the red wire to
OUT-A
, the white/brown wire to
OUT-B
, and
the black wire to
OUT-G
.
8. Connect the other end of the cable to the second CMRV chassis by
attaching the red wire to
IN-A
, the white/brown wire to
IN-B
, and the
black wire to
IN-G
.
9. Set an Instrument Address for the second CMRV unit
using the
SELECT
dial above the RS-485 port on the CMRV chassis. The
address must be different than that of the first CMRV.
10. To daisy-chain additional CMRV units (up to a total of four), use
additional lengths of cable provided with the interface kit and
continue in the manner described in steps 6-9. Make sure to select a
unique instrument address for each CMRV added to the chain.
NOTE
Each additional CMRV should be connected to the previous CMRV in the
daisy-chain.
11. When all CMRV units have been connected, plug the converter
power supply into an appropriate electrical outlet to complete your
installation. Check serial connections by running a cleaning cycle on
all instruments per manual instructions.
From CONVERTER
To next
CMRV unit
RS-485 connections
on the CMRV chassis