Cleaning the instrument housing, Flushing and draining the air/water heat exchanger, Flushing fluid from the exchanger – Cannon Instrument CMRV-4500 User Manual
Page 22
16
CANNON
®
Mini-Rotary Viscometer CMRV-4500 Instruction & Operation Manual
Version 1.1e—October, 2011 •
CANNON
®
Instrument Company
2139 High Tech Road • State College, PA • 16803 • USA
Cleaning the instrument housing
CAUTION
Before cleaning the CMRV housing, turn off the instrument and unplug
the power cord. Do not clean the instrument unless the cell temperature
is within 10°C of ambient.
Periodically clean the outside of the unit with a damp cloth moistened
with water and/or a mild detergent solution.
Flushing and draining the Air/Water Heat Exchanger
The water-antifreeze mixture should be replaced annually for reliable
performance and to prevent corrosion of internal components. Do not
mix antifreeze types in the Air-Water Heat Exchanger.
To flush fluid from the Exchanger and CMRV-4500, obtain replacement
antifreeze, a funnel, a drain bucket and a supply of warm water. Then
complete the following procedures:
Flushing fluid from the Exchanger
1. Turn off the Heat Exchanger power switch
to remove power from the Exchanger.
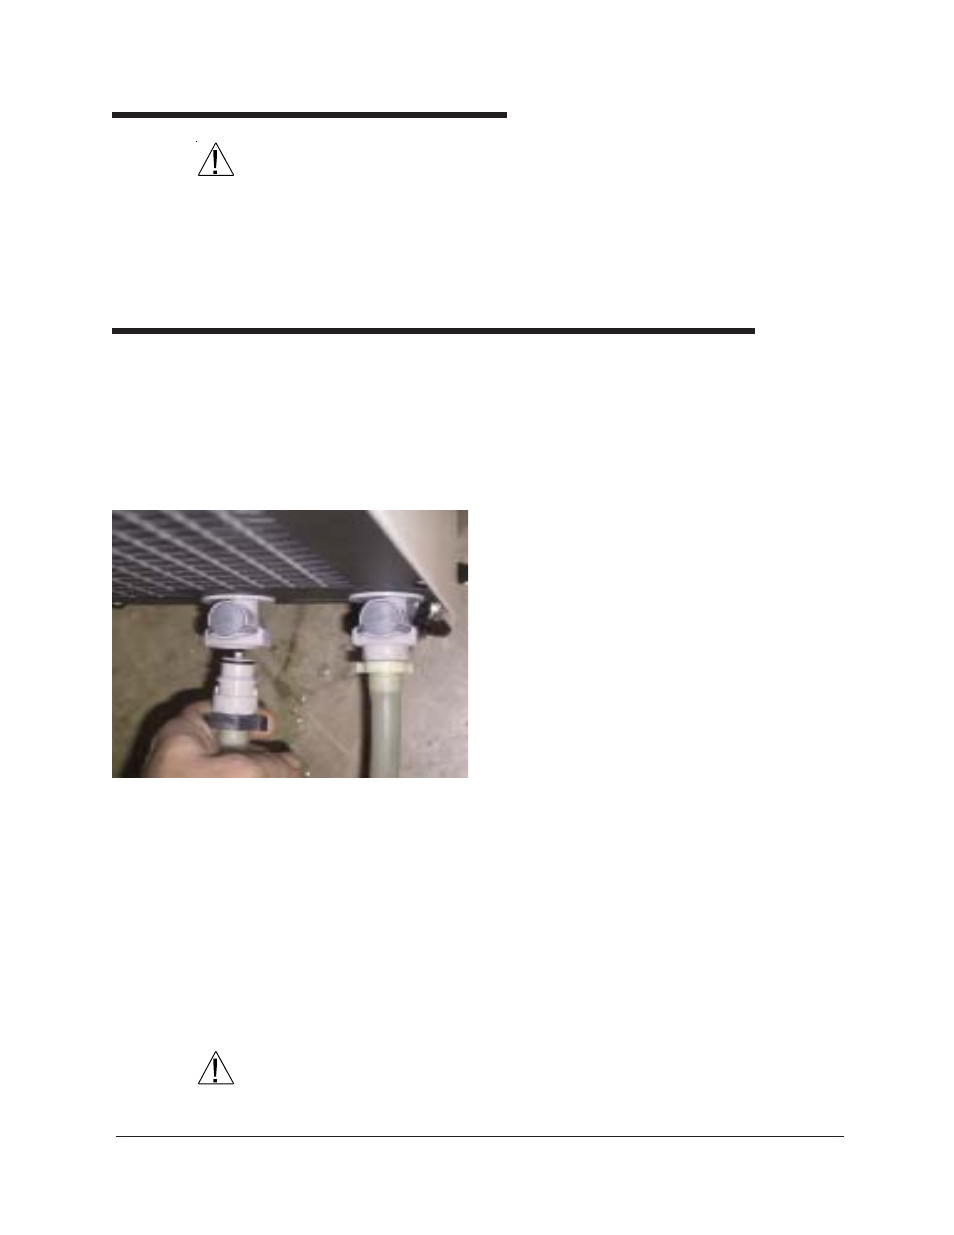
2. Detach the quick-connect fitting securing the
tubing from the CMRV-4500 to the
IN
connection on the Exchanger (see photo) by
pushing down on the release button while
pulling the hose connection out. Place the
tube end in the drain bucket and pull the
hose off of the ribbed section of the fitting.
Fluid will begin draining from the CMRV-
4500 and Exchanger.
3. Open the lid of the Exchanger reservoir and
place the funnel in the opening.
4. Turn on the Exchanger power switch to engage the Exchanger
circulating pump. Fluid from the Exchanger and CMRV-4500 will
flow into the drain bucket.
5. Immediately begin adding warm water to the Exchanger reservoir
through the funnel and continue as it is pumped out into the drain
bucket until the water exiting the drain hose into the drain bucket
flows clear.
6. Stop adding water to the reservoir and immediately turn off the Heat
Exchanger power switch.
CAUTION
Do NOT permit the Exchanger pump to operate without fluid in the
system. Doing so will damage the pump.
Removing the Exchanger tubing connection