KMC Controls CTE-5202W User Manual
Installation and operation guide, Installation, Installation 1
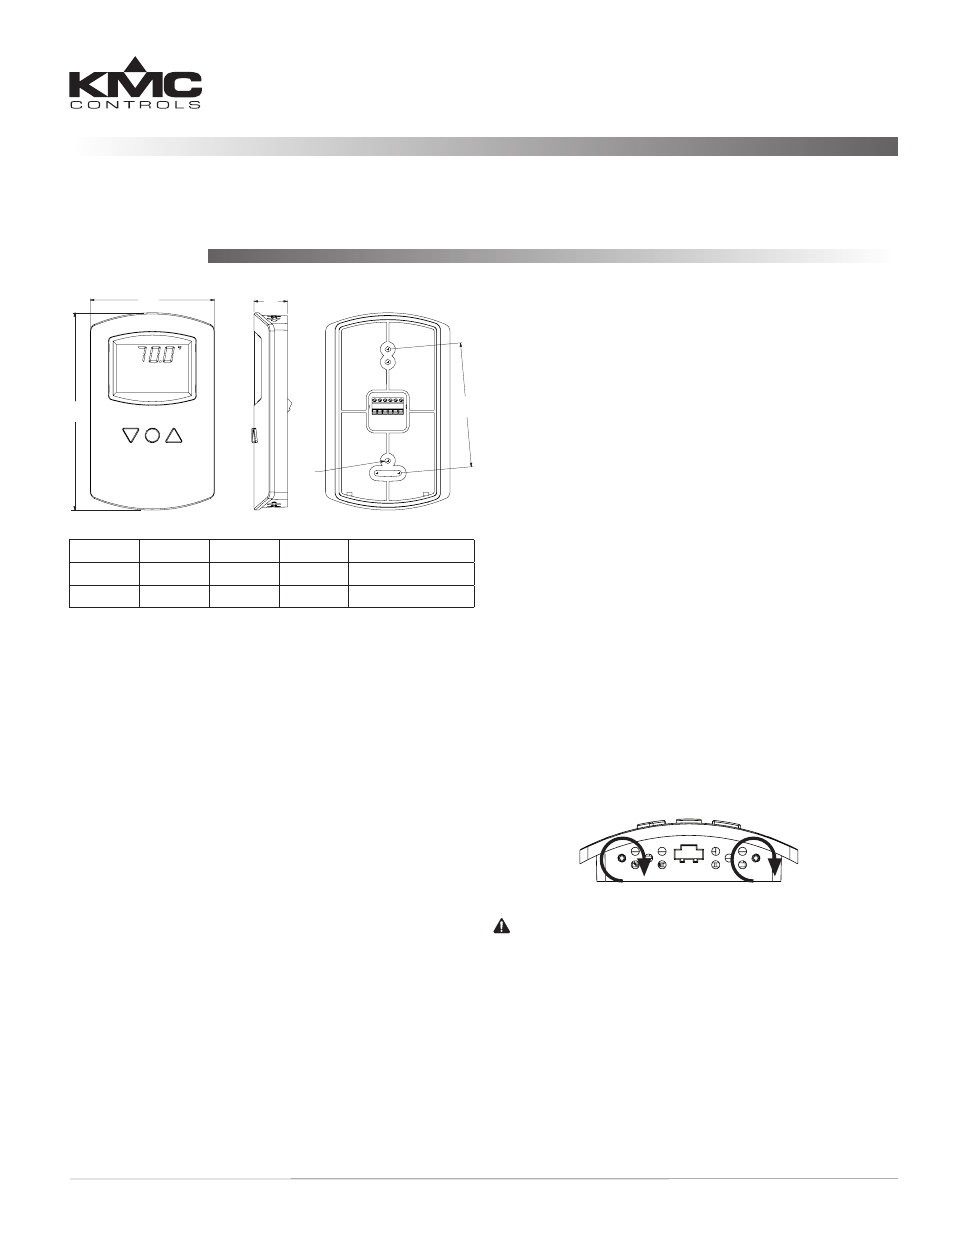
CTE-5202 Electronic Room Thermostat with LCD Display
1
Installation and Operation Guide
1. If the thermostat is locked on the backplate, turn
the two hex screws (in the two outermost holes)
in the backplate CLOCKWISE until they (just)
clear the cover. Swing the thermostat up and
away from the backplate to remove it.
Installation and Operation Guide
Electronic Room Thermostat with LCD Display
CTE-5202
Installation
Rough-in Preparation
For optimum temperature sensor performance, the
thermostat must be mounted on an interior wall
and away from heat sources, sunlight, windows,
air vents, and air circulation obstructions (e.g.,
curtains, furniture).
If replacing an existing thermostat, label wires as
needed for reference when removing the existing
thermostat.
Complete rough-in wiring at each location prior to
thermostat installation. Cable insulation must meet
local building codes.
CAUTION
To prevent damage to the board, do not insert
a screwdriver into any holes other than the two
outermost holes. To prevent mounting screw heads
from touching the circuit board in the thermostat, use
only the mounting screws supplied by KMC Controls.
Using other screws may damage the thermostat. Do
not turn screws in farther than necessary to remove
the cover.
2. Route the cable through the backplate.
~
T
T
AI1
AO1
AO2
SET
POINT
A
A
B
C
D
E
3.25 in.
5.16 in.
0.88 in.
3.25 in.
0.15 in. diameter
83 mm
116 mm
22 mm
83 mm
3.81 mm diameter
B
C
D
E
Mounting and Wiring
The thermostat must NOT be:
• Mounted on an exterior wall.
• Mounted on or near a large thermal mass (e.g.,
concrete block wall).
• Blocked from normal air circulation by obstruc-
tions.
• Exposed to heat sources (e.g., lights, computers,
copiers, or coffee makers) or to sunlight (at any
time of the day).
• Exposed to drafts from windows, diffusers, or
returns.
• Exposed to air flow through the conduit (from
leaks in plenum ducts)—put plumber’s putty or
similar material inside the conduit to block air
flow.
NOTE: For specifications and other information,
see the
NOTE: For detailed applications, cross-references,
accessories, and other information, see the
.