KMC Controls THE-1105 User Manual
Installation guide, Mounting, Mounting 1
THE-1105
1
Installation Guide
Installation Guide
Humidity Transmitter w/ Temperature Sensor
THE-1105
Mounting
Handy Box Mounting (Recommended)
1. Install, but DO NOT TIGHTEN, the HMO-
5024/5026/5030/5031 mounting plate to a handy
box using the two 6-32 screws (included).
2. Adjust and level the backplate (in the vertical
or horizontal plane) using the slotted mounting
holes and tighten the two mounting screws.
3. Remove the THE-1105’s cover by turning the two
setscrews (on the side) clockwise (inward) using a
1/16" hex wrench until the cover clears the base.
4. Pull all the wires or wire cable through the
backplate’s decorative trim plate opening
(included with HMO-5024/5026/5030/5031) and
through the cable access hole in the THE-1105.
5. Make sure that the humidity sensor is in the
lower right corner (vertical installation) or lower
left corner (horizontal installation) of the base.
6. Connect the wires (see Wiring section).
7. Mount the THE-1105 to the backplate with the
two 6-20 x 2" self-tapping screws (included).
8. Reinstall the cover and lock it by turning the
setscrews counter-clockwise (outward).
Hollow Wall Mounting
Mounting on a hollow wall up to 5/8" thick can be
done with the HMO-5023 or HMO-5001. To mount
with an HMO-5023:
1. Using the template, cut a 1-1/2" x 2-11/16"
opening in the drywall.
2. Remove the THE-1105’s cover by turning the two
setscrews (on the side) clockwise (inward) using a
1/16" hex wrench until the cover clears the base.
3. Loosely mount the HMO-5023 bracket to the
thermostat (cover removed) using the two 6-32 x
2" screws.
4. Pull the wires through the wire access holes in the
HMO-5023 and the THE-1105.
5. Make sure that the humidity sensor is in the
lower right corner (vertical installation) or lower
left corner (horizontal installation) of the base.
6. Connect the wires (see Wiring section).
5. Insert bracket diagonally, through the wall
opening, center and tighten screws.
8. Reinstall the cover and lock it by turning the
setscrews counter-clockwise (outward).
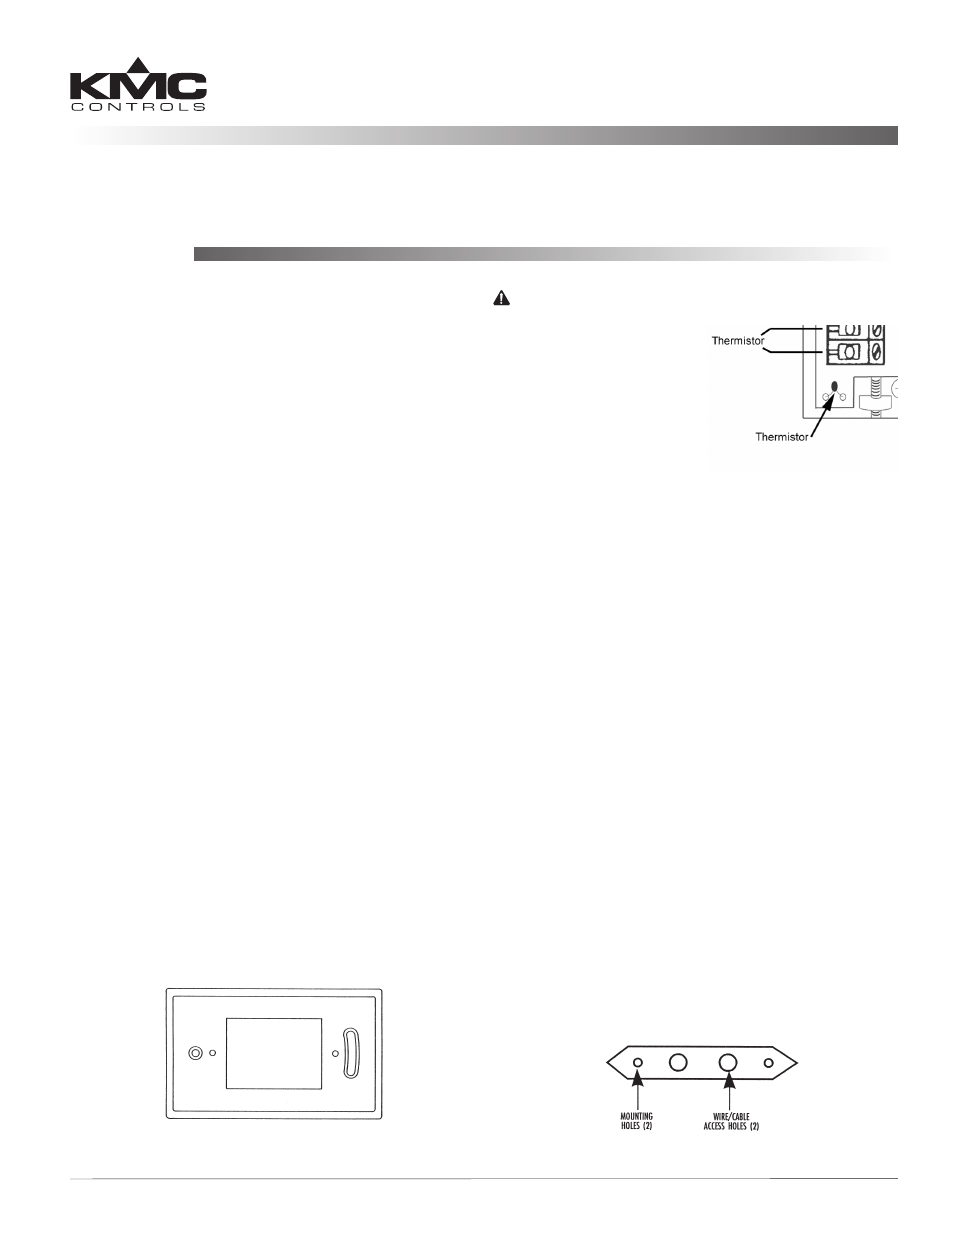
HMO-50xx Mounting Plate
(Shown in horizontal installation)
HMO-5023 Drywall Mounting Kit
Handy Box Mounting (Recommended)
More Information 2
Important Notices 2
Location
Install the sensor on an inside wall where it can sense
the average room temperature/humidity and be
away from direct sunlight, heat sources, windows,
air vents, and air circulation obstructions (curtains,
furniture, etc.).
CAUTION
Check that the
thermistor leads are
not bent and that the
thermistor bead is
upright (perpendicular
to the board) BEFORE
reinstalling the cover.