KMC Controls BAC-8007 Quick start User Manual
KMC Controls Sensors
These are brief instructions for installing a SimplyVAV
controller. To view a short video of this
procedure or to download a PDF of The
Simply VAV Installation and Applications
Guide, browse to the simplyVAV web site.
3
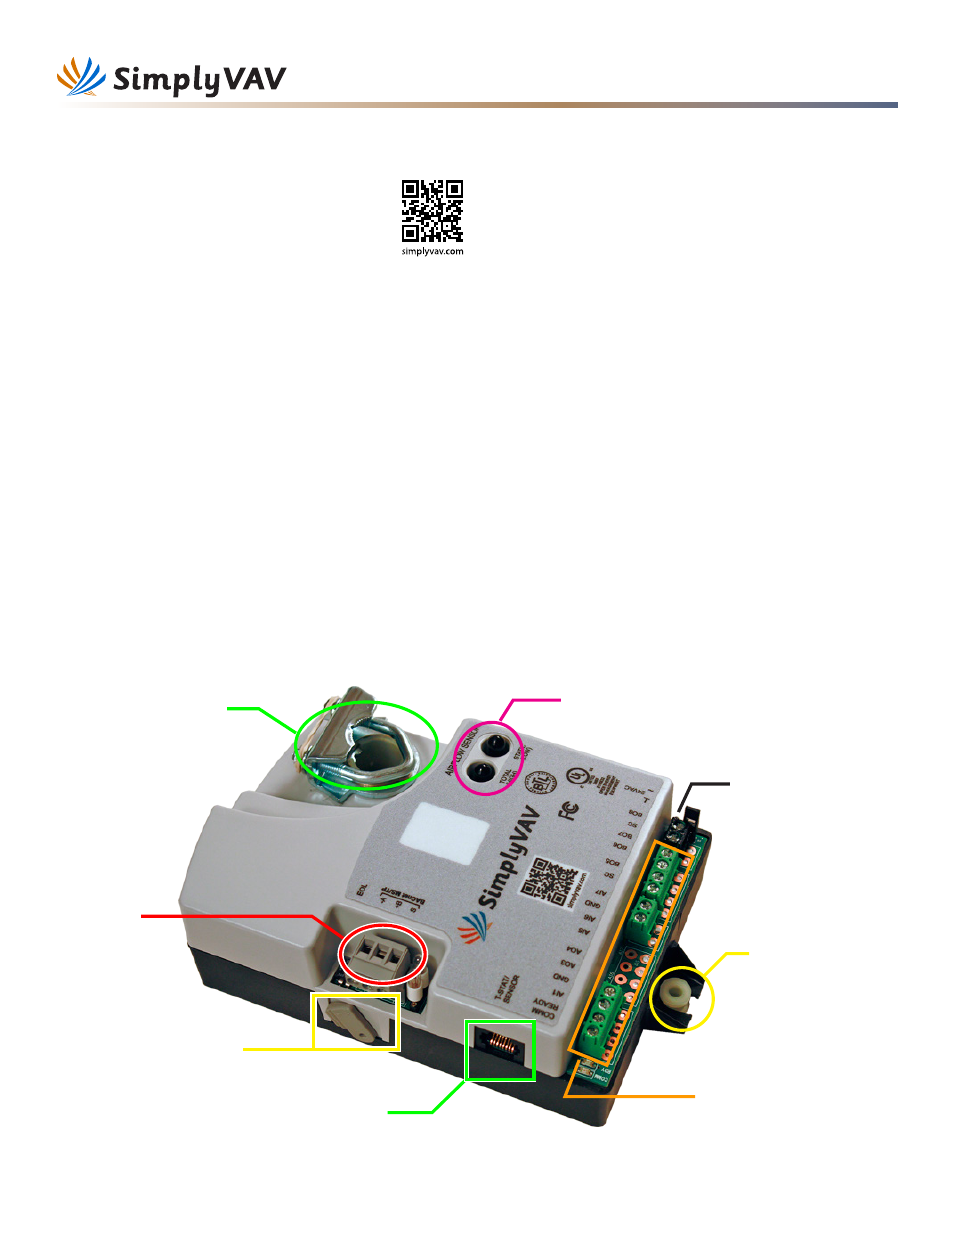
Connect the room sensor cable
Connect a SimplyVAV sensor to the controller with
a standard Ethernet cable. Plug the controller end
of the cable into the T’stat connector.
4
Connect the airflow sensors
Connect the airflow sensor on the VAV box to the
airflow ports on the controller. Use 0.25 in. FR
tubing.
5
Connect auxiliary equipment (optional)
Other VAV equipment such as fans, heaters,
reheat valves, and discharge air temperature
sensors connect at the green terminals.
If the controller is part of a BACnet network, wire it
to the gray MS/TP network terminals.
6
Connect 24 volt power
Connect the controller to a 24 volt, Class 2
transformer at the black power terminals. As soon
as power is connected, the controller begins
operation.
Drive hub
and V-bolt
Airflow sensor ports
Gear clutch
button
Mounting tab and
bushing
T’stat
connector
Black power
terminals
Green terminals
for fan, reheat, and
other equipment.
Gray network
terminals
Quick start guide for installing SimplyVAV controllers
1
Align the damper and drive hub
Manually rotate the damper on the VAV box to the
fully open position.
Press the gear clutch button and rotate the drive
hub in the same direction that opened the damper.
Turn the hub until it reaches a stop.
2
Mount the controller to the VAV box.
Place the controller over the damper shaft.
Finger tighten the nuts on the V-bolt to position the
shaft in the drive hub.
Center the mounting bushing in the mounting tab
and fasten it with a #8 sheet metal screw.
Evenly tighten the V-bolt nuts on the drive hub to
30-35 in-lbs.