Rockwell Automation Liqui-Flo 1.5 General Purpose and Vector Duty User Manual
Page 19
Using the LCD OIM
2-7
•
Parameter range
•
F1 key defined as a toggle to enable you to view the parameter’s current value
and the factory-default value
See figure 2.5 and table 2.2 for instructions on how to adjust the parameter values.
To restore all parameters to their factory-default values, select Reset Defaults from the
Memory Storage menu.
Note that the parameter values are retained through a line dip or power shutdown.
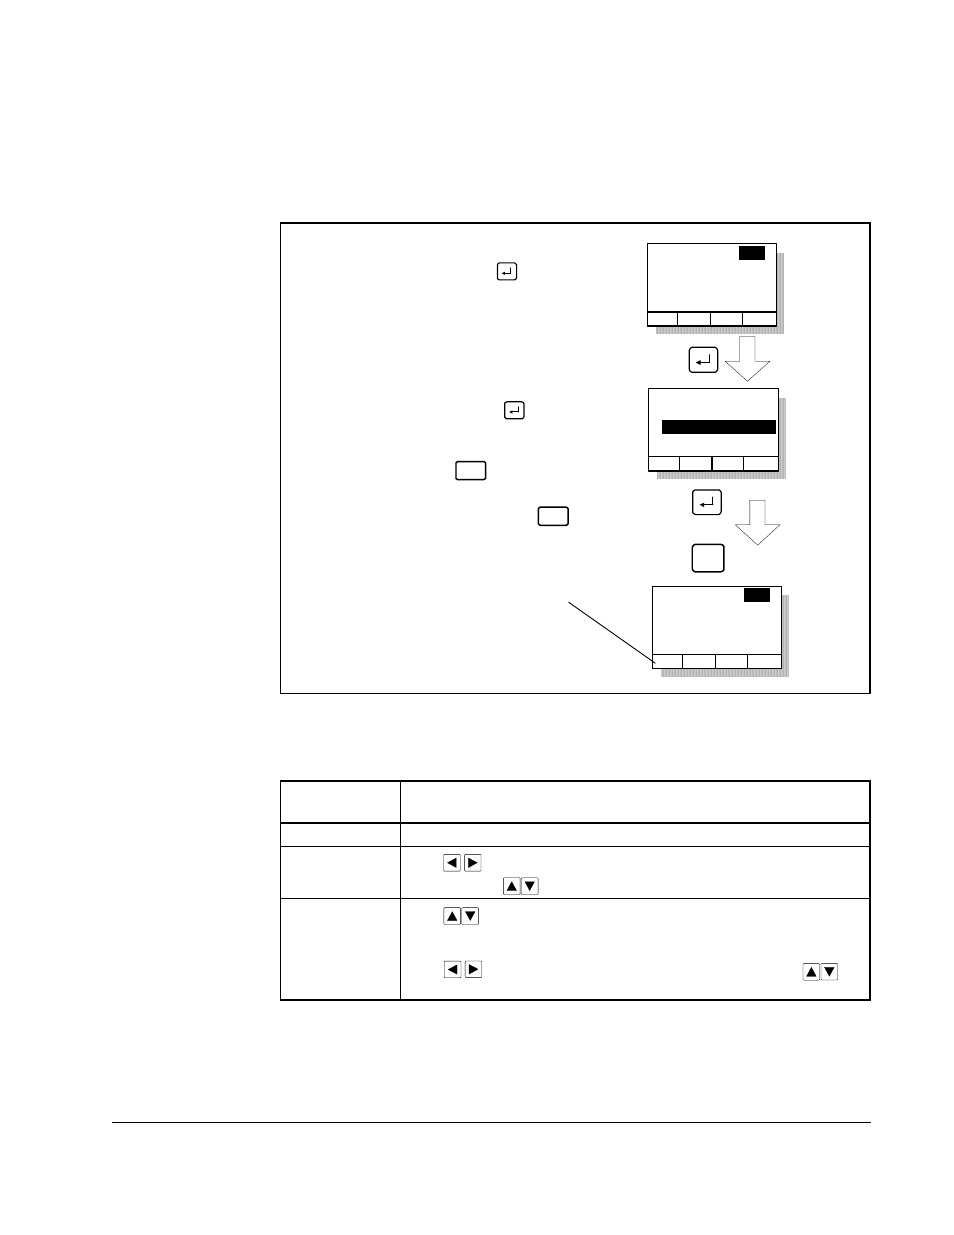
Figure 2.5 – Adjusting Parameters
Table 2.2 – How to Adjust Each Parameter Type
Parameter
Type
How to Adjust
Numbered List
Use up/down arrow keys to advance through the list of options.
Bit
Use
to move the cursor to the bit location you want to
change. Use
to change the value of the bit.
Numeric
Use
to increase or decrease the value.
- Or -
Use
to move the cursor from digit to digit, and use
to
increase or decrease the value of the digit.
Parameter: #
Parameter Name
Lower limit< >Upper limit
Value Units
Dflt
nnn
Parameter: #
Parameter Name
Lower limit< >Upper limit
Value Units
Dflt
nnn
Save change
Don’t save
change
ESC/
PROG
Step 1. At the parameter entry
screen, press to
highlight the parameter
value.
- OR -
Parameter: #
Parameter Name
Lower limit< >Upper limit
Value Units
Dflt
nnn
Step 2. Adjust the parameter
value (see table B.2),
and then press
to save the value.
ESC/
PROG
If you do not want to save the
value, press to return to the
initial parameter screen. You can
then repeat steps 1 and 2 to
change the value, or press
to back out of this menu.
ESC/
PROG
(The screen shown here was
accessed using the
Parameters>P Numbers path)
The F1 key is defined as a
toggle to enable you to view the
parameter’s current value and
the factory-default value.