Using automated batch reverse telecine – Apple Cinema Tools 3 User Manual
Page 192
192
Chapter 11
Working With 24P Video and 24 fps EDLs
Using Automated Batch Reverse Telecine
To remove the pull-down from several clips at once:
1
Place all the clips that you want to process into one folder. (Make sure that they are all
clips that were captured from a 24P digital video camcorder.)
2
Choose File > Batch Reverse Telecine.
3
In the dialog that appears, select any source clip file in the folder that contains the clips
you want to process, then click Choose.
4
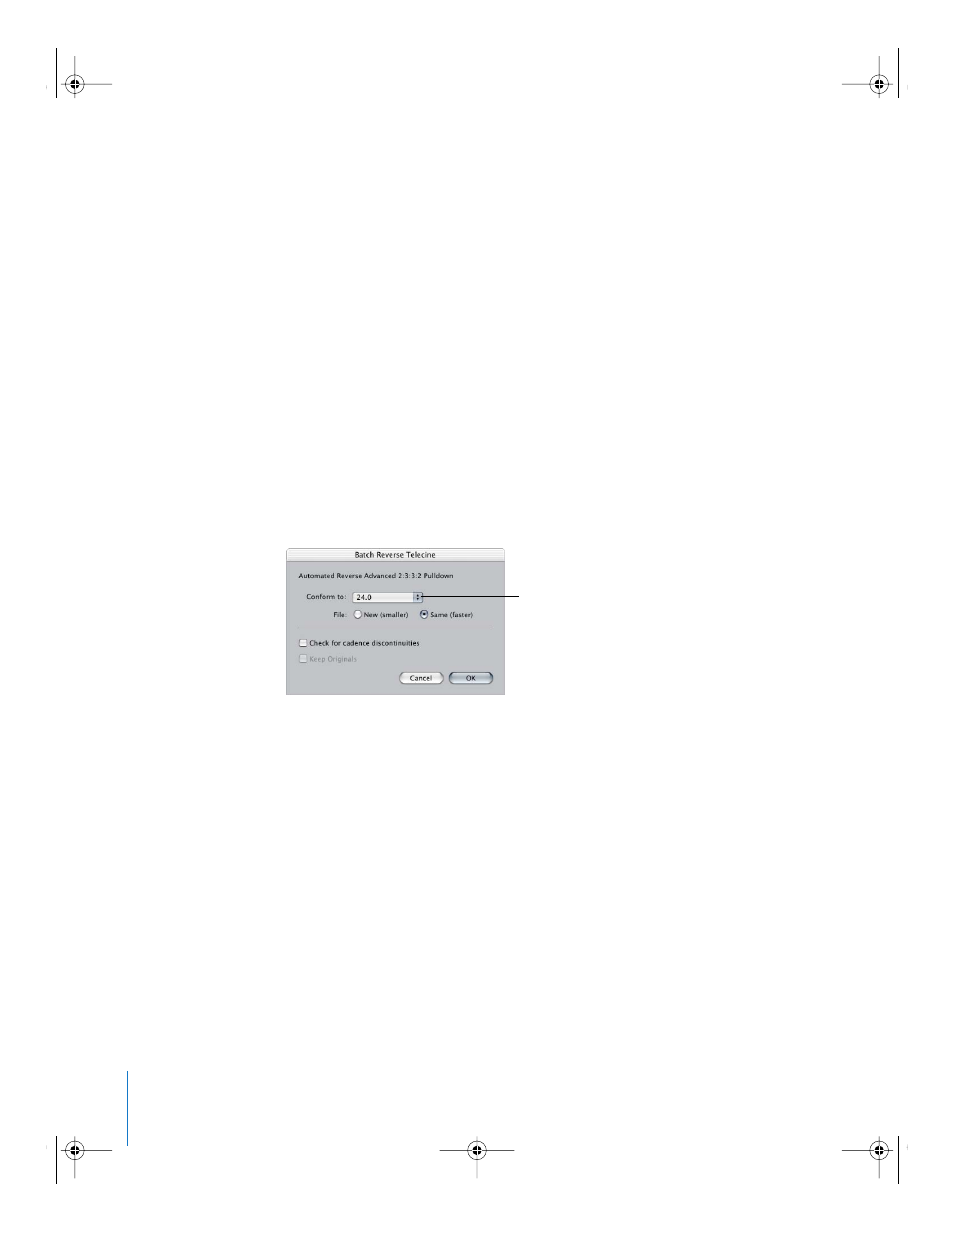
Choose a frame rate from the “Conform to” pop-up menu:
 23.98: This frame rate is useful if you want to later use the Final Cut Pro pull-down
feature that lets you output 23.98 fps video as 29.97 fps video. (See “
Patterns You Can Apply to 23.98 fps Video
” on page 194 for more information.)
 24.0: You may want to conform and edit the clips at this rate if you plan to include
them in a project that contains other clips that are exactly 24 fps.
Note: If the audio and video are contained in the same clip, and you choose 24.0
from this pop-up menu, the Reverse Telecine feature increases the audio speed by a
very small percentage so that it is in sync with 24 fps instead of 23.98 fps.
5
Select “New (smaller)” or “Same (faster)” to specify the kind of files you want to create:
 New (smaller): Creates new clip files that do not contain the extra frames introduced
by the pull-down. The new files are about 20 percent smaller than before, but this
method is slower. Regardless of whether the original files were referencing or self-
contained, this method creates self-contained files. (See “
Self-Contained and Referencing Clips
” on page 126 for more information.)
If you select “New (smaller),” you can also choose to keep or delete the original clip
files. To save the original clips in a separate folder, select the Keep Originals checkbox.
Choose a frame rate from
the pop-up menu.
UP01101.Book Page 192 Thursday, March 10, 2005 3:16 PM