Creating changes over time with automation curves – Apple GarageBand '08 User Manual
Page 78
78
Chapter 9
Tutorial 7: Mixing and Adding Effects
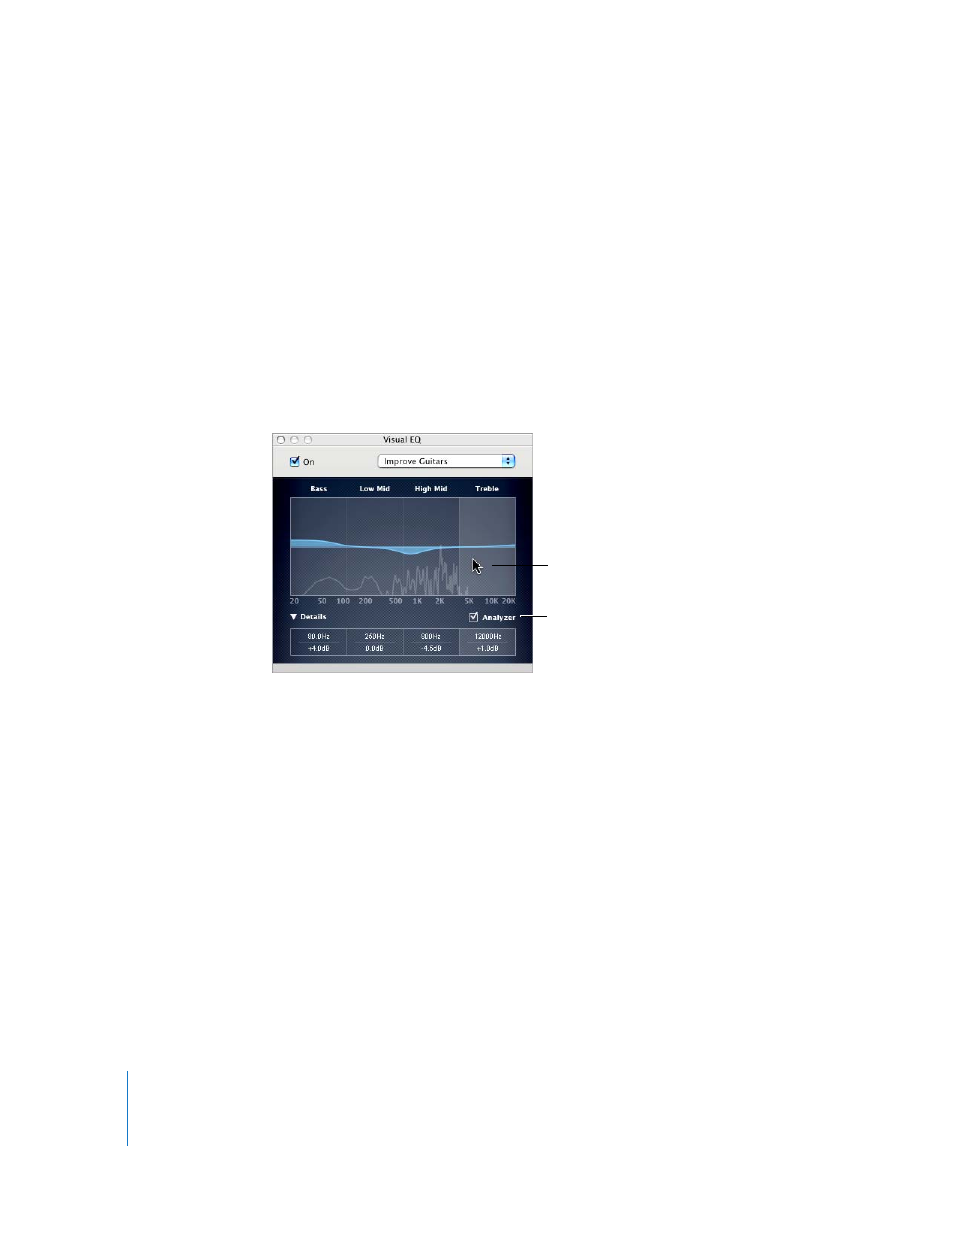
To edit the Visual EQ effect graphically:
1
Click the Edit button to the right of the Visual EQ effect’s preset pop-up menu.
The Preset window for the Visual EQ appears. In the center of the window is the
graphic editing area, divided into four bands: Bass, Low Mid, High Mid, and Treble.
2
Place the pointer in one of the four bands in the editing area. Drag the pointer left or
right to change the frequency for that band. Drag it up or down to change the gain
(how much the frequencies are boosted or cut).
3
To see the numeric values for each band, click the Details triangle. You can adjust
values numerically by dragging them up or down.
4
To see the frequency curve for the track in real time, select the Analyzer checkbox, then
play the track.
To save an effect preset:
1
Adjust the settings for the preset to get the sound you want.
2
Choose Make Preset from the pop-up menu, then type a name for the preset in the
Save dialog.
Creating Changes over Time with Automation Curves
Creating changes over time is called automation. You can add automation curves to
tracks in GarageBand, including the master track, and use them to create volume, pan,
and other changes.
To show a track’s automation curves:
m
Click the triangle to the right of the Solo button in the track’s header.
A row appears below the track, showing the volume automation curve.
Drag in one of the four bands to
graphically adjust the Visual EQ
Click the Analyzer checkbox to see
the track’s frequency curve