HP XP Continuous Access Software User Manual
Page 111
9.
Click Apply to register journal volumes. After volumes are registered, the journal groups are
displayed below Registered in the tree.
NOTE:
If an error occurs, the right-most column of the Preset list displays the error code. To
view detailed information about the error, right-click the error code, and select Error Detail.
An error message appears providing detailed information about the error.
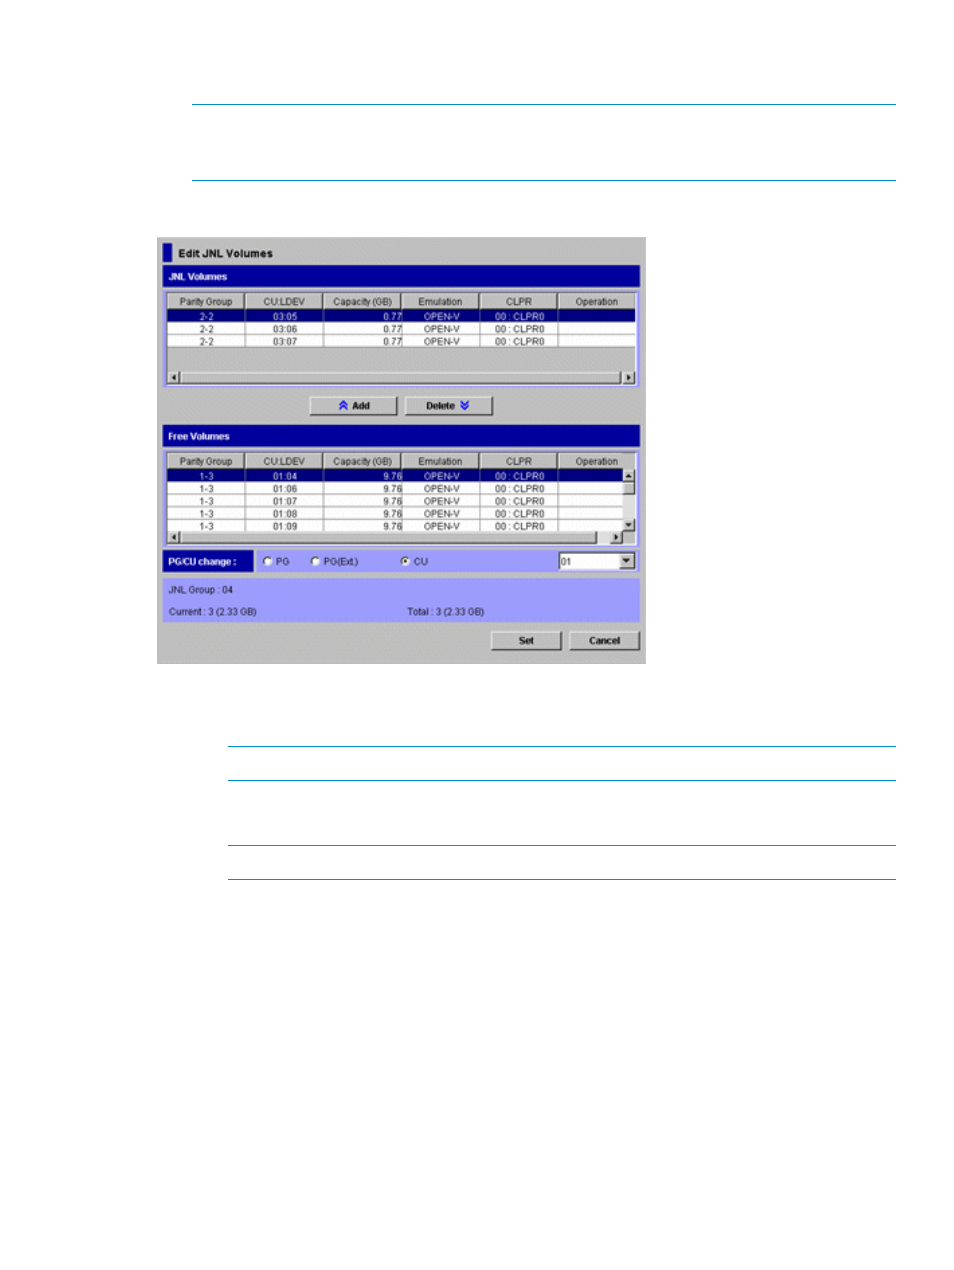
Figure 50 Edit JNL Volumes pane
•
JNL Volumes: Information about journal volumes.
Parity Group: Parity group where a journal volume belongs.
◦
NOTE:
If a parity group begins with E, the journal volume is an external LU.
◦
CU:LDEV: Journal volume's CU and LDEV numbers. The CU number appears to the left of
the colon (:). The LDEV number appears to the right of the colon.
NOTE:
If a volume ends with #, the volume is an external LU.
◦
Capacity(GB): Journal volume's capacity in gigabytes.
◦
Emulation: Journal volume's emulation type.
◦
CLPR: Number and name of the CLPR where the journal volume belongs.
◦
Operation: Displays one of the following:
–
Blank: This column is usually blank.
–
Add: Volume to be added to a journal group.
–
Delete: Volume to be deleted from a journal group.
•
Add: Registers volumes in a journal group. When registering volumes, select the volumes from
Free Volumes, and click Add to add the volumes to JNL Volumes.
•
Delete: Deletes volumes from a journal group. When deleting volumes, select the volumes from
JNL Volumes, and click Delete.
Registering journal volumes in journal groups
111