Cleaning – West Control Solutions ProVU 4 User Manual
Page 17
ProVU4 Controller, Profiler & Recorder/Controller - Product Manual
Page 16
Installation
59407, Issue 1 – March 2008
Instruments may be mounted side-by-side in a multiple installation, but instrument to panel
moisture and dust sealing will be compromised. Allow a 20mm gap above, below and behind
the instrument for ventilation. The cut-out width (for n instruments) is:
(96n - 4) mm or (3.78n - 0.16) inches
If panel sealing must be maintained, mount each instrument into an individual cut-out with
6mm or more clearance between the edges of the holes.
Note:
The mounting clamp tongues may engage the ratchets either on the sides or the
top/bottom faces of the Instrument housing. When installing several Instruments side-by-
side in one cut-out, use the ratchets on the top/bottom faces.
CAUTION:
Ensure the inside of the panel remains within the instrument operating temperature
and that there is adequate airflow to prevent overheating.
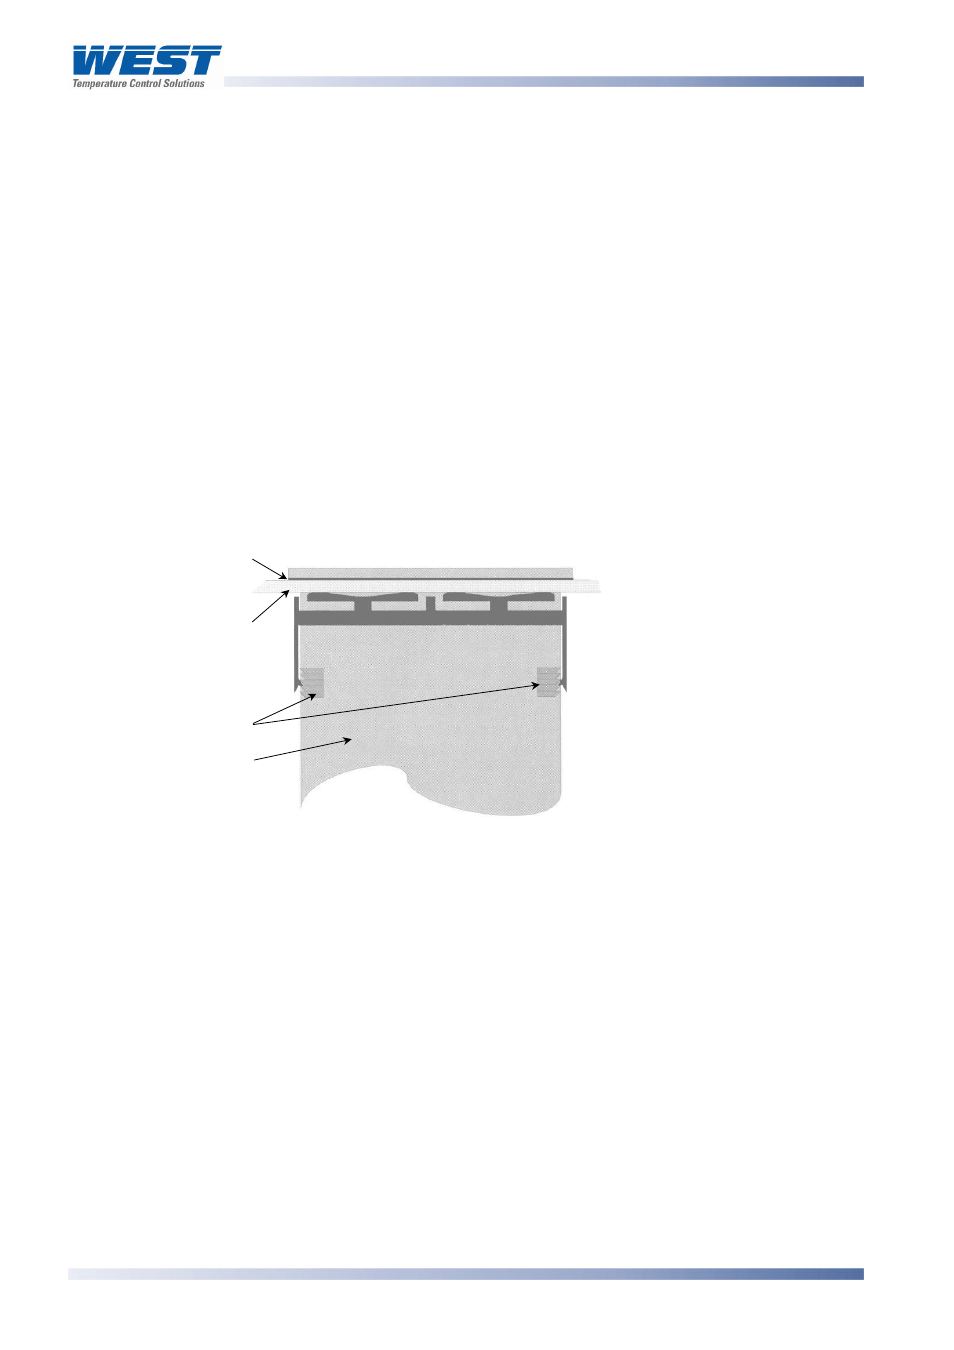
Gasket
Mounting Panel
Clamp
Ratchets
Instrument
Housing
Slide mounting clamp over
the instrument housing
towards rear face of
mounting panel until the
tongues engage in ratchets
and instrument is clamped in
position.
Hold instrument firmly in
position (apply pressure to
bezel only)
Figure 2. Panel-Mounting the instrument
CAUTION:
Do not remove the panel gasket, as this may result in inadequate clamping and
sealing of the instrument to the panel.
Once the instrument is installed in its mounting panel, it may be subsequently removed from
it’s housing, if necessary, as described in the Fitting and Removing Option Modules section.
Cleaning
Clean the front panel by washing with warm soapy water and dry immediately If the USB
option is fitted, close the USB port cover before cleaning.