4 membrane/o-ring replacement (optional procedure), Membrane/o-ring replacement (optional procedure) – Thermo Fisher Scientific CyberScan DO 600 User Manual
Page 123
115
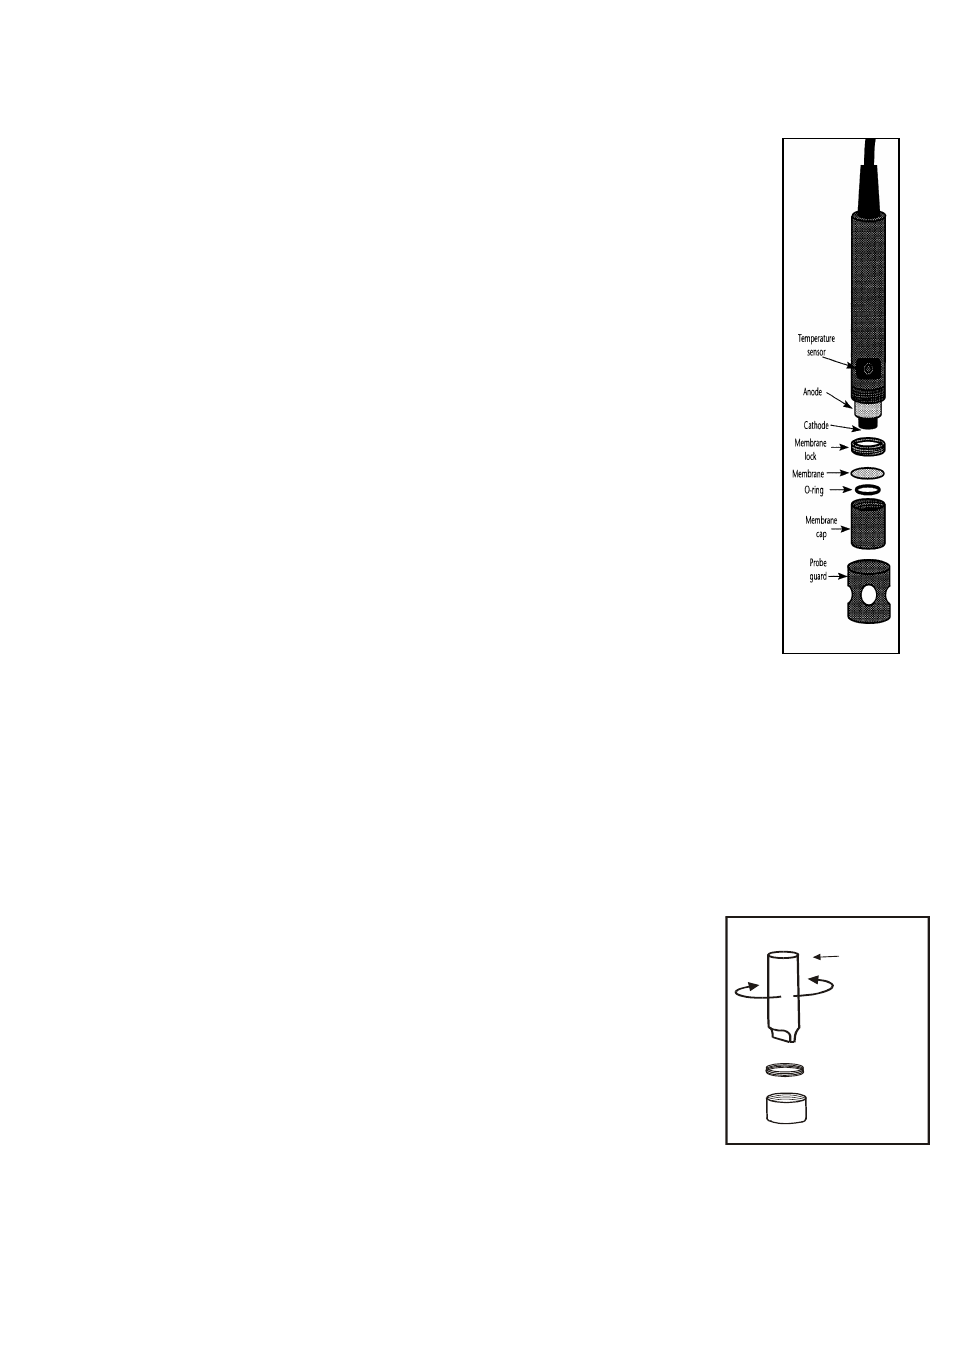
Figure 63:
Positioning of O-
ring & Membrane
Close
Open
Installation tool
Insert installation
tool into slots on
membrane lock.
Then unscrew
membrane lock
from membrane
cap
Figure 64: Use tool to take
out (or put in) membrane
3.2.4 Membrane/O-ring Replacement (Optional Procedure)
It is recommended only experienced service personnel can
perform this procedure.
This procedure is OPTIONAL, and should only be performed if you
have new membrane and O-ring. You are also required to have a
membrane installation tool. These items are available as optional
accessories in the “Accessories” section.
1. Pull off the probe guard.
2. Unscrew the membrane cap from the probe.
3. Hold the probe under hot running water and brush away the
white oxide on the cylindrical anode with a stiff plastic brush –
do not use metal cleaning material.
4. If the cathode has any deposits, remove them with a light
scouring powder. Do not polish the cathode.
5. Using the installation tool, unscrew and remove the membrane
lock from the membrane cap. See Figure 64 on the following
page.
6. Remove the membrane and O-ring. Discard both.
7. Rinse the membrane cap and membrane lock in tap water.
8. Install a new O-ring inside the membrane cap.
9. Install a new membrane. Make sure the membrane covers
the O-ring all around its circumference.
10. Using the installation tool, screw the membrane lock back into the
cap. Tighten the lock firmly over the membrane and O-ring, but do
not over tighten.
11. Inspect the membrane for wrinkles. If wrinkles exist, remove the
membrane and repeat steps 8 – 11.
12. Fill the membrane cap with water and inspect the bottom for leaks.
If water drops are leaking from the membrane, re-seal
the membrane on the O-ring (repeat steps 8 – 11, for
membrane replacement only).
13. If the assembly is leak-free, empty the water and fill the
membrane cap with electrolyte to the brim.
14. Tap the side of the housing gently to remove any air
bubble that may be sticking to the membrane.
15. Screw the cap onto the probe. Excess electrolyte will
drain out.
16. Replace probe guard.
17. Calibrate the probe after the % saturation readings
have stabilised.