Resistivity calibration mode – Thermo Fisher Scientific CyberScan DO 600 User Manual
Page 101
93
2. Resistivity Calibration Mode
Use a standard solution of known value for calibration. Use the single-point
standardization option to measure samples that are close in value and multi-point
standardization to measure wide range of samples.
1. Switch the meter on. Make sure the meter is in resistivity measurement
mode.
2. Press CAL (F2) to go to calibration mode.
3. The meter shows the ‘Calibration-Rinse Electrode’ screen for a few seconds
and then shows the cell constant adjustment screen.
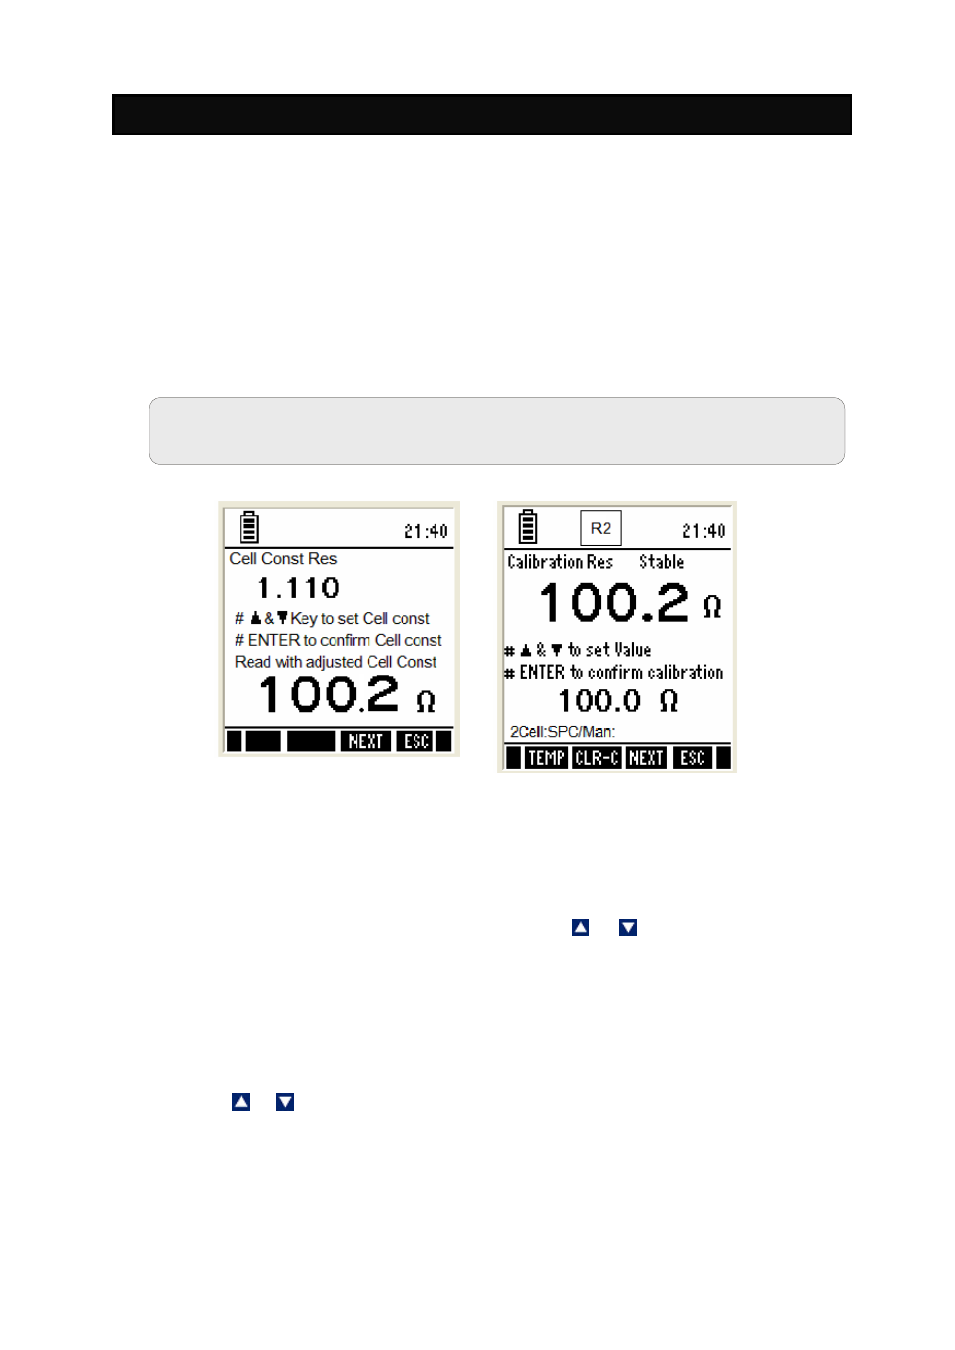
Figure 46 : Resistivity Cell Constant & Resistivity Calibration
4. The upper display of the resistivity cell constant screen shows the cell
constant of your cell & lower display shows the measured value of the
solution with adjusted cell constant. Press &
keys to adjust the cell
constant for your custom solution in upper display.
5. Press ENTER key to confirm the entered value and to go to resistivity
calibration screen.
6. The screen shows two readings. The upper display shows the resistivity
reading of the solution with respect to previous calibration (if any) & lower
display shows the resistivity reading of the solution without any calibration.
Use
&
keys to adjust the upper display of the resistivity value of your
custom solution.
7. Press ENTER key to confirm the entered value.
Note: If the meter is password protected, you will be prompted to enter a
password.