Accuracy test, Test setup – Atec Agilent-81618A User Manual
Page 43
Performance Tests
Performance Tests
Agilent 81618A/9A and Agilent 81622B/3B/4B/6B/7B/8B User’s Guide, Second Edition
43
Accuracy Test
This performance test applies to Agilent 81622B/3B/4B/6B/7B/8B
Optical Heads.
N O T E
The linearity test must only be performed at either 1310 nm or
1550 nm. The accuracy test must be performed in the -20 dBm range at
10.0 µW at both 1310 nm and 1550 nm.
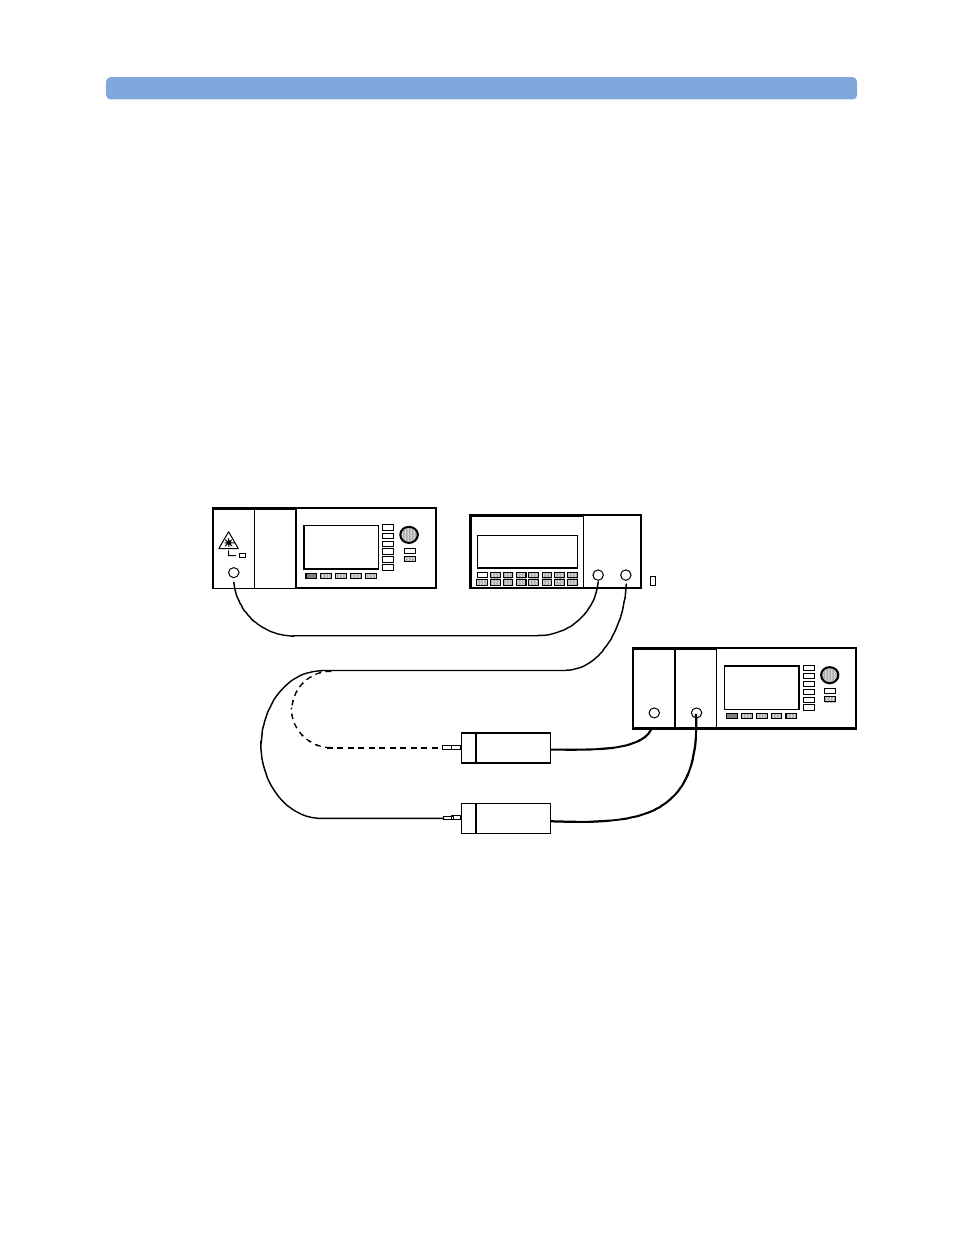
Test Setup
1 Make sure that cable connector, detectors and adapters are clean.
2 Connect the equipment as shown in Figure 10.
Figure 10
Accuracy Test Setup
N O T E
Make sure that the cables to and from the attenuator are fixed on
the table and that both the optical head and the DUT are close
together so that minimum cable movement is required when
connecting the cable to the head or to the DUT.
For 81627B only: The 81627B does not support 81101AC patchcord.
Use 81101PC patchcord for measurement path and 81001FA
connector adapter (for the DUT) and 81000FA connector adapter
(for reference power meter) instead.
1.
81101AC
81101AC
Mainframe 8163A/B or 8164A w/
8163A/B
81657A
Mainframe 8163A/B w/ 81618A and
81618A with 8162xB Opt. Head (Ref)
8163A/B
81618A
81618A
Optical Attenuator 8156A
8156A
Optical Head 8162xB
Wk Std
Optical Head 8162xB
DUT