Installing button labels, Button labels, Installing button labels – Extron Electronics IPI 200 Series User Guide User Manual
Page 84
Button Labels
IPI 100 and IPI 200 Series • Button Labels
D-4
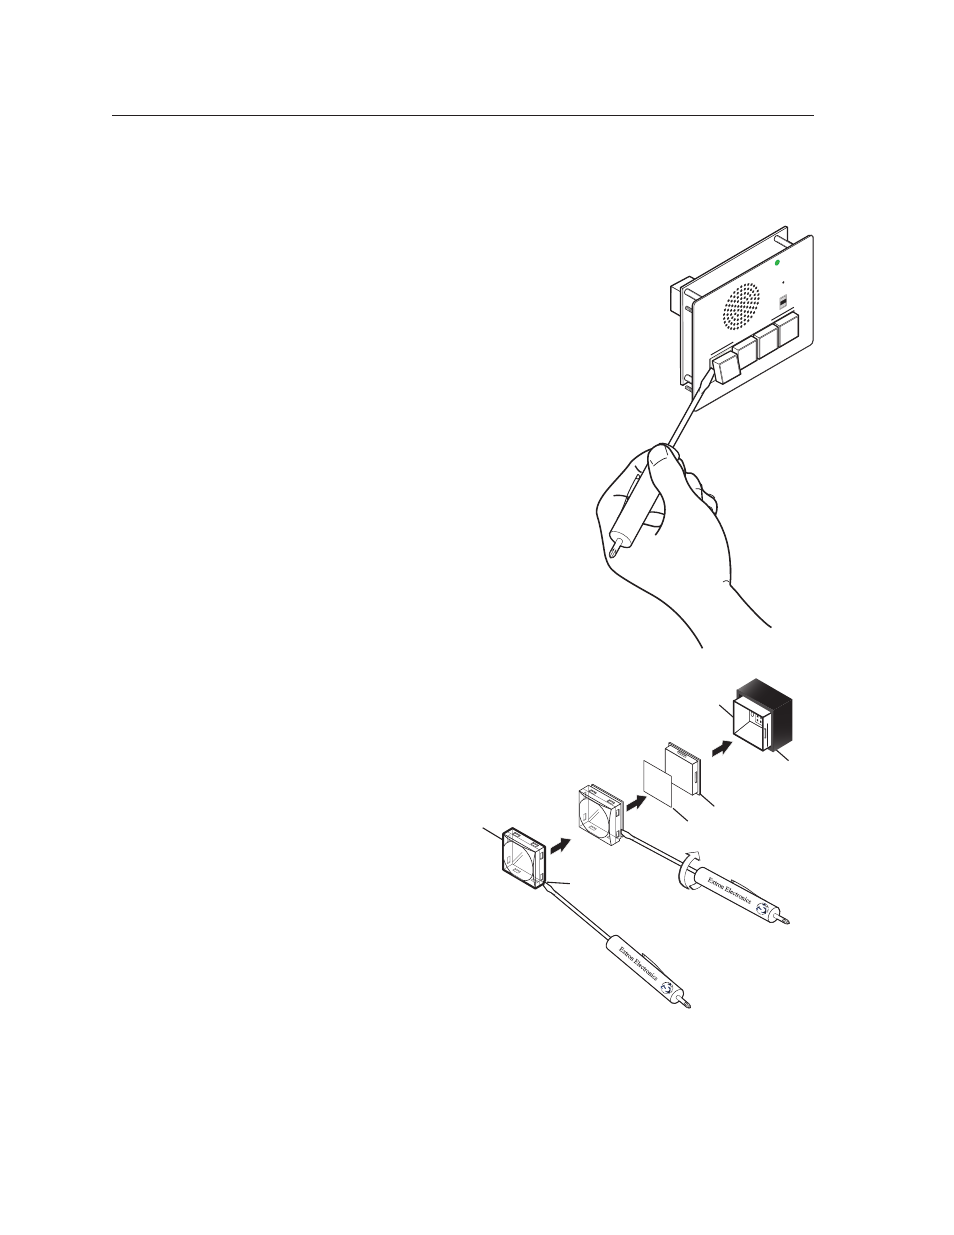
Installing Button Labels
The button assembly consists of a clear lens cap, the label and a white diffuser. To
remove a button assembly and replace a label:
1.
Use a small flat‑blade screwdriver to gently
pry the button assembly away from its
plunger/base.
2.
Locate the small corner notch on the lens cap and slide
the screwdriver between the lens cap and the
diffuser, as shown in the figure at right.
Using a rotating motion of the
screwdriver (see the figure at
right), carefully pry the two
pieces apart.
3.
Replace the label with
the new button label.
4.
Press the lens cap and
diffuser together and
reinstall the button
assembly into its
plunger/base.
5.
Repeat steps 1 through
4
for each button you
plan to re‑label.
INTERCOM
MIC ON
LEVEL
HIG
H
MED
LO
W
1
2
3
4
IPI 104
PUSH
TO
TALK
SECU
RITY
LAB
ADMIN
OFFIC
E
HELP
DESK
TEXT
Separating the two-
piece button here at
the corner.
Pry the two
pieces apart.
Diffuser
Plunger
Base
Button Label
Clear Lens
Notch