Initial configuration, cont’d, Setting the ip address using embedded web pages – Extron Electronics IPI 200 Series User Guide User Manual
Page 32
Initial Configuration, cont’d
IPI 100 and IPI 200 Series • Initial Configuration
4-4
Setting the IP address using embedded Web pages
Each IPI 200 Series intercom unit contains an on‑board Web server with interactive
pages that can be used to configure the device.
The intercom unit must be at its factory default IP address.
To set an IP address via embedded Web pages:
1
. Connect an Ethernet crossover cable between the device and a local PC.
2
. On the PC, locate the TCP/IP Properties dialog box.
On Windows XP, the TCP/IP Properties dialog box is found at:
Start > My Network Places
> right‑click to Properties > Local Area
Connection > right-click to Properties > Internet Protocol (TCP/IP) >
Properties
.
3
. Record the current IP address, subnet mask, default gateway and DHCP
settings. You will need this information later to return the PC to its original
TCP/IP settings.
IP Address:
. . .
Subnet Mask:
. . .
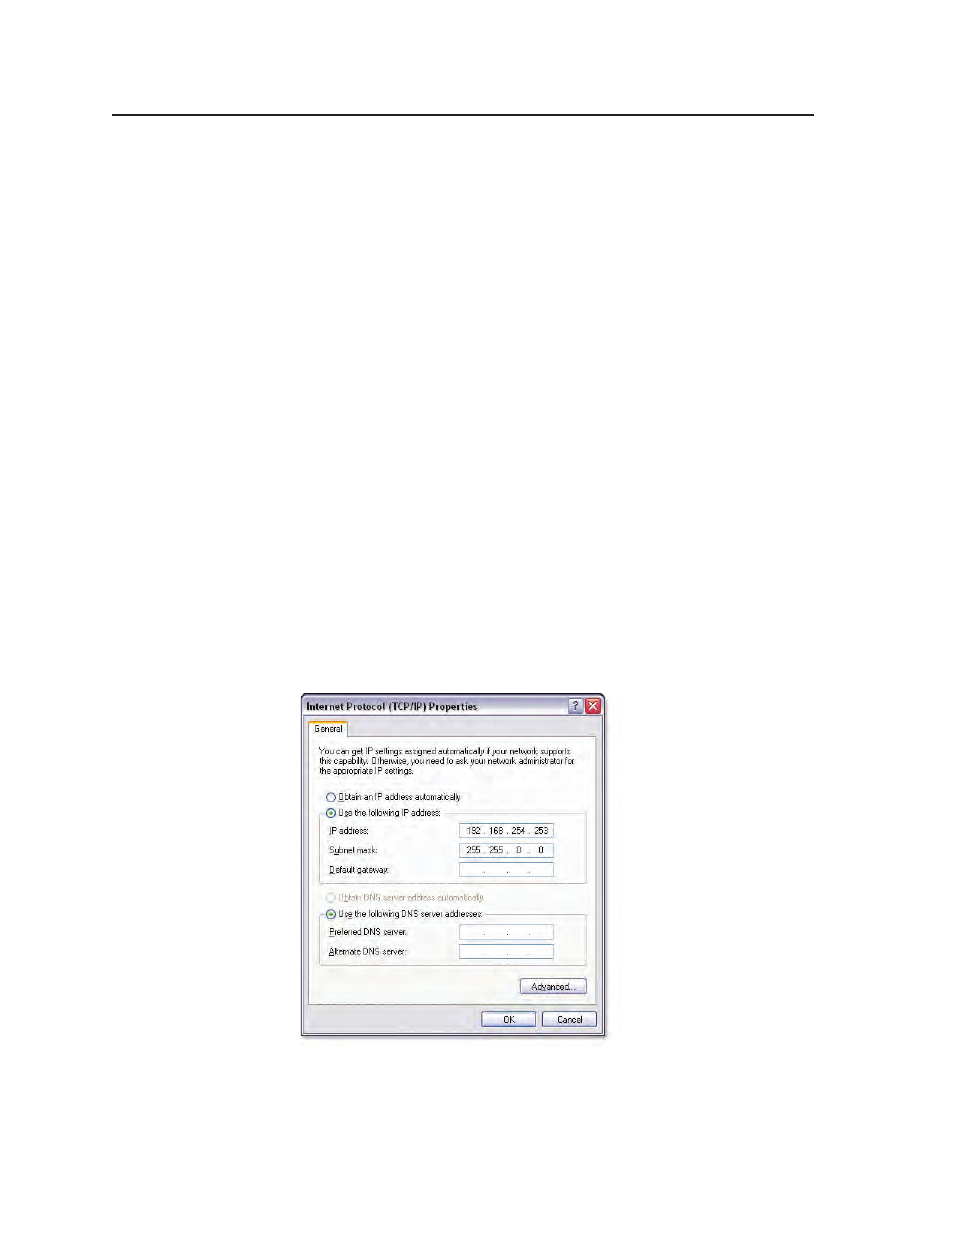
4
. Enter the following:
IP address: 192.168.254.253
Subnet mask: 255.255.0.0
Default gateway:
5
. Click OK.
6
. Open a Web browser on the local PC.
7
. Enter 192.168.254.254 in the browser’s Address field and press the Enter key.
The intercom unit’s embedded Web page is displayed.
8
. Click the Configuration tab.