Mounting the ipi 100 series, Mounting, Hig h me d lo w 1 2 3 4 – Extron Electronics IPI 200 Series User Guide User Manual
Page 78: Extron mlc 226 ip aap, Extron ipi 104 aap, 40 nut w/ captive washer (included)
Mounting
IPI 100 and IPI 200 Series • Mounting
C-2
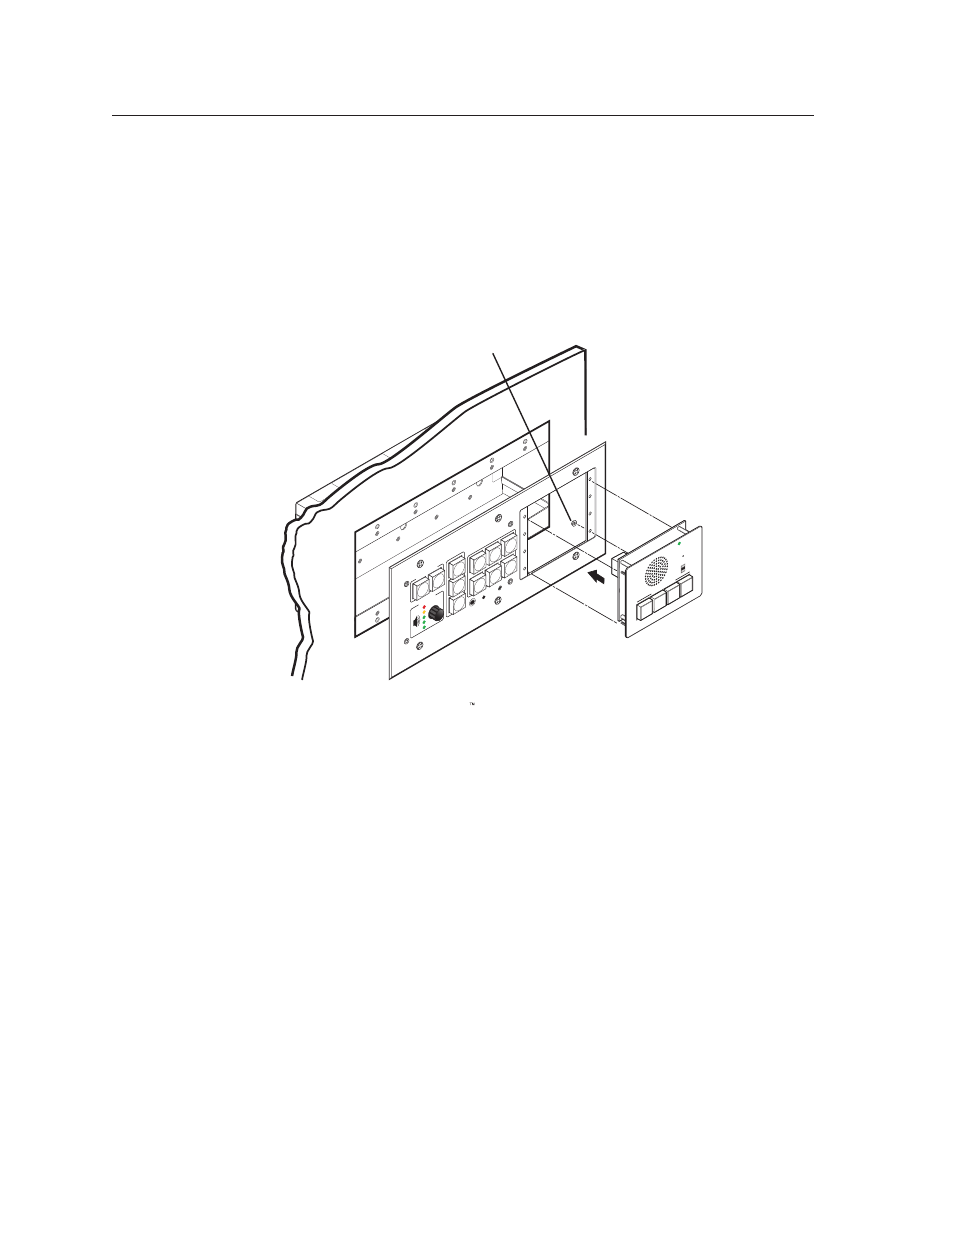
Mounting the IPI 100 Series
The IPI intercom and any other adapter plates must be attached to a device
faceplate or AAP wall plate and cabled before the device or wall plate is installed in
a wall or furniture. The screws needed for installing the IPI are built into its front
panel.
1.
Before cables are attached, insert the IPI’s screws through the holes in the
device’s faceplate or AAP mounting frame. Secure the intercom module to
the faceplate/wall plate with the provided captive washers and #4‑40 nuts, as
shown below:
Ext
ron
PR
OJEC
TOR
MLC
226 IP A
AP
1
2
3
4
5
6
VOL
UME
CONFIG
IR
PC
AUX
VIDEO
DVD
VCR
DOC
CA
M
LAPT
OP
AUT
O
IMA
GE
MUT
E
ON
OFF
Extron
MLC 226 IP AAP
MediaLink Controller
Extron
IPI 104 AAP
Intercom
#4-40 Nut w/ Captive
Washer
(included)
INTERCO
M
MIC
ON
LEVE
L
HIG
H
ME
D
LO
W
1
2
3
4
IPI 10
4
PUSH
TO
TA
LK
SECURI
TY
LAB
ADMIN
OFFI
CE
HELP
DESK
2.
Connect each IPI to an MLC via the RJ‑45 intercom ports on both devices using
the included cable. If a longer cable is required, use a standard CAT 5, CAT
5e, or CAT 6 straight through network cable.
See “IPI Rear Panel Features and
3.
Mount the AAP mounting frame or other device to the wall, furniture, or rack
panel. Follow any special mounting instructions that came with that device.