Installing dimm modules – NEC MH4500 User Manual
Page 84
4-14 Upgrading Your System
7.
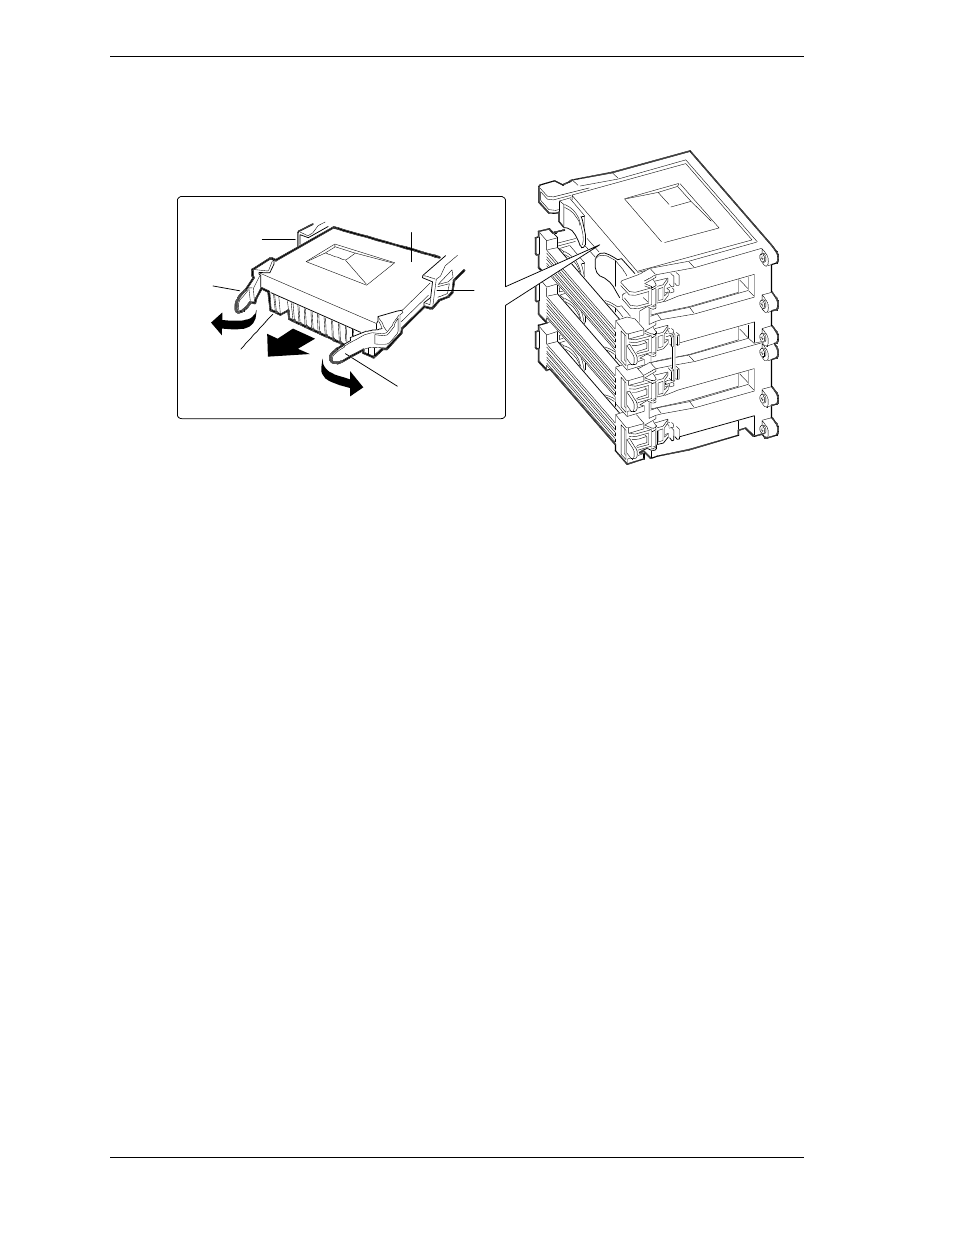
Pull the two tabs (C on the following figure ) on the cartridge straight away
from the system board to disengage the cartridge from the system board.
B
B
C
D
C
A
A.
S.E.C. cartridge
B.
Retention module guide rails
C.
Tabs on S.E.C. cartridge
D.
Processor heat sink
Removing the Processor
8.
Pull the processor cartridge straight out of the system board and retention
module. Place it on a grounded, static-free surface or conductive foam pad.
9.
Put the old processor cartridge in conductive foam and store in an antistatic
package.
10.
Install a new processor cartridge (see “Installing a Processor Cartridge,”
next). If not installing a processor, install a termination board the same way
as a cartridge and remove the appropriate VRM module(s).
Installing DIMM Modules
Main memory resides on a memory module that plugs into the system board.
The memory module contains four banks of DIMM sockets, with each bank
containing four sockets, for a total of 16 DIMM sockets. The banks are labeled
A, B, C, and D. The sockets are labeled J1 through J16. The following figure
shows the module and sockets.