NEC MH4500 User Manual
Page 100
4-30 Upgrading Your System
C
B
D
A
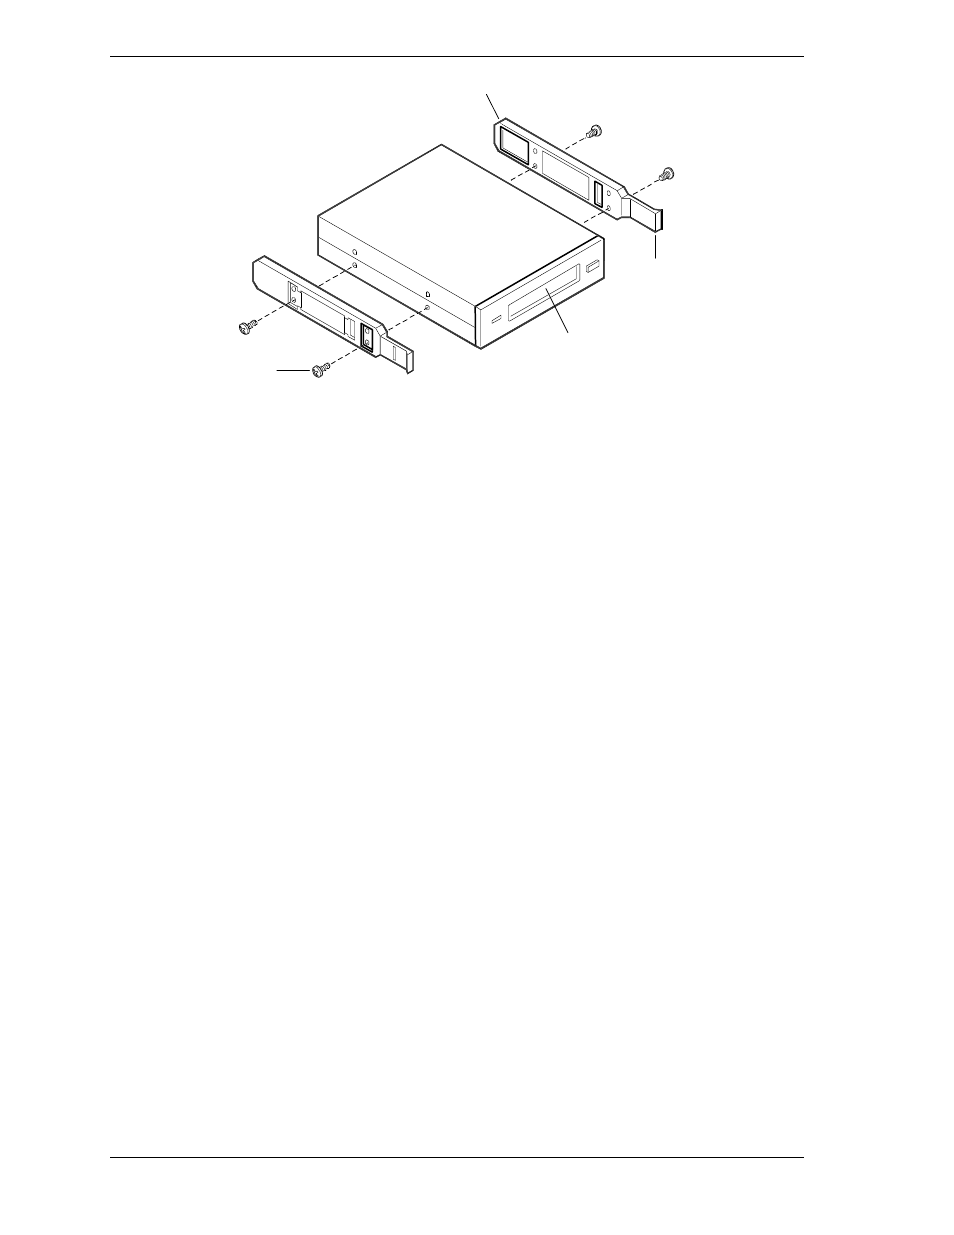
A.
Tape drive or other removable device
B.
Tab on rail
C.
Screws (4)
D.
Rails (2)
Installing the Device Rails
7.
Align the device with the device slot guide rails and carefully slide the
device into the slot until the device locks in place.
8.
Remove the access cover and open the subchassis for access to the power
and signal cables and the back of the device (see “Removing the Access
Cover” and “Opening the Subchassis and Electronics Bay,” described earlier
in this chapter).
9.
Locate a power cable and the SCSI cable, depending on the device being
installed.
10.
Connect the signal and power cables to the device. The connectors on the
cables are keyed and can only be connected one way.
11.
Check your connections, close the subchassis, install the access cover, and
close the front panel.
12.
Connect any external peripherals, plug in the system power cords, and turn
on the system.
13.
Configure the system for the new device (see Chapter 3, “Configuring Your
System”).