NEC MH4500 User Manual
Page 39
Setting Up Your System 2-19
3.
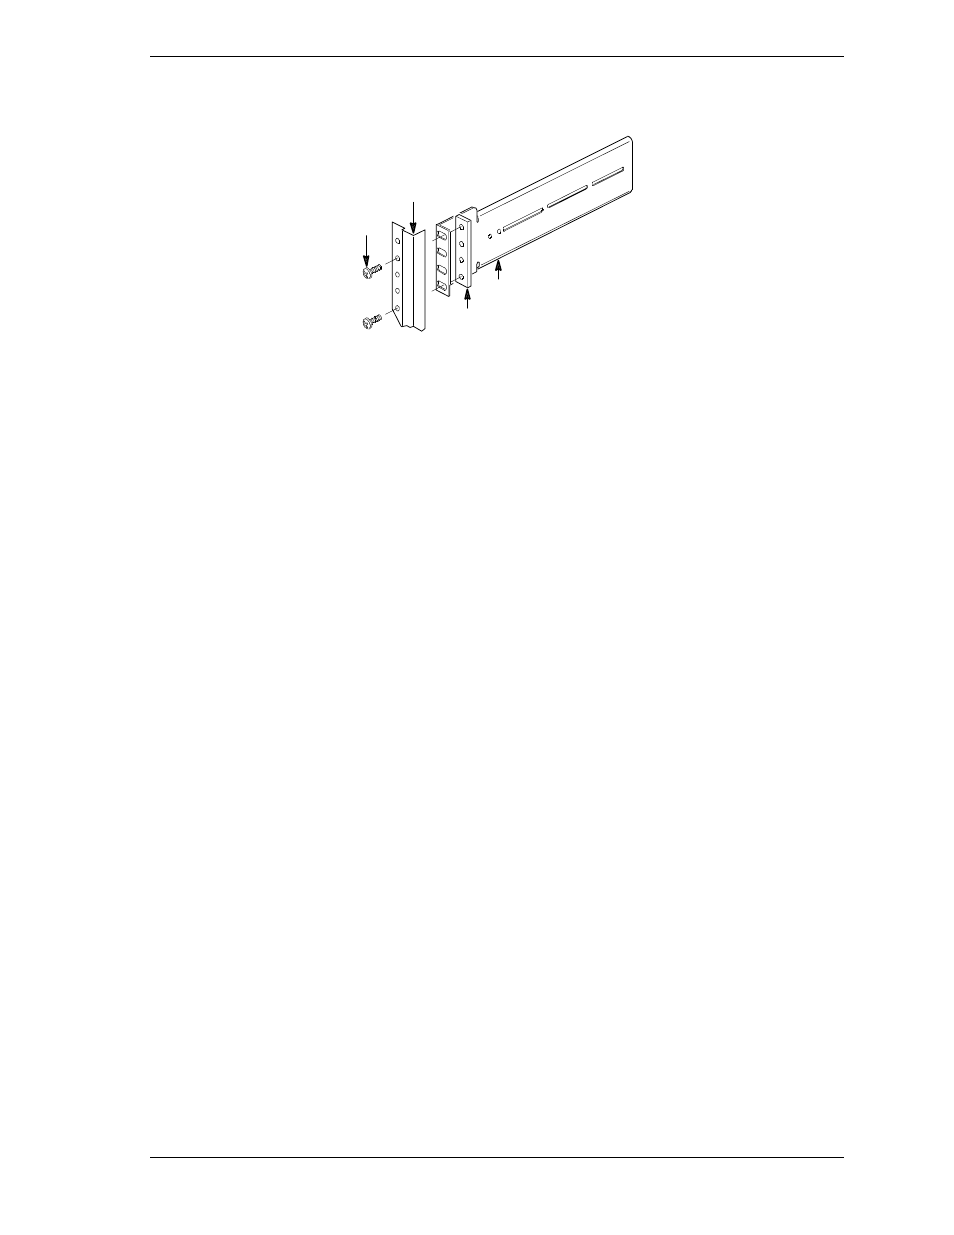
Align the bracket behind the rack’s vertical edge and behind the mounting
holes in the vertical edge (see the following figure).
1
4
2
3
1.
Screw
2.
Rack Vertical Rail
3.
Bar Nut
4.
Right angle Extension Bracket
Installing the Extension Brackets
4.
Determine where you want to attach the bracket on the rack’s vertical rail.
T
When determining where to attach the bracket, be sure to allow space
for additional units.
T
Mark, with a pencil, the bracket top and bottom hole locations on the
rail.
5.
Insert a screw through the marked top hole in the vertical rail and through
the top hole in the extension bracket.
6.
Place a bar nut over the screw and loosely thread the screw into the bar nut.
7.
Insert a screw through the marked bottom hole in the vertical rail and
extension bracket and loosely thread the screw into the bar nut.
8.
Install the remaining three extension brackets, bar nuts, and screws.
T
Before installing, carefully align each bracket in exactly the same
vertical position as the first bracket.
T
After installing, check that the brackets are vertically aligned and level
with each other.
9.
Tighten all the screws holding the brackets to the rack.
Installing the Slider Assemblies
Use the following procedure to install each slider assembly on the extension
brackets in the rack. Refer to the following figure while performing the
procedure.